Randomness can be an attractive design feature when controlled well. Grasshopper offers two main methods for generating random points in your designs: the Random component and the Populate components. In this post I’ll walk you through their differences, when to use which and how to generate random points on various types of geometries.
Let’s dive in!
Understanding Randomness in Grasshopper
It’s virtually impossible to create ‘true’ randomness in Grasshopper. Computers are built on logic and control, which is the opposite of randomness. So anything random in Grasshopper is just an effect that appears random to the naked eye. But that’s not a bad thing. In fact, true randomness may not be what we want in our designs.
Let me explain:
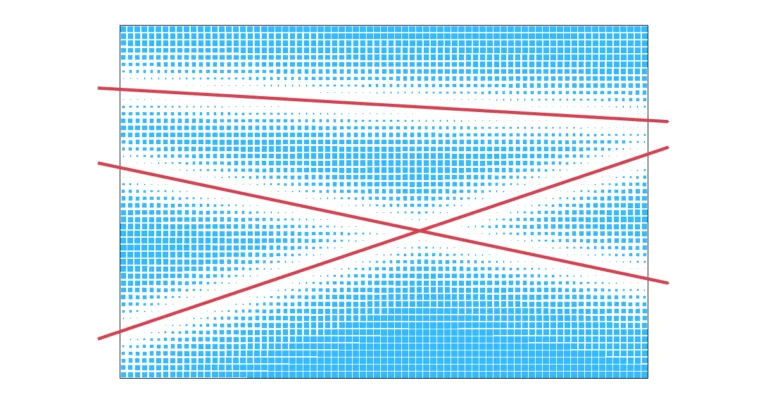
Consider the following two examples:
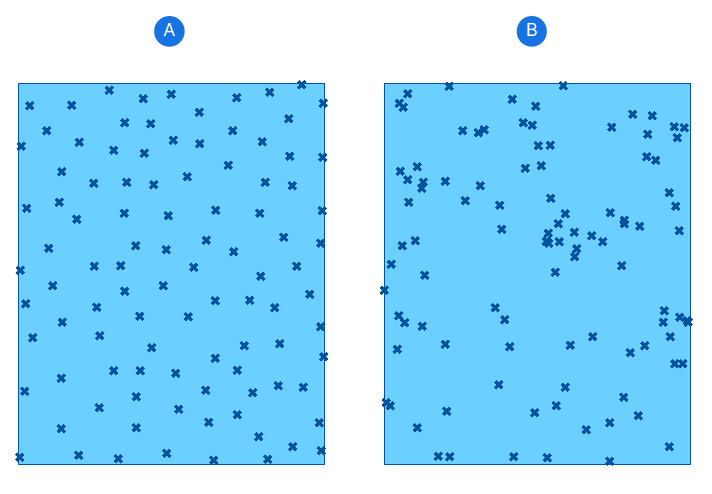
Both surfaces are filled with what you could call ‘random’ points, yet they vary in their ‘randomness’.
On the left (A), the points are not aligned or in a grid, but still they are somewhat evenly distributed.
On the right (B), the same number of points is distributed a bit more erratically, coming closer to what one might consider randomness.
When it comes to design it’s likely that the first image better reflects the kind of randomness we can implement in our designs.
Let’s look at the techniques involved in creating the two effects shown above.
The Populate components in Grasshopper
To create random, but evenly spaced point distributions, we can use Grasshopper’s Populate components.
You can find them in the Vector component tab, grouped under ‘Grid’.
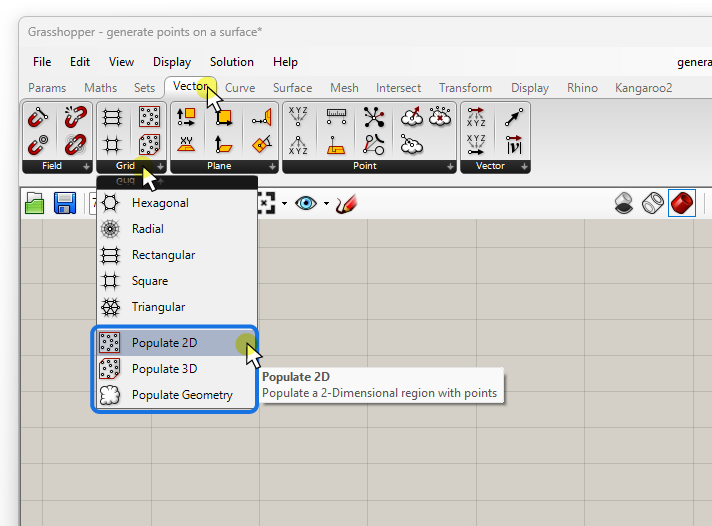
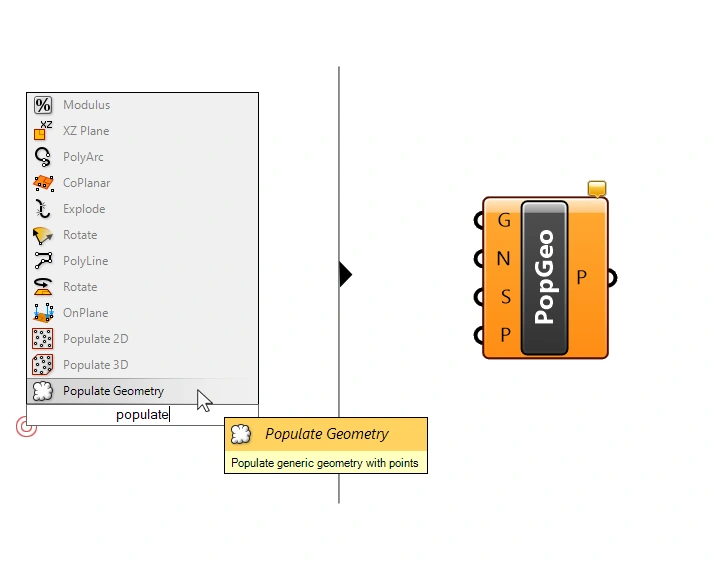
Alternatively you can double-click anywhere on the canvas, and type “populate” to find all three components. Click on the one you want to drop it to the canvas.
All three populate components are based on the same ‘randomness’ principle: they generate points in a relatively evenly spaced manner. Visually they are random enough that one can’t tell any rhythm or grid behind them.
As their names suggest, the three components differ in what boundary condition the points will be generated in:
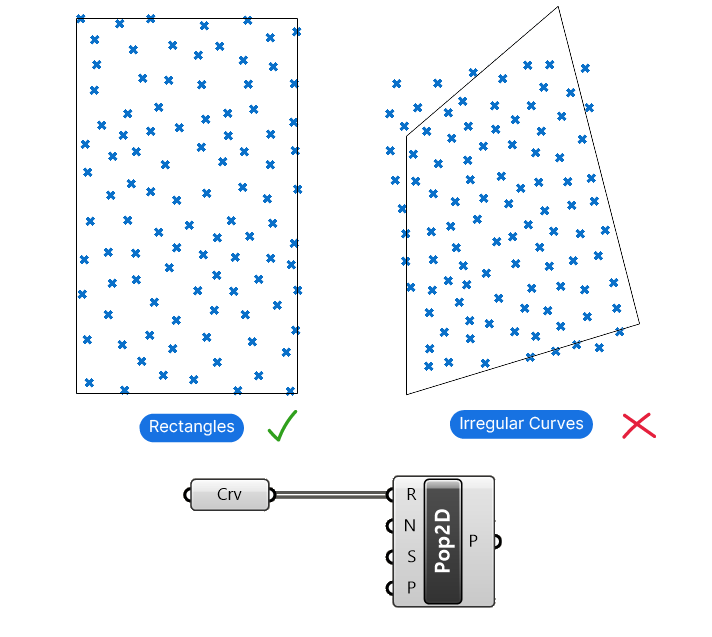
Populate 2D
The Populate 2D component takes planar (flat) rectangular curves as input and generates the points within their 2D boundary. The rectangles can be freely oriented in space, as long as they remain flat. The Populate 2D component works exclusively for rectangles.
If you input other shapes, the component will try to fit a rectangle, resulting in points that extend beyond the boundary or leave corners unfilled.
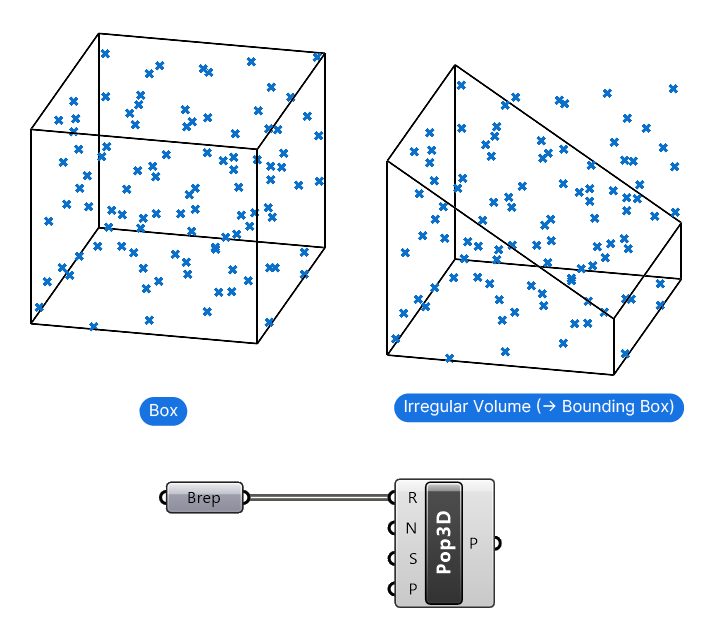
Populate 3D
The Populate 3D component takes boxes (Breps) as input and generates the points inside the entire volume. The points are generated in three dimensions within the geometry’s boundary. For complex volumes, the component generates a bounding box around the object and places points within that box. (example on the right).
Populate Geometry
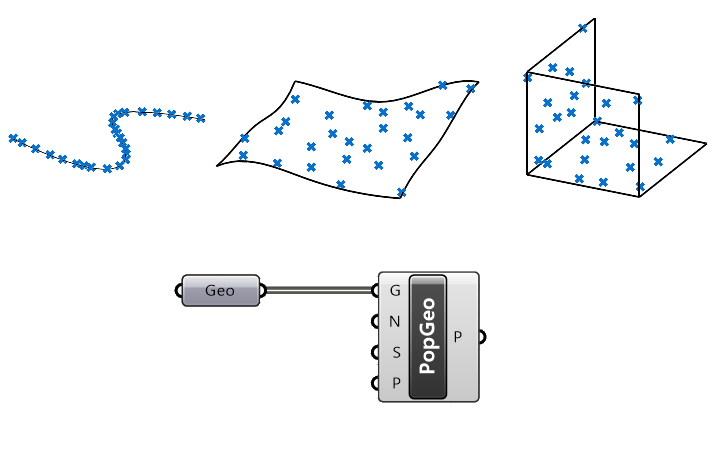
The Populate Geometry component is the one I use most frequently thanks to its versatility: We can connect any type of geometry: lines, surfaces or polysurfaces, and the component will generate the ‘evenly’ spaced, random points on the input geometry.
Controlling the Populate Component Inputs
All three Populate components share three inputs besides the main Geometry (G) input .
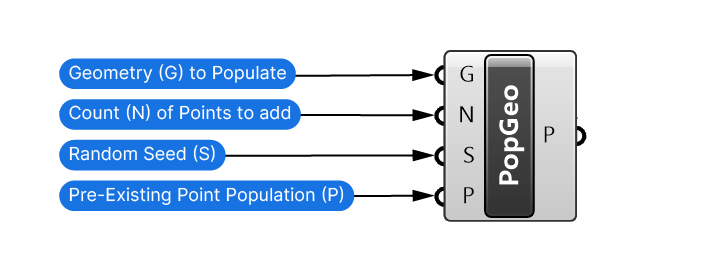
- The Count (N) controls how many points are generated.
- The Seed (S) represents a unique randomness identifier in the form of a number.
- The optional Pre-existing Population (P) can contain points the component should consider in the distribution.
How to Use the Seed Property of Random Components
Consider this: say you have two identical curves and you use a Populate Geometry component to generate random points along it.
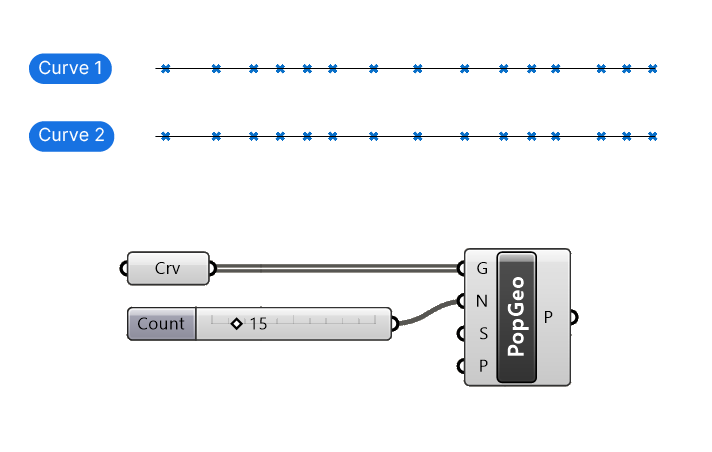
You’ll notice that both ‘random’ patterns look exactly the same!
Now if they were truly random that wouldn’t be the case.
As mentioned earlier, we are not dealing with real randomness. All Populate component’s randomness is based on an algorithm that creates a numerical pattern that’s based on a single starting number – called the Seed. The same starting number will always result in the exact same ‘randomness’.
By default the Seed (S) is set to ‘1‘. In our scenario above, both input curves are using the same Seed (S) number and therefor the output is identical. To create different randomness for each curve, simply use two different Seed numbers in the Seed (S) input. That way, we get two different sets of random point patterns.
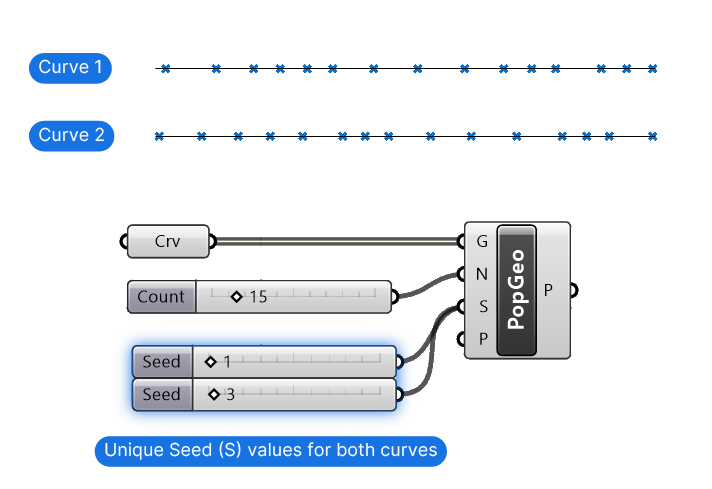
Use the Seed (S) input to avoid repeating patterns when working with multiple sets of randomly generated points.
How to Use Pre-existing Populations of Populate Components
The pre-existing population input allows us to specify a list of points on the geometry that the component should consider when generating random points. Since the populate components space out the points evenly, these pre-existing points will be considered in the even distribution.
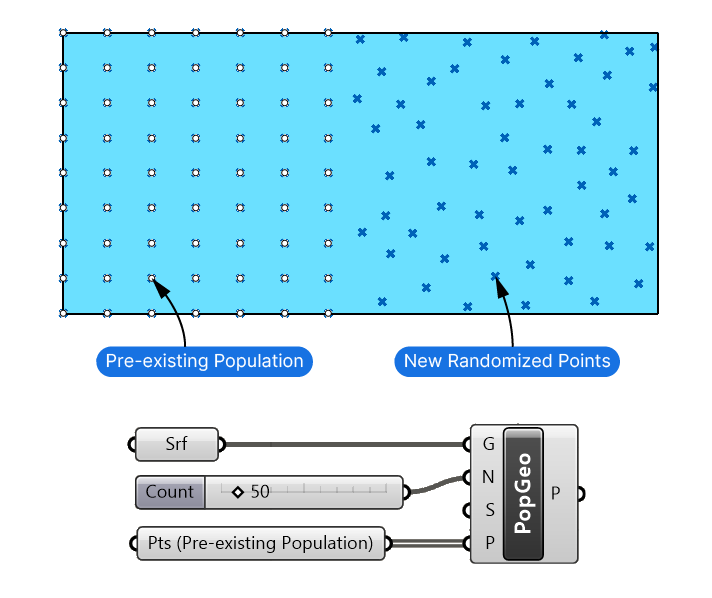
While I’ve never encountered a scenario in my designs where I had a pre-existing point population I wanted to expand, this feature has an interesting side-effect: You can use pre-existing points to keep specific areas clear of new points.
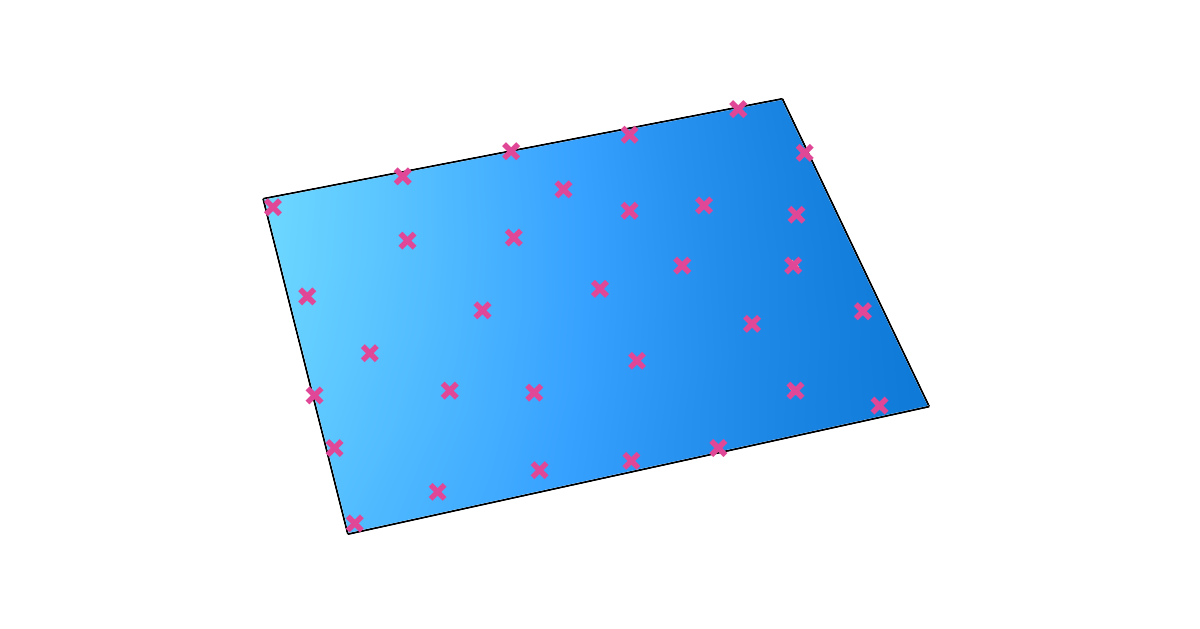
Here’s an example:
By dividing the input rectangle curve with the Divide Curve component, I’m adding several points along the border (shown below in pink). I connect them to the Pre-existing Population (P) input, and all the newly generated points will stay clear of the border.
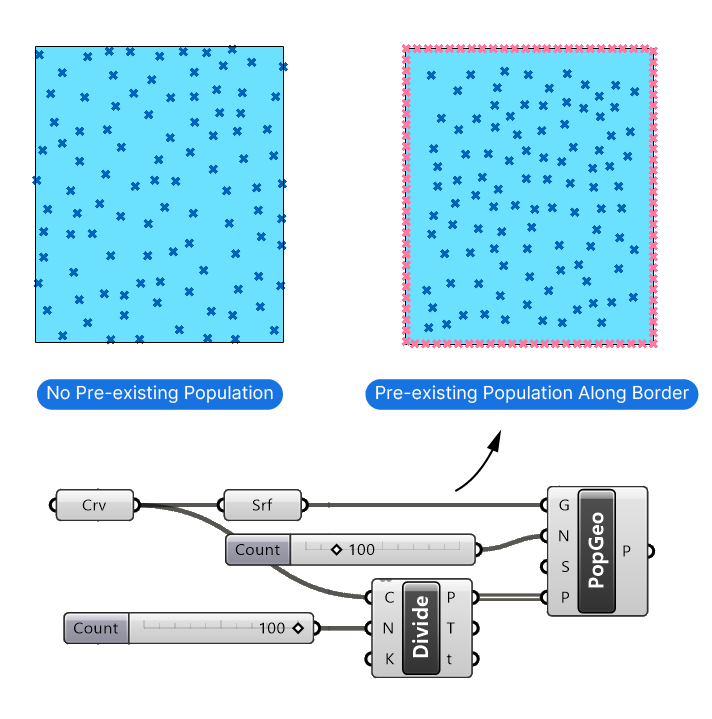
This technique of keeping certain areas free from newly generated points works well but has its limits. Once the average point density of the new random points exceeds that of the pre-existing population, the new points will start to get closer and closer to the existing ones and finally intersperse between them.
A more reliable approach to achieve the same would be to find the closest point on the curve from each point and delete all those that fall below a specified threshold. But that’s something for another article!
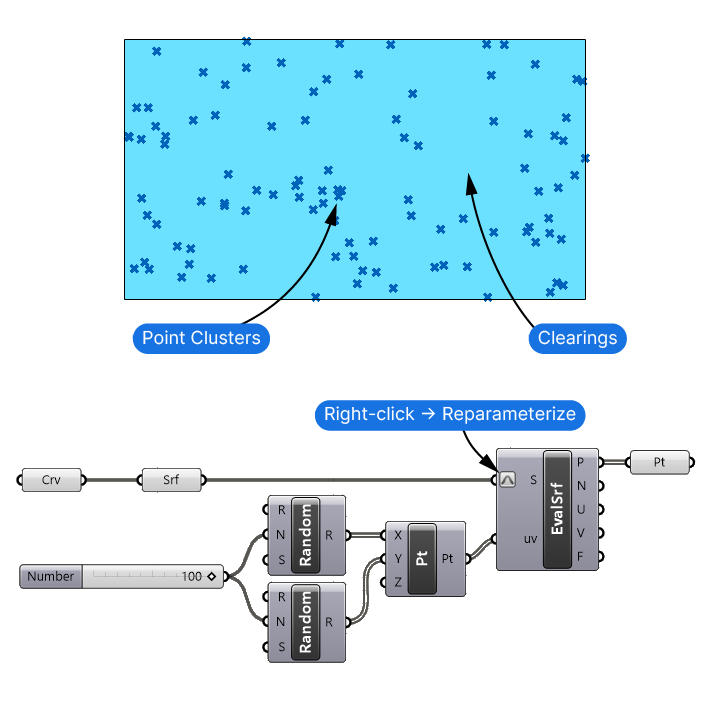
Creating Points on a Surface Using the Random (Rdm) Component
Now if you are after a ‘more’ random point distribution than the populate components provide, we can use Grasshopper’s Random (Rdm) component. This component generates pseudo-randomized numbers within a set range.
Here’s how we can use it to generate random points on a surface:
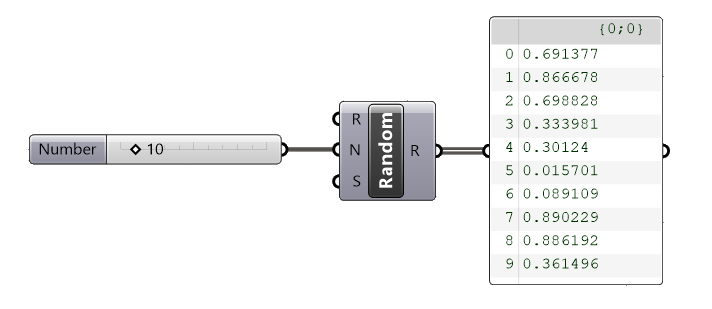
- Add two Random (Rdm) components and specify the number of random values to generate with a Number Slider that you connect to both components’ Number (N) input.
- Make sure to right-click on the Seed (S) input of one of the two components and change it to a different number to avoid generating the same ‘random’ numbers.
- Next, add a Construct Point (Pt) component to manually construct a point using x,y-and z coordinates (we won’t need the z-coordinate).
- Connect one set of random numbers to the X-input and the other to the Y-input.
- Now add an Evaluate Surface (EvalSrf) component and connect the surface. Using this component we can generate points on the surface using uv-coordinates. Uv-coordinates are effectively x- and y coordinates which describe a locations on the surface.
- To ensure that our Random values range matches with the surface’s domain, right-click on the Surface input and select ‘Reparameterize’. Now the UV range is reset to 0 to 1, matching the default range for the Random components’ numbers.
- Connect the Construct Point (Pt) output to the uv input.
Turn off the Evaluate Surface component’s preview since its multiple outputs can crowd the display. Instead, add a Point (Pt) container component and connect the Points (P) output to only preview the points.
There you go! The points are now more random: they both cluster much closer but also create much bigger gaps in between.
Concluding thoughts
Randomness can be a great feature but being able to control it is essential. You’ve learned two techniques you can use to generate random points in Grasshopper: one that distributes points evenly and one that’s closer to true randomness.
Happy designing!