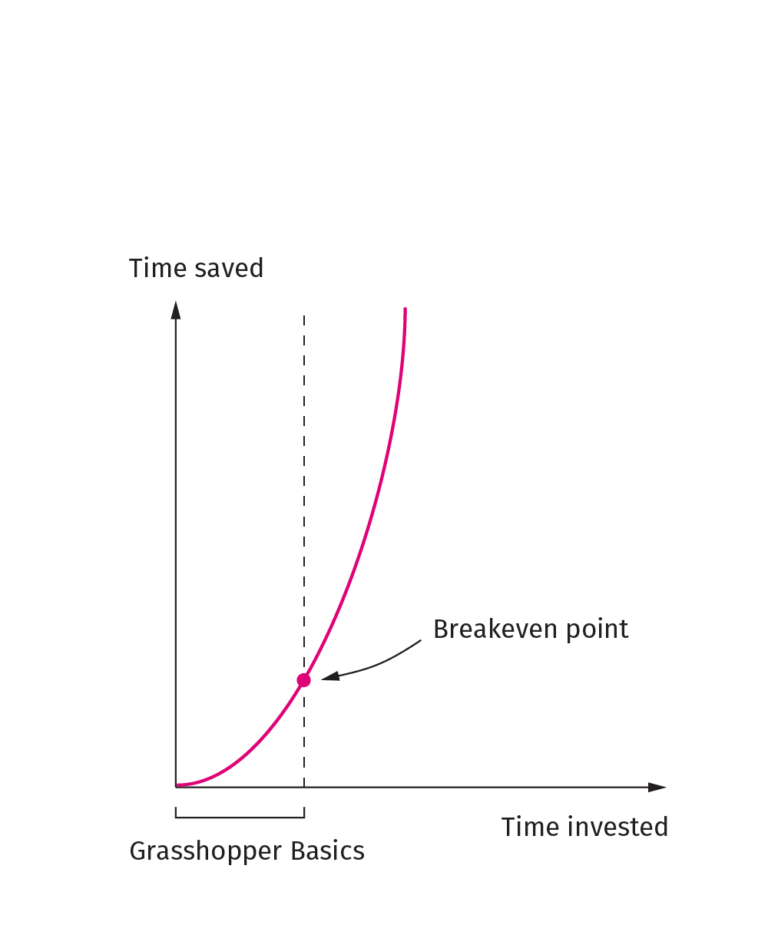
There’s nothing like shortcuts when it comes to speeding up your workflow – it’s true for almost any software, and it’s true for Grasshopper! While some shortcuts enhance your existing workflow, others are essential for advanced scripting in Grasshopper. In this post I’ve collected the most useful Grasshopper keyboard shortcuts out there, check them out to speed up your workflow!
I’ve organized them by category for easier reference:
Wire Connections Shortcuts
Connection wires are Grasshopper’s life and blood, and with just a few shortcuts, you can save a lot of ‘re-wiring’ time.
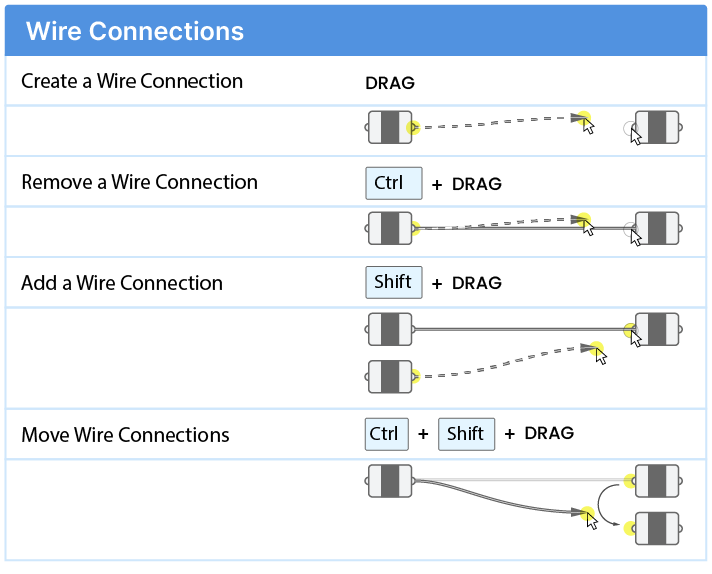
While creating a connection is intuitive, removing a wire and adding an additional wire to an existing component can be tricky when starting out. To remove a wire, simply hold down the CTRL key and re-trace a connection, just the way you would when creating it for the first time. A small red ‘minus’ symbol will light up on your cursor once you press CTRL. Move the mouse all the way to the input and let go to remove the connection.
Adding a wire connection is something that many beginners only encounter once they’ve mastered the basics. When I first tried to do so, I got frustrated that the wire would be replaced instead of being added, and I’m sure I’m not alone with this! The solution is easy: simply hold down the SHIFT key as you create the connection. A small green ‘plus’ symbol will light up on your cursor as you drag the wire.
While not vital, the next shortcut can save a lot of time. Imagine this: you have connected seven components to a specific input, and then you realize that you need to connect them to a different input, or a different component altogether! Re-drawing seven wires can be cumbersome, especially if they are located in various place of the canvas!
Luckily no re-wiring is required! Simply hold down CTRL + SHIFT. You’ll now be able to ‘grab’ all the wires connected to an input directly at the input, and move them to any other input by dragging and letting go. It’s one of my favorites by far!
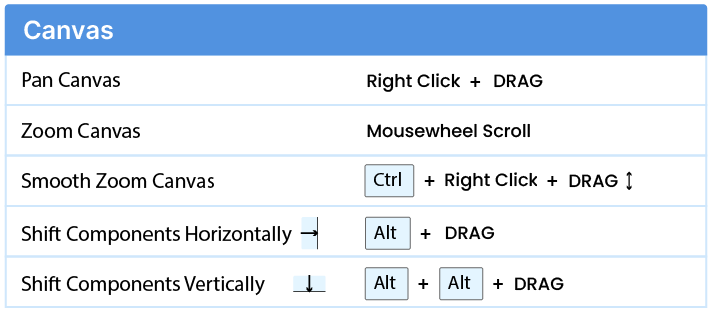
Grasshopper Canvas Shortcuts
When talking about Grasshopper Shortcuts, the famous ‘Moses tool’ (parting the seas) can’t be missing. This shortcut allows you to shift all the components on the canvas vertically or horizontally. To do so, hold down ALT and start dragging on the canvas to the right. A bar will appear, that will push all the components to the right as far as you drag. This comes in extremely handy when you are adding some components to an existing part of the script, and you need more canvas real estate.
You can also shift the components vertically, by doing the same as described above, but letting go and tapping the ALT key once again as you keep dragging.
While panning and zooming will be like second nature to anyone used to working in Rhino there is a subtle shortcut that gives you more control. To zoom in and out of the canvas smoothly, press CTRL and right-click and drag up or down. Just like in Rhino, this creates a smooth zoom that allows you to get just the zooming scale you need!
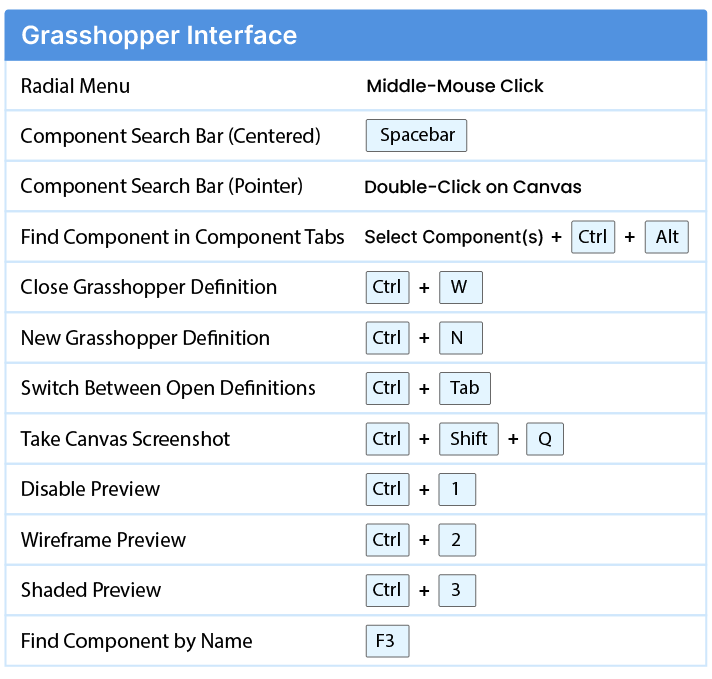
Grasshopper Interface Shortcuts
Now let’s move on to shortcuts that have to do with the entire Grasshopper interface.
Adding and Finding Components
The most important shortcut here is probably simply the Spacebar. By hitting it, the component search bar will open in the middle of your canvas. By typing in the name of the component you are looking for, you can add it to the canvas much quicker than having to browse through the component tabs. And you won’t have to remember in which group it was hidden!
A small variation of it is to double-click onto the canvas. The advantage of this method is that the component search bar will pop up wherever you clicked, meaning that the chosen component will also appear at that location. This can save you the time to move the component into place.
Now sometimes you find a component in a script and you are not quite sure where it is located in the component tabs. Simply select the component and hold down CTRL + ALT. A nice, red hand-drawing style arrow will show up, pointing at the exact location in the component tabs it can be found at. This can be useful if you are not sure whether a component is part of the native components or if it’s part of a plugin.
Switching Between Grasshopper Definitions
If you have several Grasshopper scripts open, and you are switching back and forth between them, use CTRL + TAB to switch through the scripts currently open in Grasshopper. If you are ready to close a definition, hit CTRL + W to close it. Don’t worry, you’ll be asked whether you want to save or not.
When developing a script, you’ll probably turn the preview of the definition on and off several times. This can of course be done with the preview icons in the top right corner of the Grasshopper canvas, but these useful shortcuts can make it even quicker:
- CTRL + 1 to Disable the Preview
- CTRL + 2 to enable ‘Wireframe’ Preview
- CTRL + 3 to enable ‘Shaded’ Preview
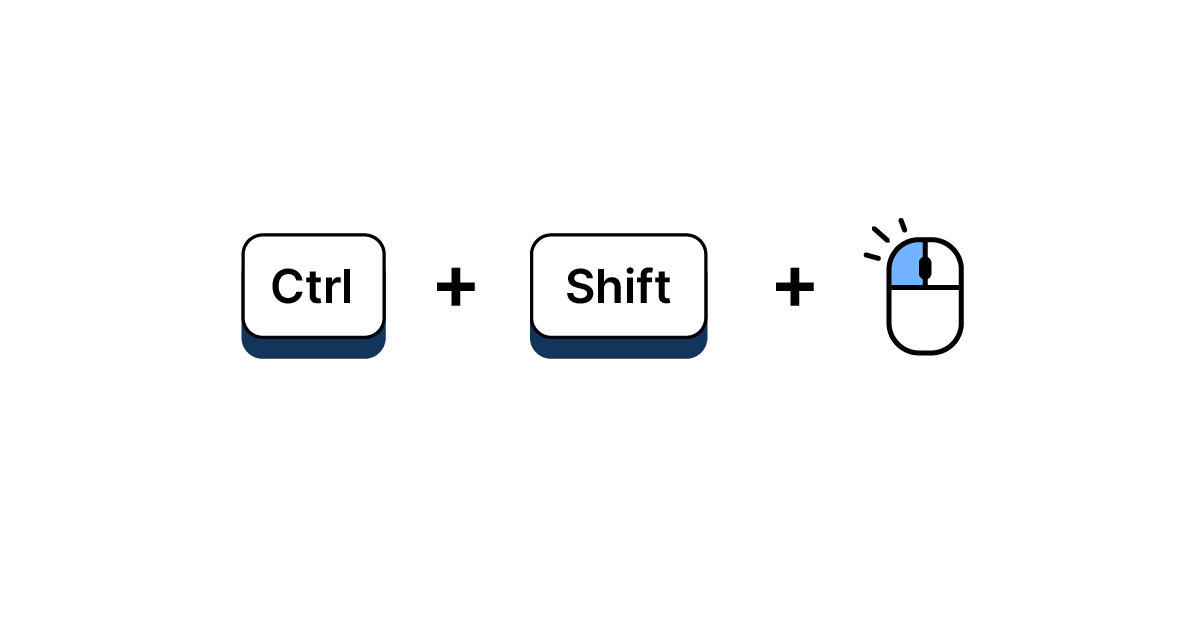
Finally, a shortcut that’s useful when sharing part of a script or asking for help: hit CTRL + SHIFT + Q, and Grasshopper will take a screenshot of the current canvas view that you can sketch on and then easily copy and paste anywhere, for example on Slack to ask a colleague, or a forum.
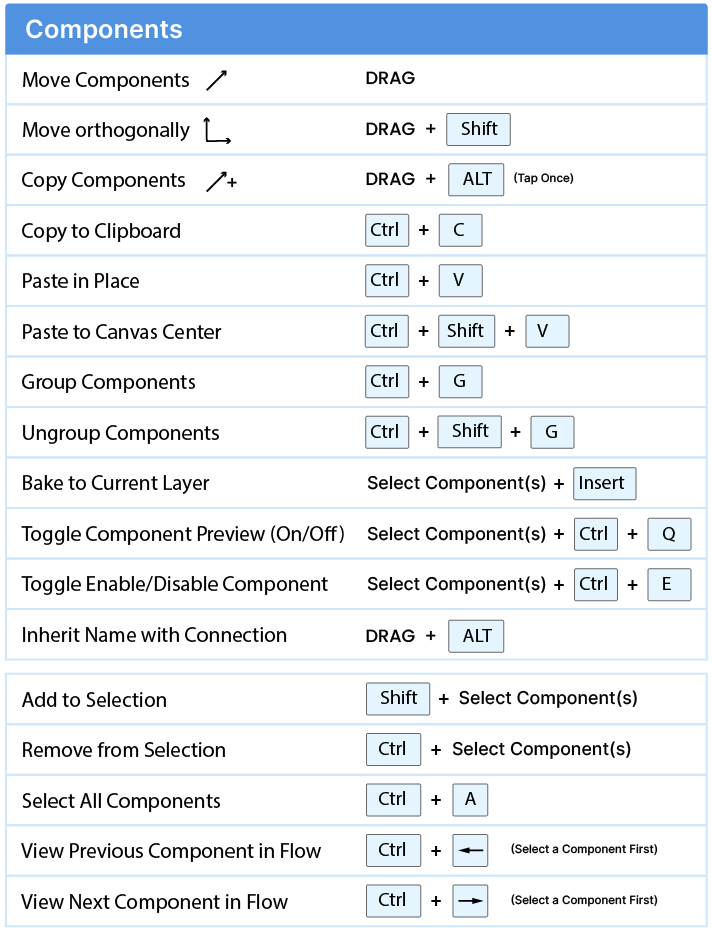
Grasshopper Component Shortcuts
Components have their own set of keyboard shortcuts, and since components play a central part in Grasshopper, there are many! Some are quite subtle, while others are really powerful.
Let’s begin by the simple operations we can use on components: to move a component we simply click and drag. But did you know that you can constrain the movement to straight lines by holding down SHIFT as you drag?
How to Copy Components in Grasshopper
There are several ways to copy components: You can create a copy by tapping the ALT key once while dragging a component. When you let go, you’ll have copied the component to that location.
Of course, the normal CTRL + C, CTRL + V, copy – paste components work on components too. If you do so, the copied components will be pasted right on top of the components you had selected. This means that you need to move them carefully to avoid a manual re-selection (which can be annoying if you copied many components).
A way around this limitation, is the modified ‘Paste’ shortcut CTRL + SHIFT + V. Provided that you copied one or more components with CTRL + C before, this shortcut will paste the components into the middle of your current canvas view. So to avoid clutter, you can move to an empty spot on the canvas and use this shortcut.
Quick-bake
When you learn about baking, you learn to right-click on a component and click the ‘bake’ symbol. This opens a window to specify baking options. While the window is great, sometimes we just want to rapidly bake something as a test, or as an intermediate step. In that case we can ‘Quick-bake’ by simply selecting the component and hitting ‘Insert‘ on the keyboard. The component will immediately be baked onto the active layer of the Rhino document.
Toggling the Component Preview
As you prototype your Grasshopper script, you’ll often shift the focus from certain components to others by turning their preview on and off. For disabling large sections of code, the basic right-click method is impractical. The shortcut to toggle the preview of components is CTRL + Q. Simply select the components in question, use this shortcut, and their preview will be turned off. Repeat the shortcut to turn it back on! Keep in mind that this shortcut will always invert whatever state the components are in. So if some components are off and some on, you’ll just invert their states.
Carrying the Name of Components
Here is one that I’ve been using more and more: the innocent-looking Drag + ALT. When creating a connection, and hitting ALT, you can copy the Name of the output to the input. Let’s say you created a curve container and gave it a descriptive name. Holding down the ALT key while connecting to an input will transfer the name of the output to the input. No more typing the same name over and over!
Grasshopper Shortcuts – Final thoughts
Grasshopper Shortcuts are a bit like hidden treasures. You learn some when you start, you find others as you hit some keys by mistake (that’s how I found at least a handful of them!) and some you find out about way too late, leaving you wondering how you could have missed them!
I hope this guide uncovered some hidden keyboard shortcut treasures for you!
Happy designing!