As a Grasshopper user, understanding how to find the center of a curve is an essential skill. Whether you’re creating a building façade, landscape, or any other design element, curves will be at the heart of your work. In this post, we’ll be covering the area, evaluate curve and curve middle component, as well as providing examples and tips to help you master this technique. Let’s get started!
Jump to: How to find the center of a curve
Jump to: How to find the middle of a curve
Using the Area component to find the center of a curve
To find the center or centroid of a curve, you can use the component simply called Area.
Double-click onto the empty Grasshopper canvas and type ‘Area‘ to add it to your Grasshopper script.
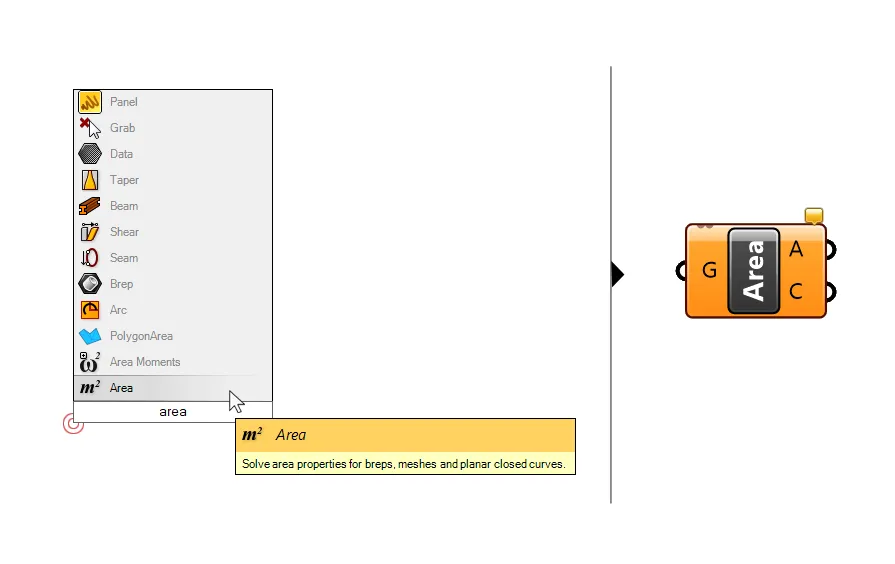
Although the Area component primary task is to compute the are of geometry, it has a second output: the area centroid (C). The centroid describes the geometric center of the curve, which is defined as the arithmetic mean of all the points on the curve.
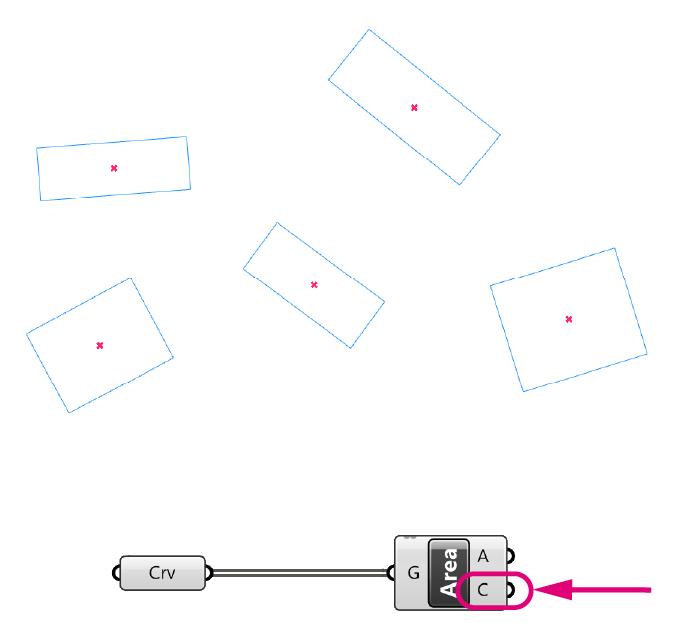
There are two requirements for using the Area component to find the center of a curve in Grasshopper:
1. The curve must be planar (flat, i.e. all control points are on the same plane).
2. The curve must be closed.
If one of these conditions is not met, the component will fail and turn red.
The Area component can compute the area and generate the centroid for closed planar curves, surfaces, polysurfaces, and even meshes.
Common applications
A common application for getting center of a curve is to use the resulting point as a proxy for the selection of the curve itself.
Here is an example:
Let’s say there are a number of randomly placed rectangles, but you only want to keep the ones contained in a curve you specify.
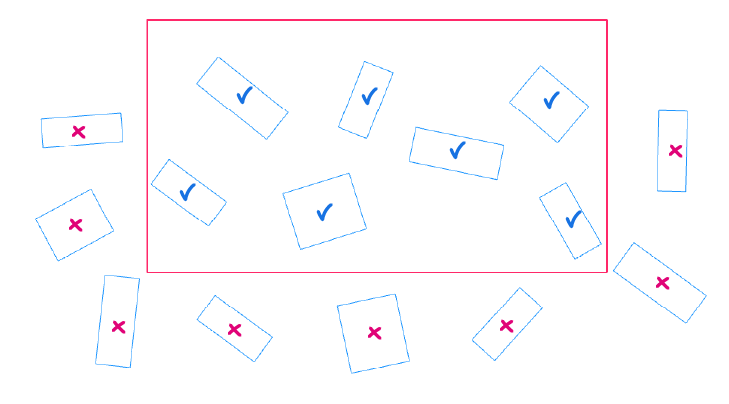
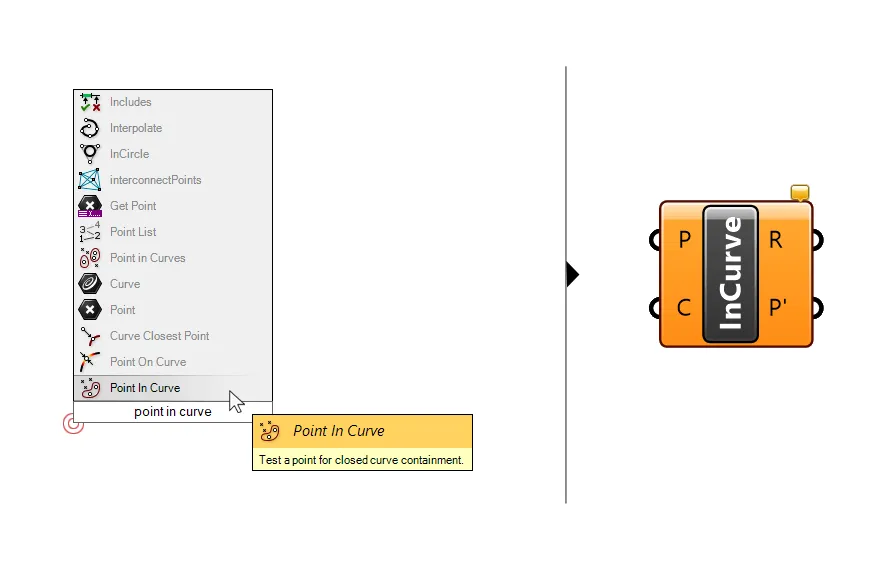
There is no component to check whether a curve is located within another curve, but there is a component that will check whether a point is in a curve or not. It is called Point in Curve. Type the name into the component search bar to add it to your Grasshopper script.
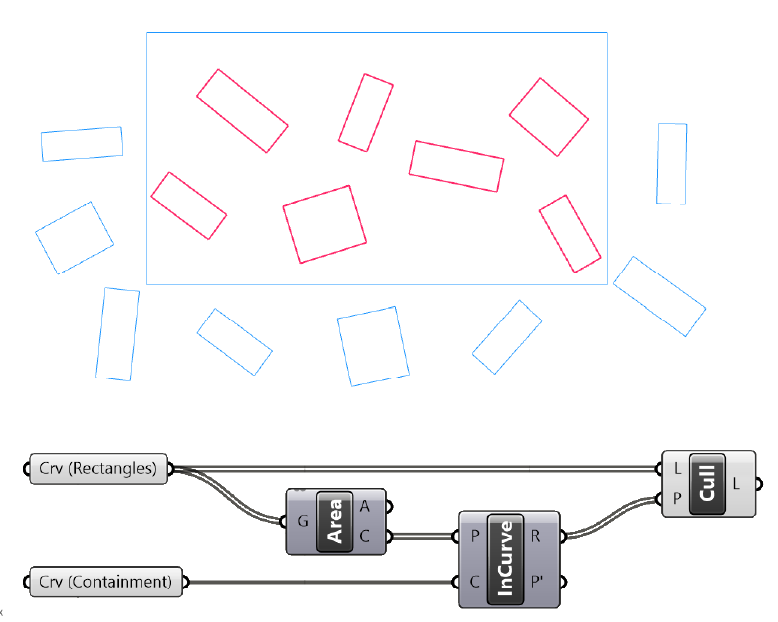
In this case, we can get the centroid of the randomly placed curves, then use the Point in Curve component to check whether they are inside or outside the selection curve, and finally use a Cull Pattern component to use the resulting boolean values to keep or remove the actual curves.
Possible issues you may run into
In many cases we run the Area command just to find a point within the curve, without it necessarily having to be the center. The reason is that we only want to use it as a proxy for the selection of the curves themselves.
However, the Area component will not always return a point within the curve. This is the case when the curve is more complex and starts to bend to look like an ‘L’ or a ‘C’ for example.
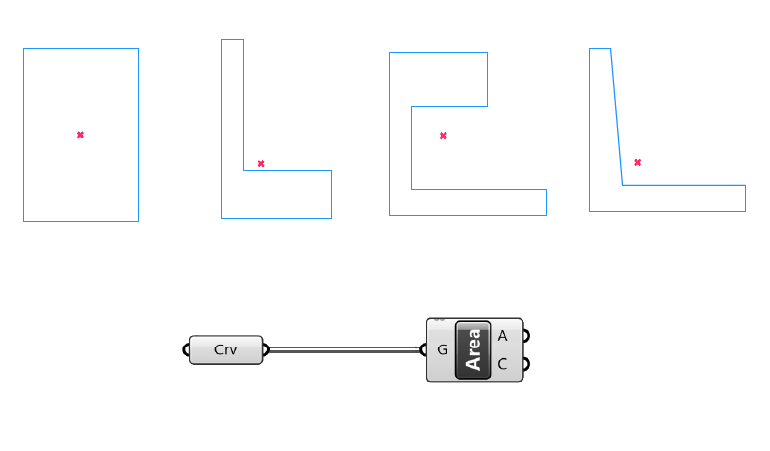
While the centroid the Area component returns is still the correct geometric center, as in the arithmetic mean of all the points of the curve, it now sits outside the curve.
Consequently, using it as a proxy for selection can lead to undesired results.
How to generate points inside complex curves
If your goal is to only get a representative point within the outlines of the planar curve, you can use the following command sequence.
- Generate the centroid normally.
- Use the Boundary Surface component to turn the closed planar curve into a surface.
- Use the Pull Geometry component to ‘pull’ the centroid to the closest point on the surface
- Create a line between the centroid and the resulting point
- extend the lines by a small amount (depending on your needs)
- get the endpoint of the extended line.
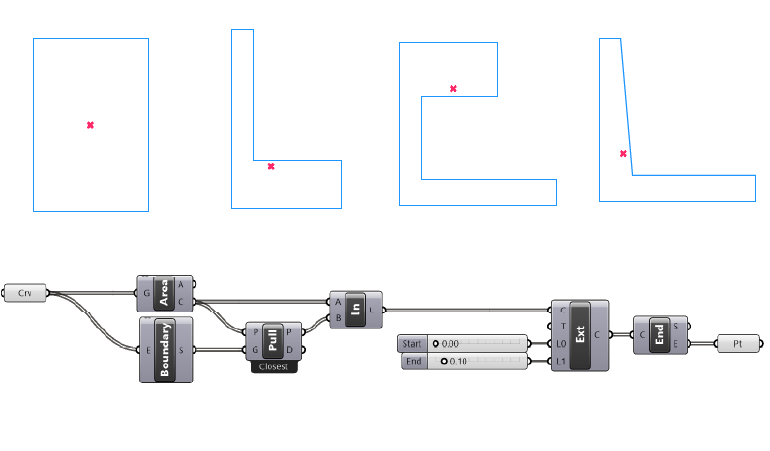
By creating a line that connects the centroid to the pulled point, we are generating a vector that points towards the curve. If we just use that pulled point we would be getting a point on the curve, at which point we could just use the Evaluate Curve component instead. But by extending the line, the endpoint will reach into the curve, providing us with a point inside the curve.
Exceptions: This method will work in most cases except when the curve becomes extremely narrow. In that case our extension might need to be adjusted to be smaller, to avoid moving beyond the curve.
If you run into this situation frequently, consider creating a component cluster to save time next time you need it!
Finding the midpoint of a curve
If you are dealing with open curves, instead of finding the center of the curve in Grasshopper, you may want to find the midpoint. The most straight-forward way of finding the point in the middle of a curve is to use the Curve Middle component. Double-click onto the empty Grasshopper canvas and type ‘Curve Middle’ to add it.
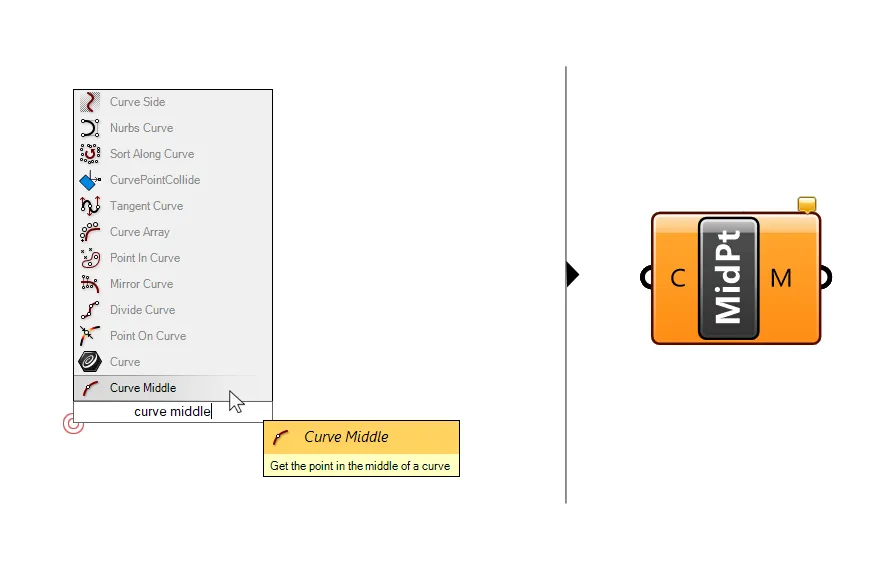
As the name suggests, the component will output the point in the middle of the curve.
This will work regardless whether the curve input has been reparametrized or not, it returns the middle point based on the total curve length.
This component only returns a single output: a point in the middle of the curve.
If you want to get more information about the curve at the middle point, for example the tangent, you get the center with the Evaluate Curve component instead:
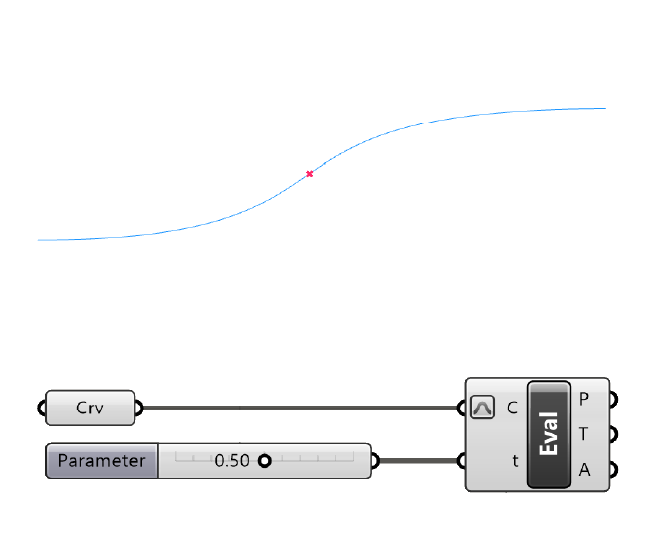
Finding the middle of a curve using an evaluation parameter
In Grasshopper the position of any point along the curve can be described with a number, called the curve parameter. Upon creation a value is assigned to the start and endpoint of the curve creating the so-called curve domain.
Any point along the curve can be described with a value within this domain.
The numbers marking the start and endpoint of a curve can vary widely, which is why there is an option to ‘reparametrize’ the curve. Reparametrizing a curve means that regardless what the domain was before, it will be reset to a value of 0.00 at the start of the curve and a value of 1.00 at the end.
Consequently, the evaluation parameter 0.50 describes the location of a point in the middle of the curve.
This is where the Evaluate Curve parameter comes in: it allows us to extract information at that point of the curve.
Double-click onto the empty Grasshopper canvas and type ‘Evaluate Curve‘ to add it to your script.
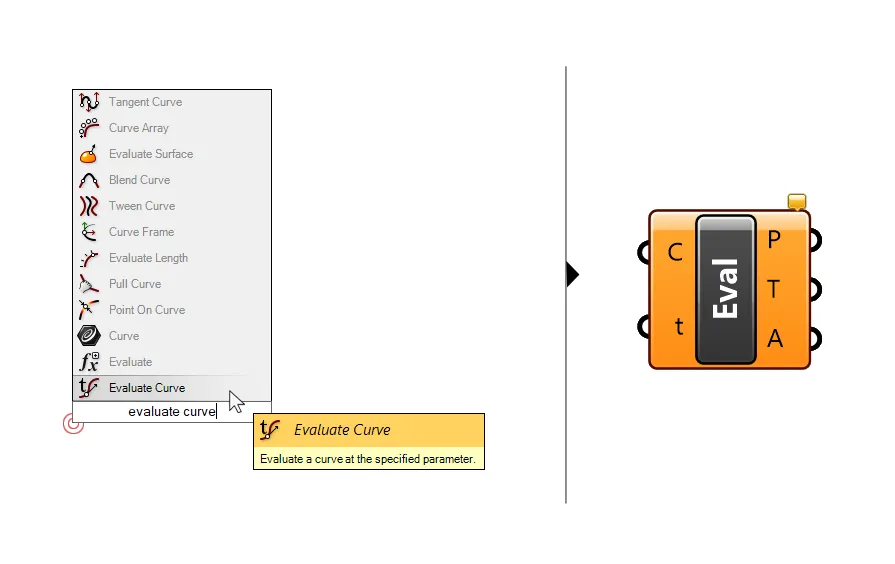
The first input is the curve to evaluate, and the second the curve parameter (t) to evaluate. Add a number slider with a value of 0.50 and connect it to the t input.
The outputs of the Evaluate Curve components include a point in the middle of the curve as well as a tangent (T) to the curve at that point.
Note:
The Evaluate Curve component with an evaluation parameter of 0.50 will return a point at approximately the middle of the curve. The reason is that if the control points are very uneven, the parametrization, meaning the way the numbers on the domain are mapped onto the curve is not constant, but it reacts to the control point spacing.
Simple straight lines of a curve degree of 1 are not affected.
Use the evaluate curve approach to find a middle point with caution and if you truly need the actual middle, use the Curve Middle component.
Conclusion
In conclusion, finding the center of a curve in Grasshopper is an essential skill for designers working with parametric design. By using the Area, Evaluate Curve and Curve Middle components, you can easily center points of a curve and incorporate them into your scripts. Whether you’re working with simple or complex curves, these techniques can help you achieve the desired results in your Grasshopper scripts. I hope you find this useful and that you are now able to confidently find the center of any curve in Grasshopper and take your design work to the next level!