Modeling in Rhino is all about precision. Being able to quickly check the length of a curve or the distance between two points is essential. In this post, I’ll walk you through five methods of how to measure length and distance in Rhino, and when to use them.
How to Measure Length in Rhino
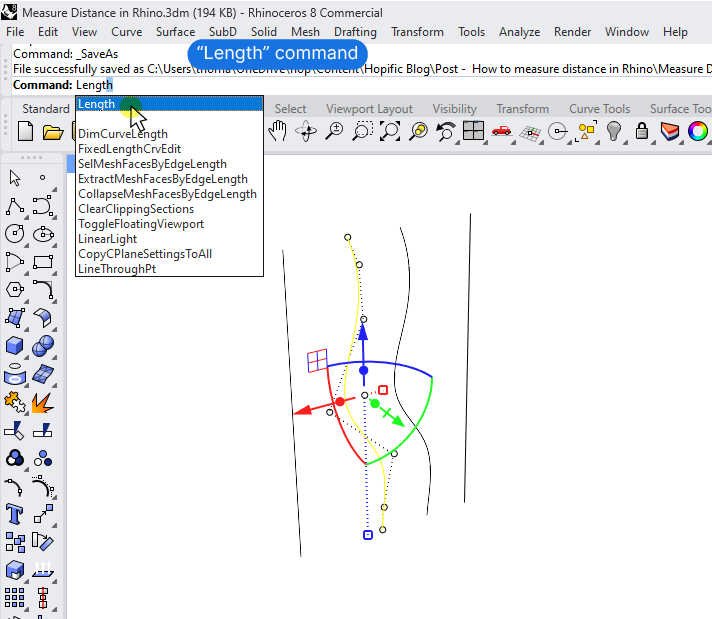
If you want to measure the length of a curve in your Rhino model, the easiest way to do so is to select the curve and run the Length command by typing “Length” into the Rhino command line.
(Typing ‘len’ and pressing Enter is sufficient if you want to save time.)
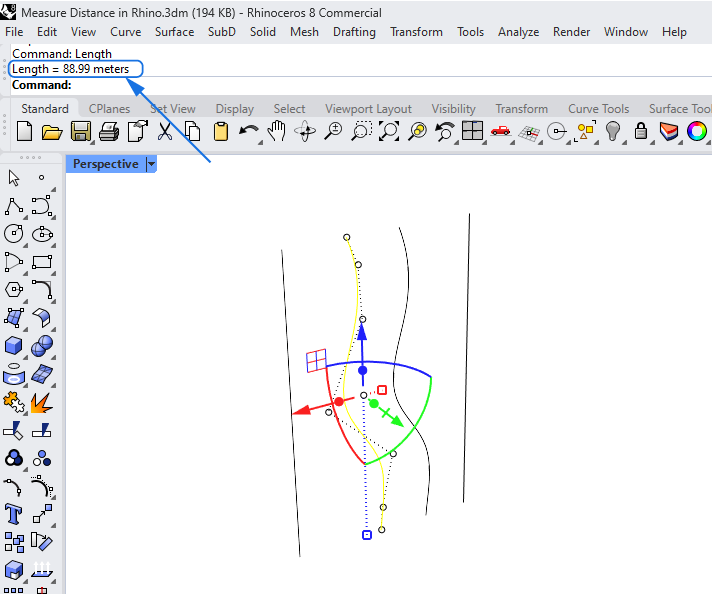
The length will be shown in the Rhino terminal, in the document’s units.
Getting the Length of Sub-elements
If you want to measure the length of an edge, whether it’s part of a surface or a polysurface, you don’t need to extract the curve first. You can select subobjects of a polysurface by simply holding Ctrl + Shift and hovering over the edge you want to measure until it lights up.
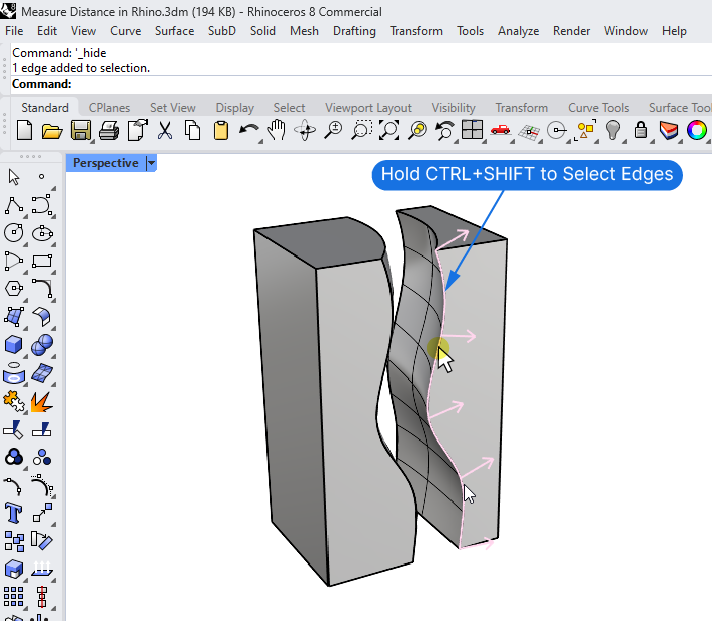
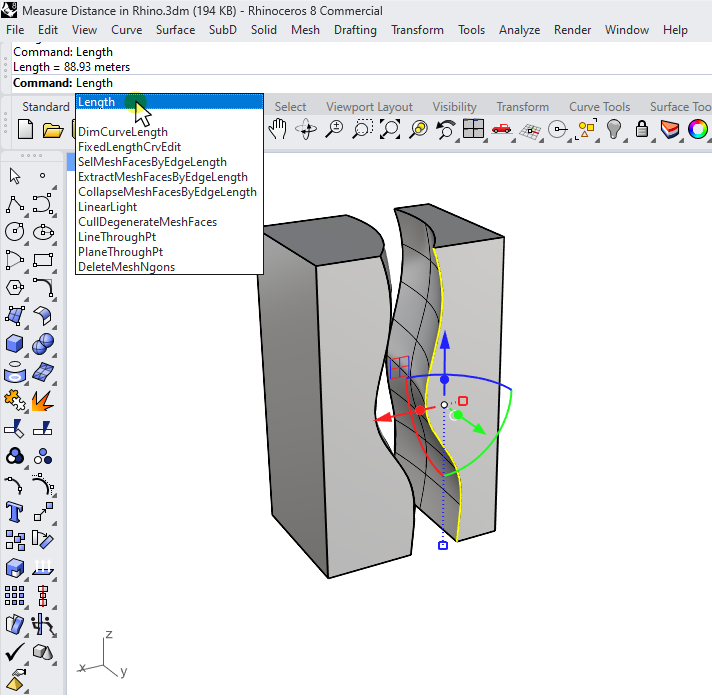
Click to select it, and then run the “Length” command as shown earlier.
How to Measure Distance in Rhino
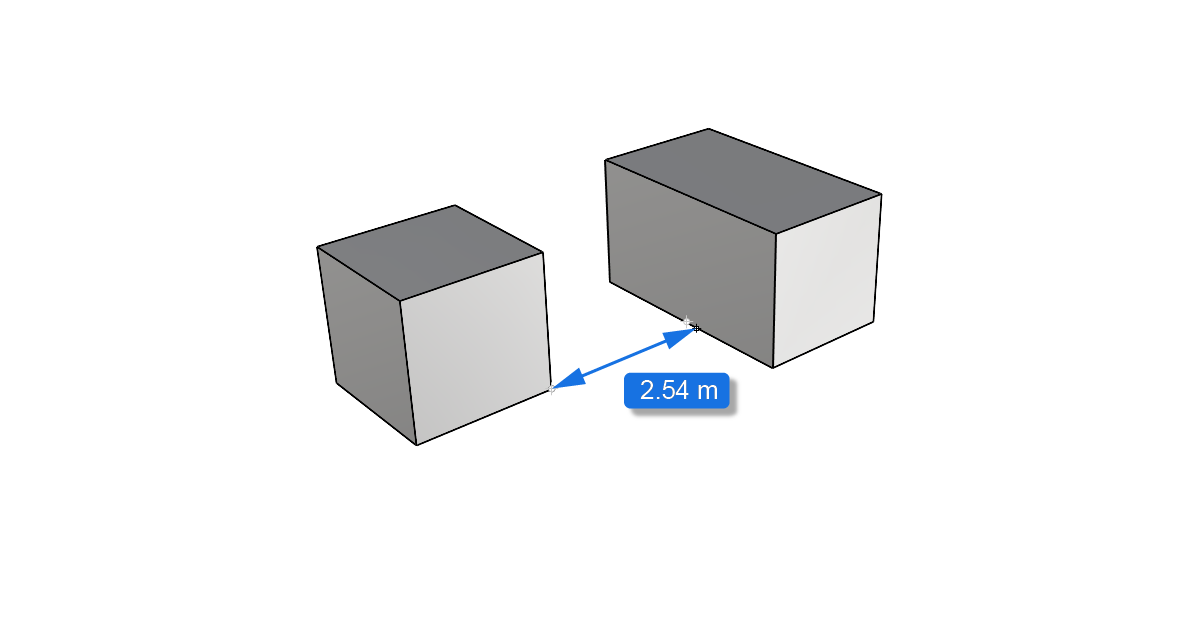
To measure the distance between two points, you can use the “Distance” command.
Type “Distance” into the Rhino terminal to start the command.
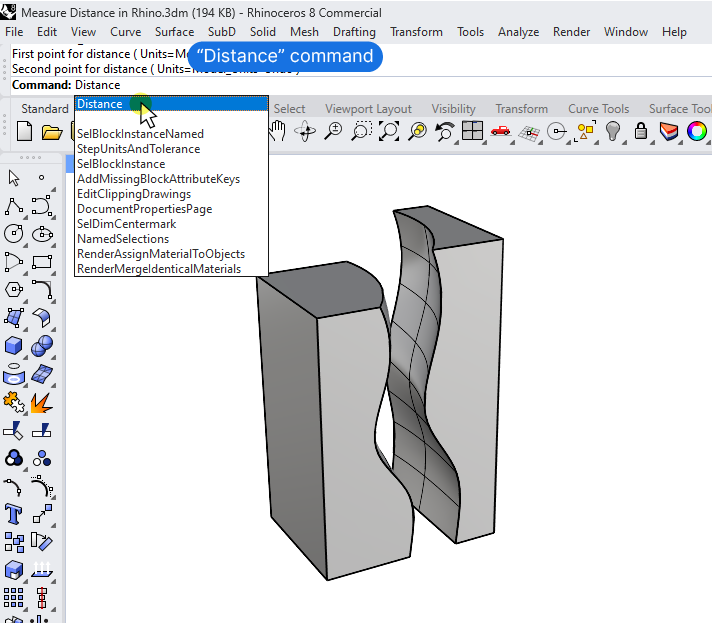
You’ll be asked to select two points.
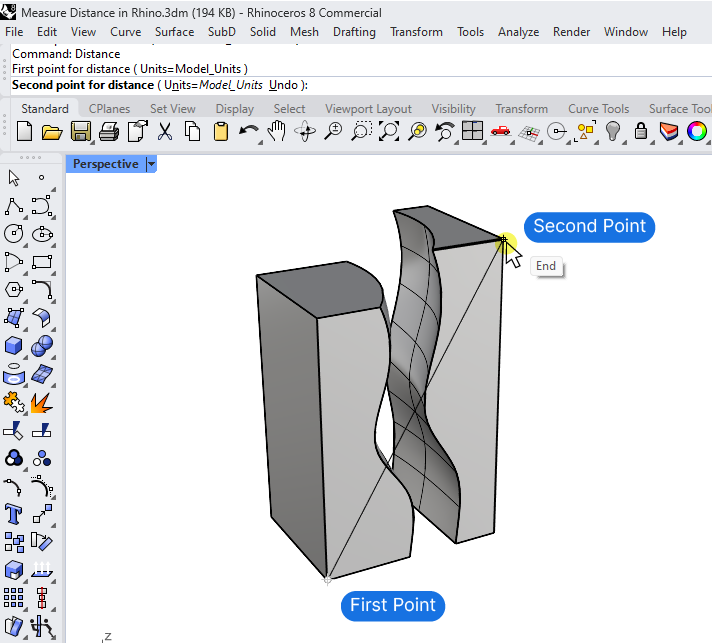
The result of the distance measurement will be shown in the Rhino terminal in this format:
Distance = 100.09 meters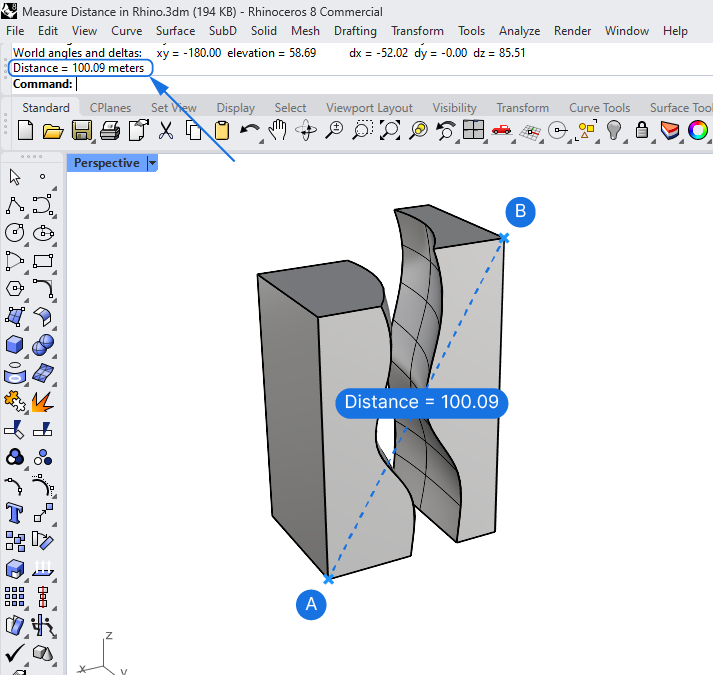
How to Get the Vertical Distance Between Two Points
Another useful feature of the Distance command is that it doesn’t just show the straight-line distance; it also shows the delta for the x, y, and z coordinates of the two points.
This feature is particularly useful if you want to measure the height difference (along the z-axis) between two points that are not located on top of each other vertically. For example the vertical distance between two objects that are located at opposing ends of your scene.
These coordinate delta values are displayed in the Rhino terminal, right above the final distance result, in the following format:
World angles and deltas: xy = -180.00 elevation = 58.69 dx = -52.02 dy = -0.00 dz = 85.51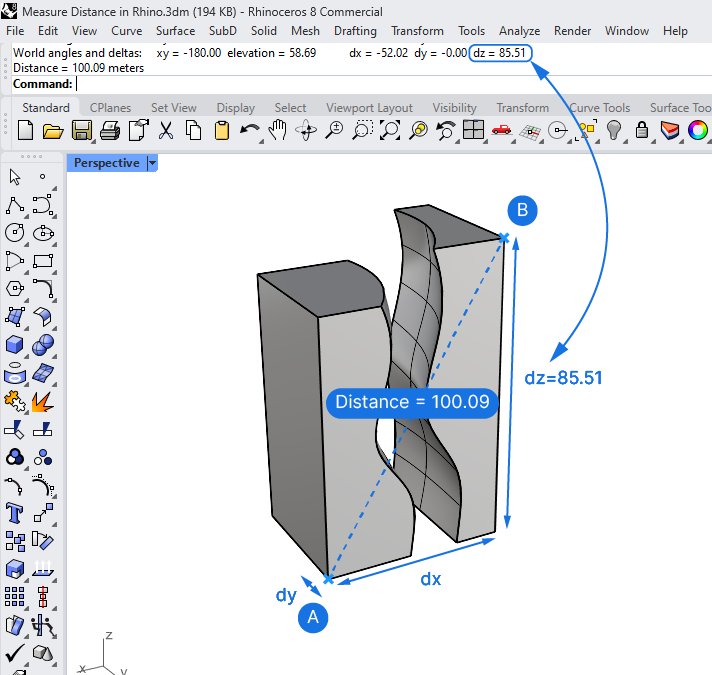
In the above example, the vertical distance would be dz = 85.51 (delta of z-coordinates).
I find this somewhat hidden feature really useful – without it, you would have to draw a line just to make the same measurement.
Using the Cursor ToolTips for Live-Distance Preview
While the Length and Distance commands are useful for analyzing geometry you’ve already created, it can be useful to get live feedback on the movement or extrusion of the objects you manipulate.
To get direct numerical insight into your object manipulations, you can turn on the distance display for the Cursor ToolTips. With it, a box will appear next to your cursor, displaying the distance.
Here’s how to turn it on:
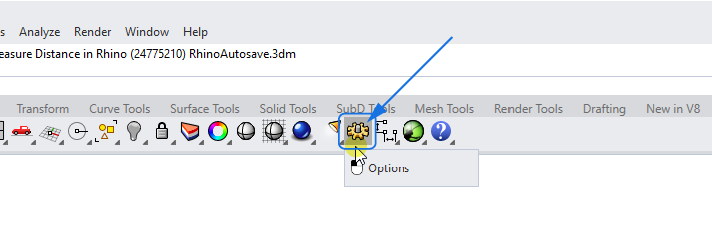
Open the Rhino Options by clicking the gear icon in the Standard Rhino toolbar, or by typing “Options” into the Rhino terminal.
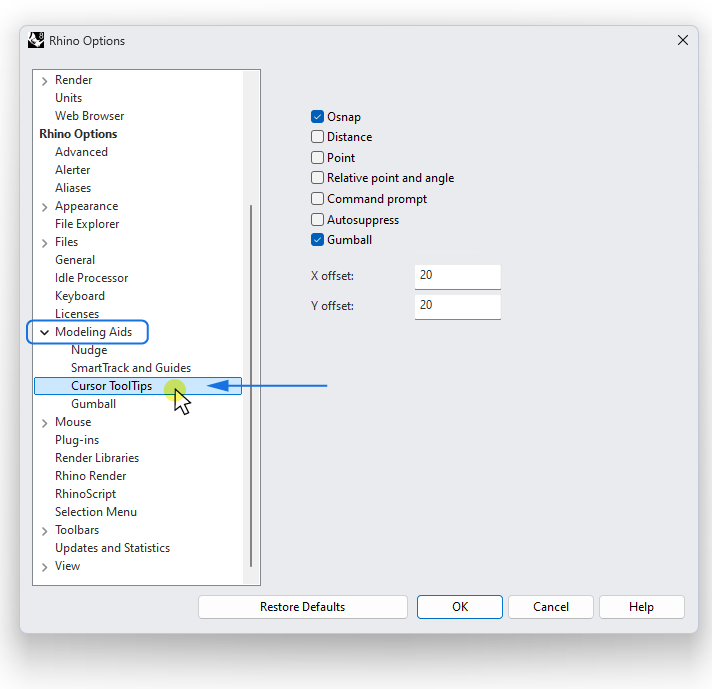
Scroll down to “Modeling Aids”, click on the chevron to display its submenu and click on “Cursor ToolTips“.
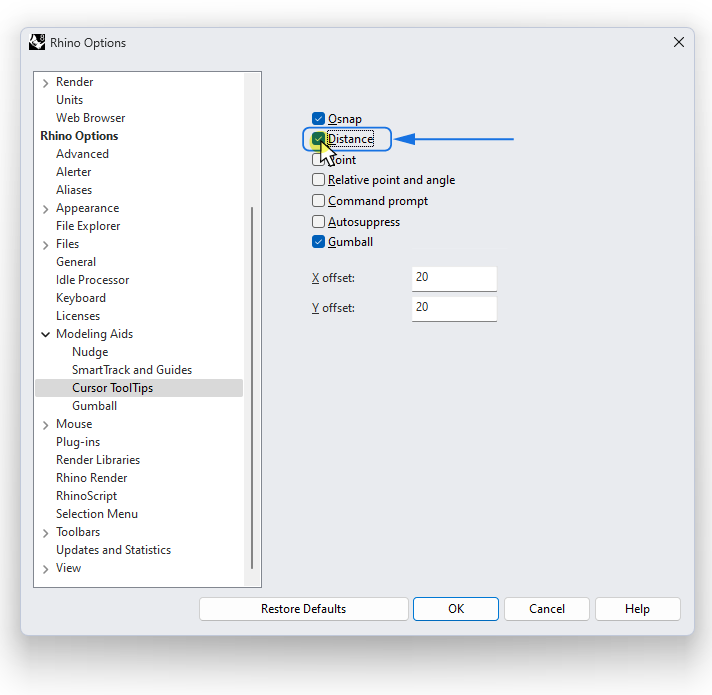
Then check the “Distance” box and confirm with OK.
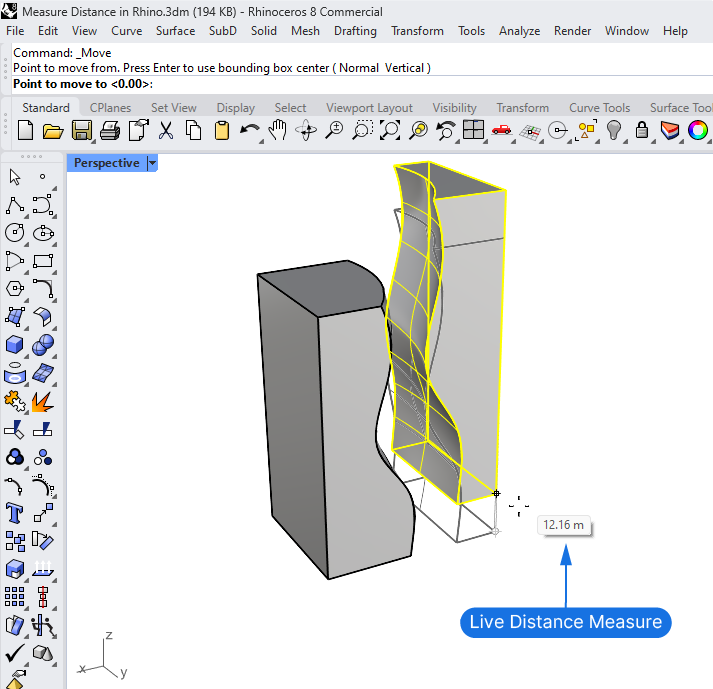
The live distance display will now show for operations like Move, Extrude, and Copy. It will even display the angle during a Rotate command, even though it’s technically not a distance.
In the image below, the Cursor ToolTip is displaying the distance of an ongoing vertical Move command of the object.
Conclusion
With the Length, Distance and Cursor Tooltips, Rhino offers several ways to stay on top of the dimensions of your model. The Cursor ToolTips can give you extra control when modeling as the live-distance feedback can prevent you from making mistakes. It can also feel a bit overwhelming, so try it out and see if you find it useful!
Happy modeling!

