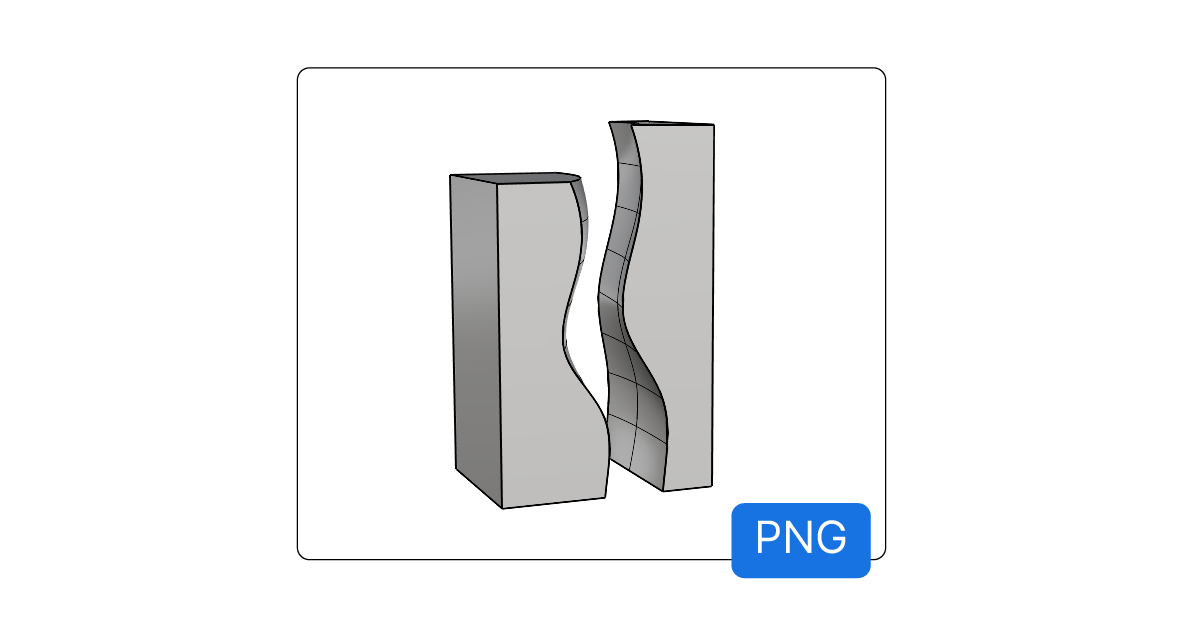
To take a screenshot of the active viewport in Rhino, you can use Rhino’s ‘ViewCapture’ commands.
Rhino gives you two options: you can save the screenshot to the clipboard (so you can easily paste it) or you can save it as a dedicated image file.
The commands are called:
- ViewCaptureToFile
- ViewCaptureToClipboard
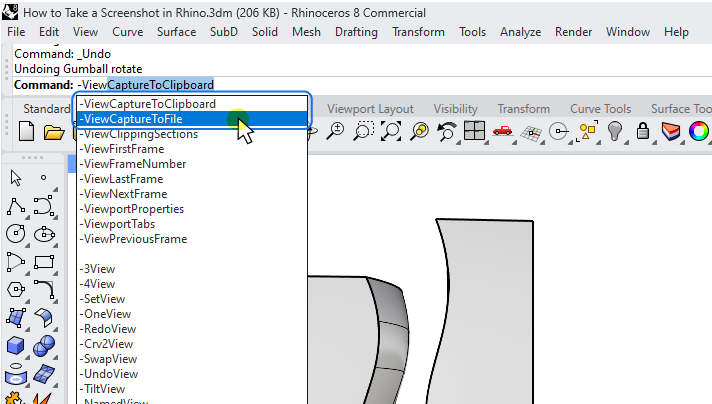
To run these commands, type “view” into the Rhino terminal. Rhino will display a list of commands with ‘view’ in their names, with ViewCaptureToFile and ViewCaptureToClipboard at the top. Select the command you need to run them.
The ViewCaptureToFile Command
The ViewCaptureToFile command will save the screenshot as an image file (like a .jpg) to a folder you specify.
Both ViewCapture commands capture the active viewport in its current display mode (Wireframe, Shaded, etc.).
To make a viewport active, click inside it – the viewport title will turn blue.
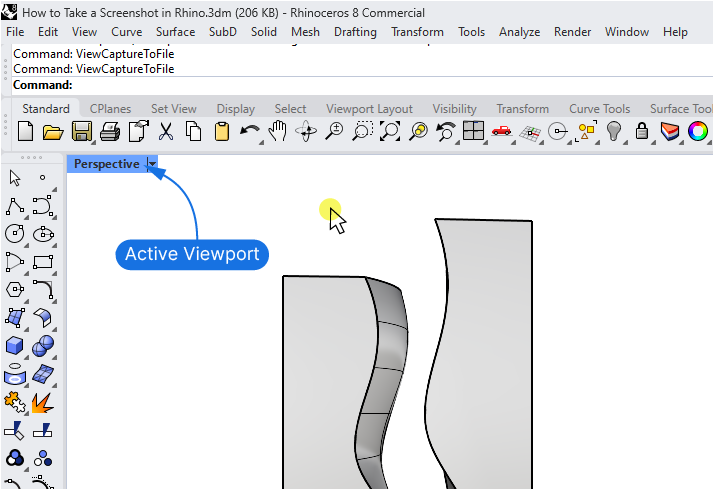
When you run ViewCaptureToFile, a floating window will pop up with options for customizing the screenshot:
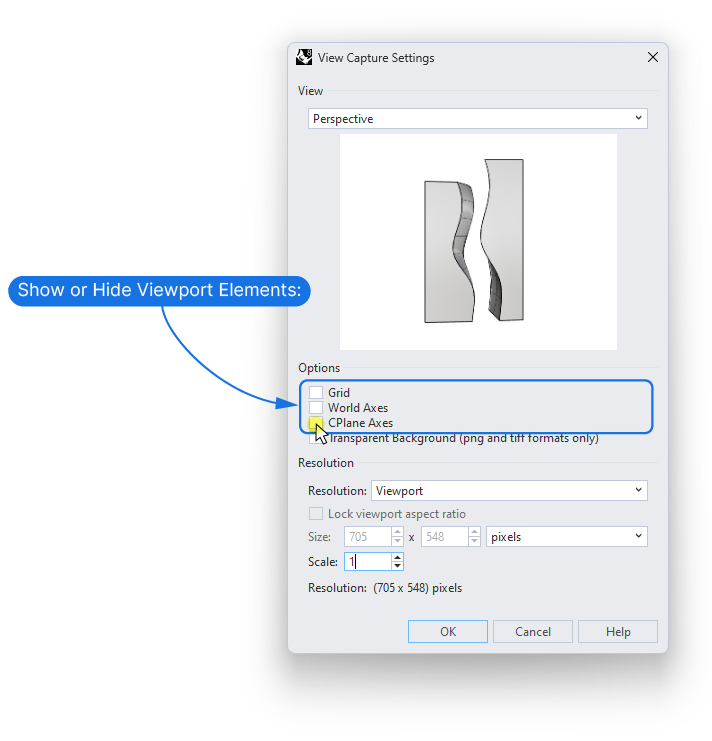
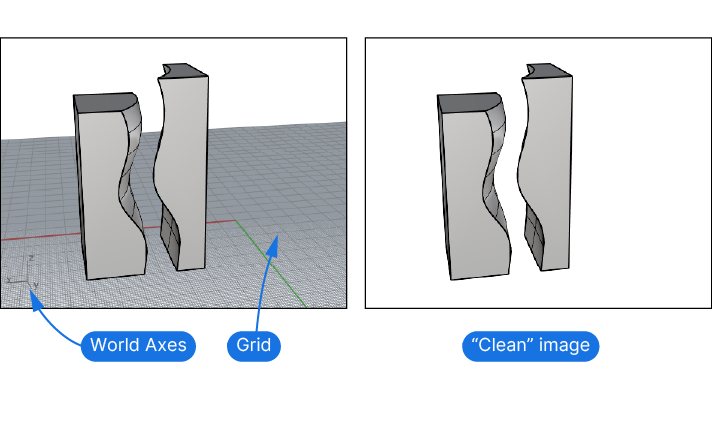
You can decide to display or hide viewport elements like the Grid, World Axes, and CPlane Axes in the final image.
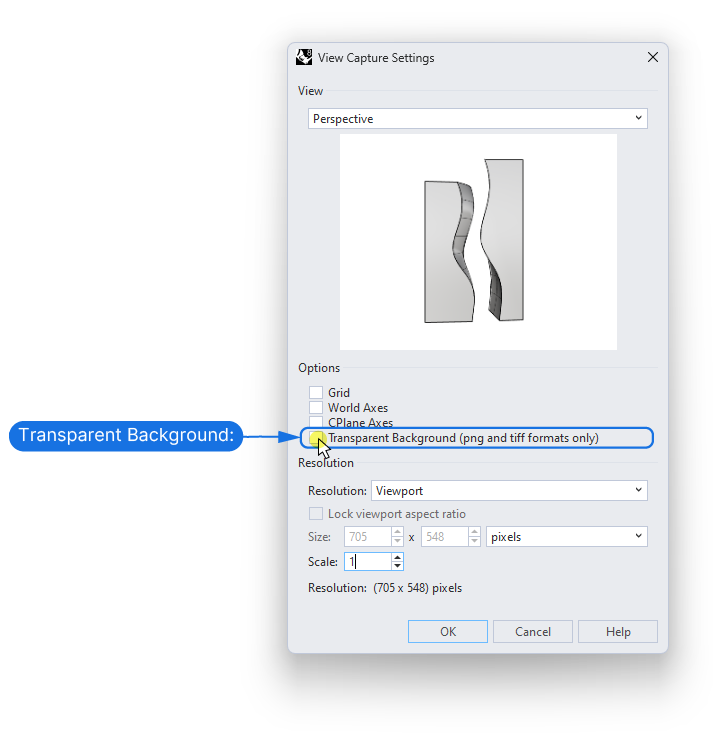
You can also save the image with a transparent background, which only works for PNG and TIFF file types. (You’ll select the file type in the next step).
Below it you can define the resolution of the image.
By default, the resolution will match the active viewport’s exact dimensions, preserving its aspect ratio. I recommend keeping this setting; otherwise, the preview may not match the final image, and unintended objects could appear in the screenshot.
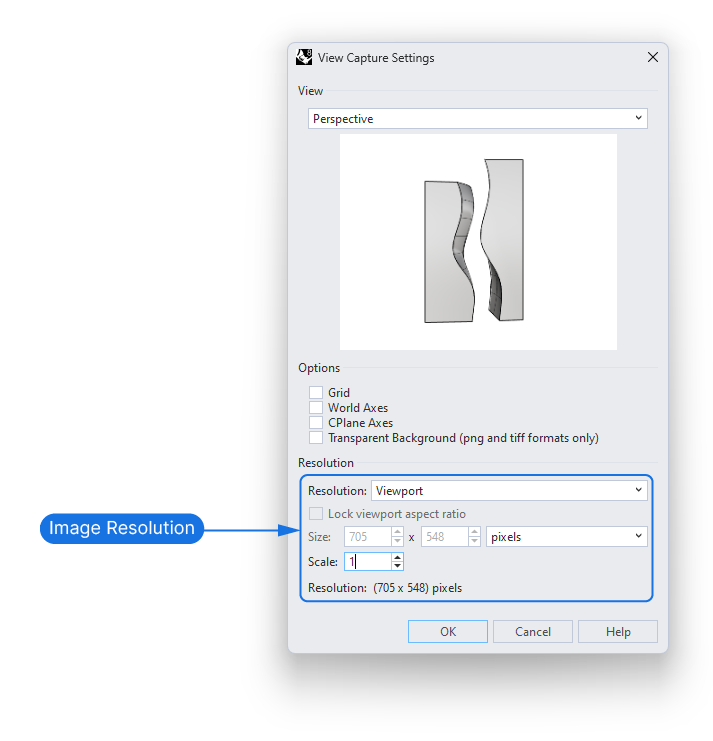
Once you click “OK“, you’ll be asked to pick a folder where to save the image.
This is also where you get to choose which filetype the image will be saved as. You can choose between:
- .png (supports transparency) (recommended filetype)
- .jpg
- .bmp
- .tiff (supports transparency)
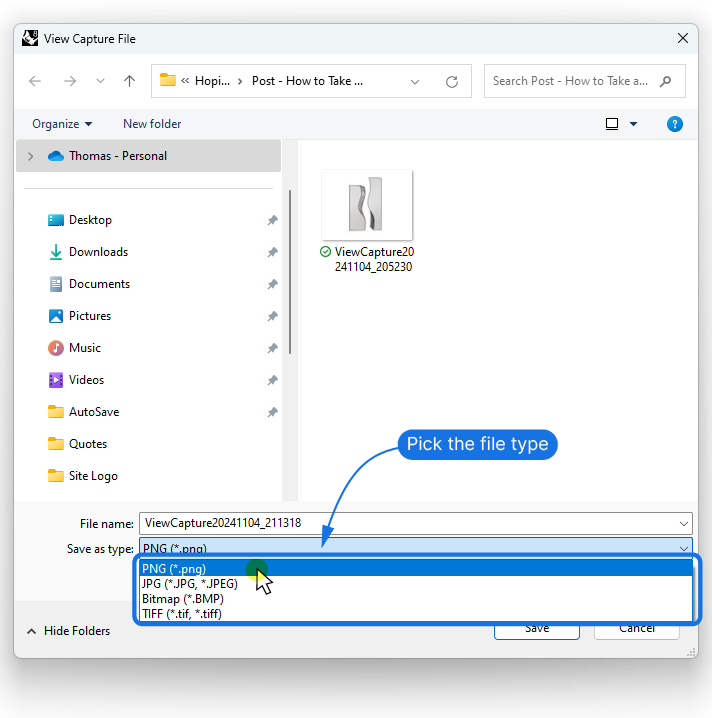
The default filename for the viewport capture will be in this format:
ViewCapture20241104_205230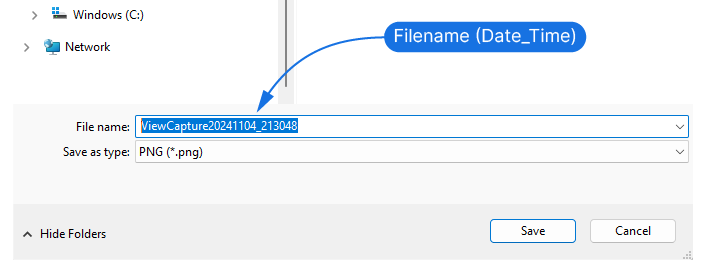
The numbers after the word “ViewCapture” are the date followed by the time the screenshot was taken.
Make sure to give the file a descriptive name for later use.
Saving a screenshot as an image file this way is great for presentations.
How to Save a High-resolution Screenshot of Your Rhino Viewport
Depending on your screen size and your viewport setup, a normal screenshot’s resolution may be too low to print or use the image in presentations. To help with this, Rhino allows us to specify a multiplier for the resolution of the active viewport, in a setting called “Scale“.
The default scale is 1, meaning if your viewport is 400 x 600px, that will also be the image resolution.
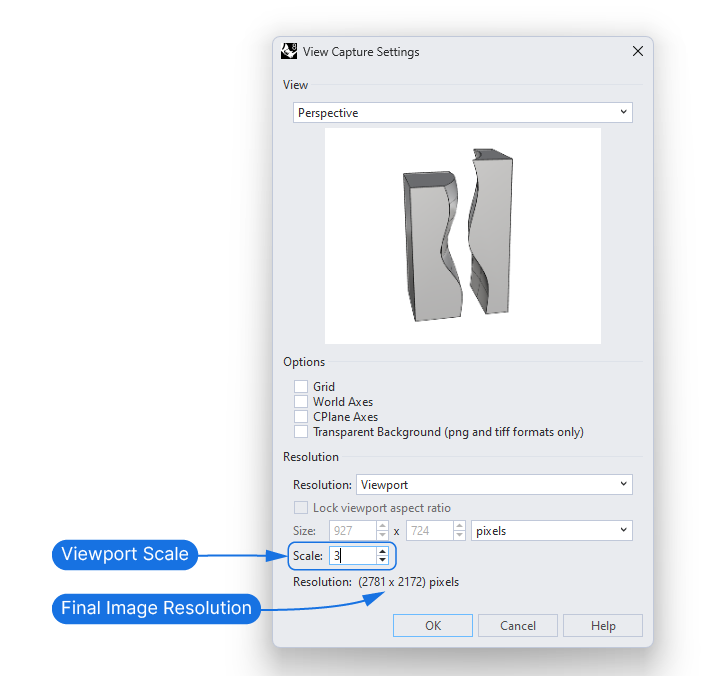
A scale of 2 will double the resolution to 800 x 1200px, and so on. The Rhino viewport itself will remain unchanged – Rhino will create the higher resolution in the background.
At the bottom of the window Rhino displays the final image resolution resulting from the scaling. Around 3,000px per side is great for most uses. Keep in mind that the thickness of the lines in the viewport will also scale – keep the scale between 1-3 for best results.
A large ‘scale’ value can cause Rhino to freeze. Especially if you are using Rendered view.
Note: Note: Once you change the scale setting, it will remain active for the entire session and won’t reset to 1 for each viewport capture.
The ViewCaptureToClipboard Command
Saving a screenshot to the clipboard is useful for quickly sharing a model over Slack, Miro, or other collaboration platforms.
The process is exactly the same: Start by running the “ViewCaptureToClipboard” command in the Rhino terminal.
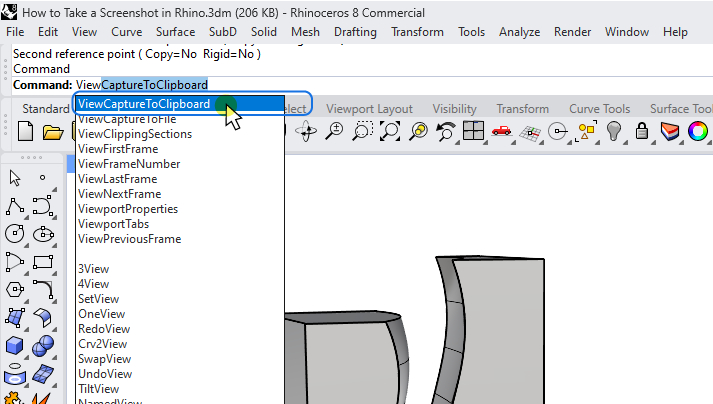
The same ViewCapture window will pop up, allowing you to specify the same settings.
The difference is that once you hit “OK“, the image will be saved to the clipboard – you will not be asked to pick a filename or a folder.
Since the image is saved in the clipboard, you can simply use Ctrl + V to paste the image wherever you need it.
Using Viewport Capture with Command Line Options
Both commands also come in a command line version. Instead of the popup window, you’ll be able to define all the settings directly in the command line, like a normal Rhino command.
To access the command line version, add a “–” (dash) before the name of the command. “ViewCaptureToFile” becomes “-ViewCaptureToFile“.
Instructions for completing the command will appear in the terminal, with a long line of settings:
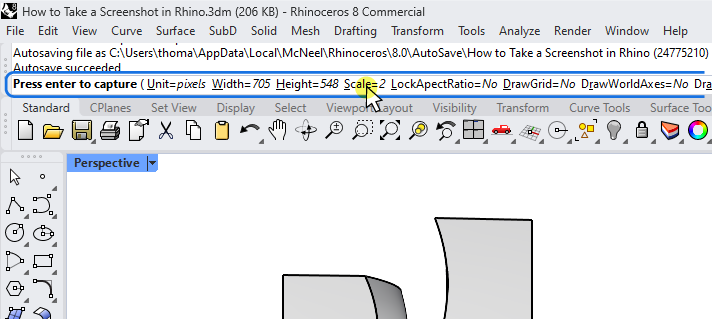
To change any of the settings, click on the option in the terminal. A sub-command will run, asking you for the new input.
Once you confirm the sub-input with a right-click or Enter, you’ll be back at the main command. Hit Enter once again to save the image.
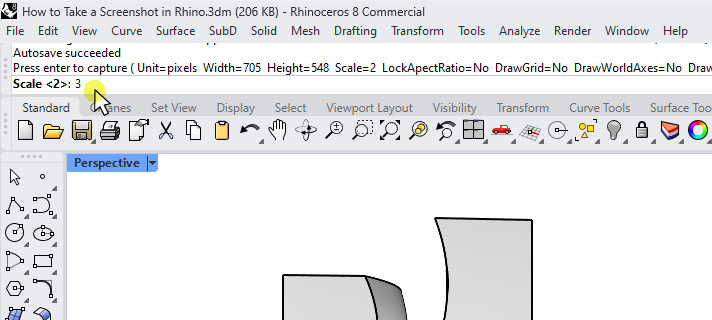
Personally I prefer this command line version, since I rarely need to specify anything other than the scale, and avoiding the popup windows saves time.
Conclusion
While renderings are nice, they can take up a whole lot of time. Sometimes taking a quick screenshot directly in Rhino is more than enough. With custom display styles and adjustable output resolution, you can use the ViewCapture commands to create clean, high-quality images quickly.
Happy modeling!

