Knowing how to subdivide a surface in Grasshopper can open up a world of possibilities for creating complex façade geometries and patterns in architectural design. It’s an essential technique for anyone looking to take their Grasshopper skills to the next level.
In this tutorial, we will be using the IsoTrim and Divide Domain² components to extract sub-surfaces and divide surfaces into grids. We will also be discussing UV values, how to create two-dimensional domains and how to reparametrize surfaces.
So, are you ready to dive into the world of surface subdivision in Grasshopper? Let’s get started!
The Basics
To subdivide a surface into a grid of surfaces in Grasshopper, we will need to run through two different steps. Unlike in Rhino, where we would actually split the surface with curves or other surfaces, in Grasshopper we’ll be extracting a grid of sub-surfaces from the base surface. First, we’ll need to describe the surface area we want to extract, and then we’ll actually extract it.
We’ll need the following two components:
- Isotrim
- Divide domain²
Read on for the step-by-step tutorial!
Defining the Surface Area to Extract
To be able to precisely describe areas within the surface, we are going to use the surface’s UV-values.
We can use the UV-values of a surface to precisely describe any point on a surface. This is because the surface is made up of two domains: one in the U and one in the V direction.
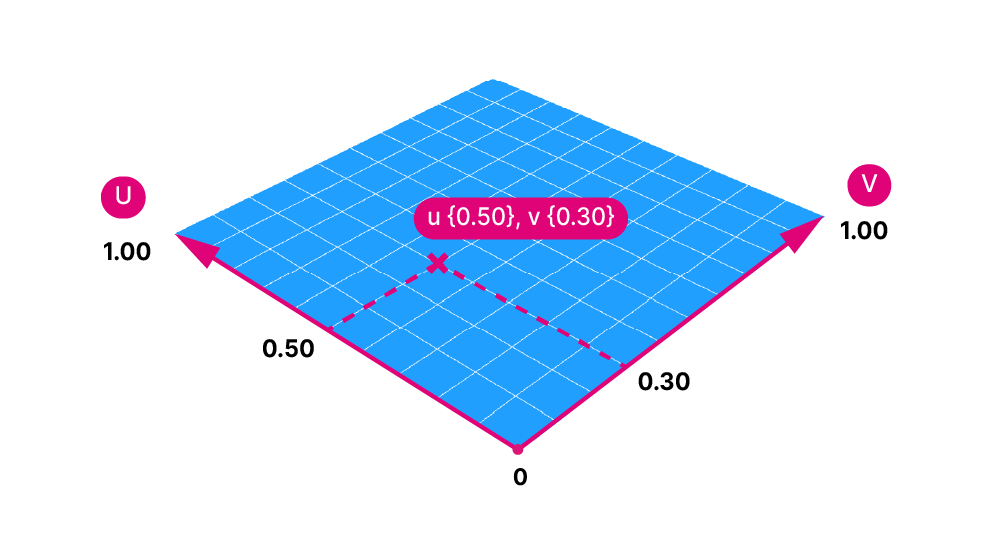
To extract any portion of a surface from a base surface, we can use a range of U-values and a range of V-values to describe not just a single point, but the entire area covered by those values!
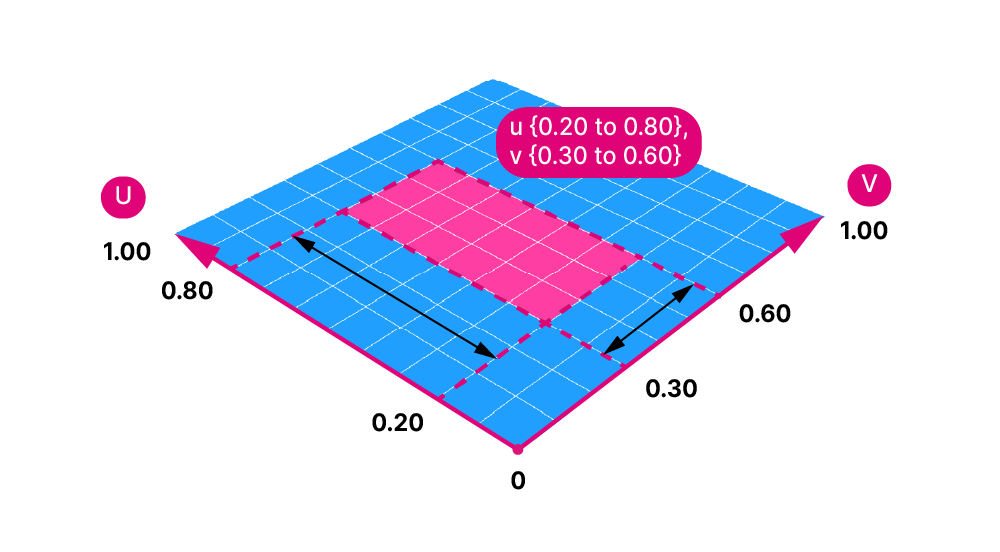
In order to do that we need to describe the area not with a single UV-value, but with two ranges of values: a domain in the U direction and a domain in the V direction.
In Grasshopper this is called a two-dimensional domain. The notation of two-dimensional domains in Grasshopper is a small squared symbol: domain².
Extracting a Single Sub-Surface
Let’s begin by learning how to extract a single subsurface from a base surface.
The component we’ll use to extract a subsurface from a base surface is called ‘IsoTrim‘.
Add it to your script by double-clicking on to the empty canvas and typing ‘Isotrim’. If you have the component name-display active, you’ll notice that instead of ‘Isotrim’ the component reads ‘SubSrf’, which stands for ‘subset of a surface’.

The component has two inputs: the surface to extract a subsurface from (S), and a two-dimensional domain (D), that describes the area to extract.
A two-dimensional domain will have the following structure:
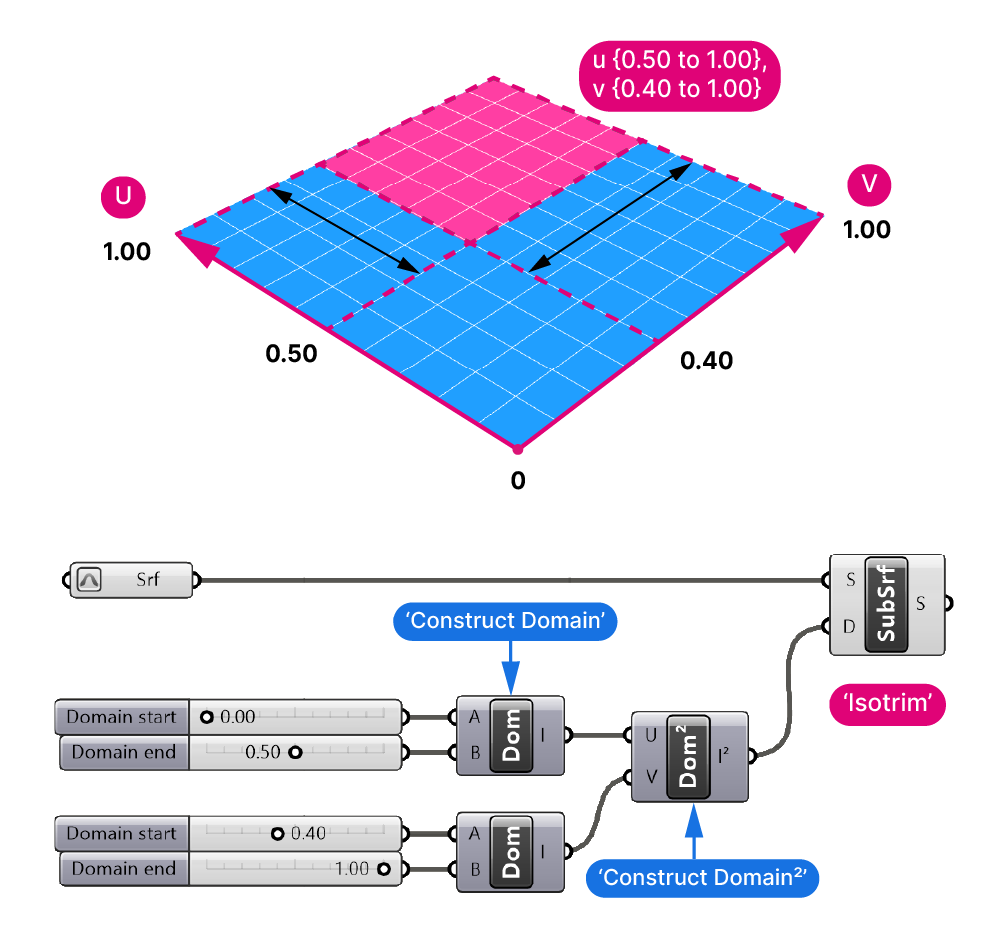
u:{ 0.00 to 0.50} and v:{0.40 to 1.00}The domain described above means that the surface to extract covers the area along the U direction from 0.00 to 0.50 and the area in the V direction from 0.40 to 1.00.

Creating a two-dimensional domain
There are a few ways to generate this kind of two-dimensional domain.
We can create two ‘normal’, one-dimensional domains, one for the U and one for the V direction, and merge them to a two-dimensional domain. Use the ‘Construct Domain²‘ component to create the two-dimensional domain.
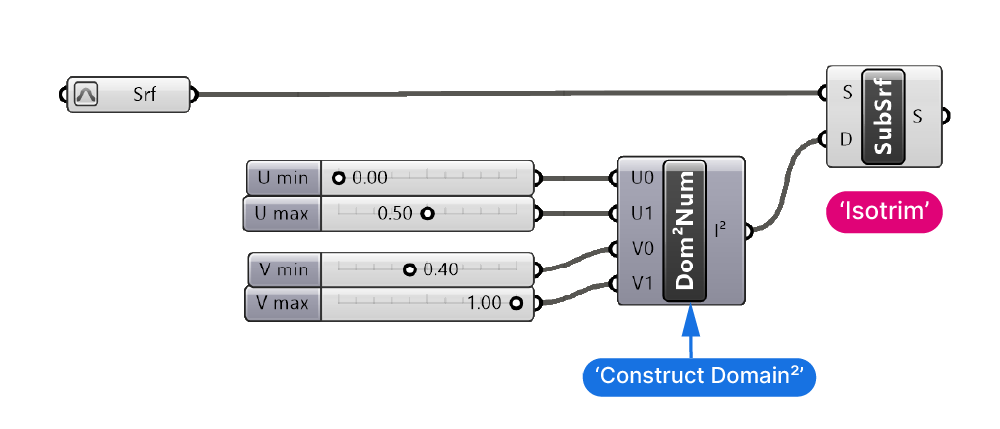
Alternatively we can directly create a two-dimensional domain by specifying four numbers (start and end value for both the U and V direction) all at once with a component of the same name: Construct Domain². The two components only differ in their icon, so read their description carefully to pick the right one!
Once we defined the extents of the subsurface to extract, we can plug the two-dimensional domain to the D input of the Isotrim component to get the extracted sub-surface.
Note: Make sure that the domain of the input surface and the UV values you specified match! If you are using UV values between 0.00 and 1.00, you’ll need to reparametrize the input surface by right-clicking on the surface and typing ‘Reparametrize’.
Extracting Multiple Sub-Surfaces at Once
Now what if instead of extracting one single subsurface, we want to divide the entire base surface into a grid of surfaces?
To subdivide a surface in Grasshopper, the process will be the same: But instead of just one, we’ll need several two-dimensional, adjoining domains that describe the areas of the sub-surfaces to extract.
Luckily we don’t have to manually create several two-dimensional domains, we can use a component that takes the domain of a surface and divides it into as many two-dimensional subdomains as we need!
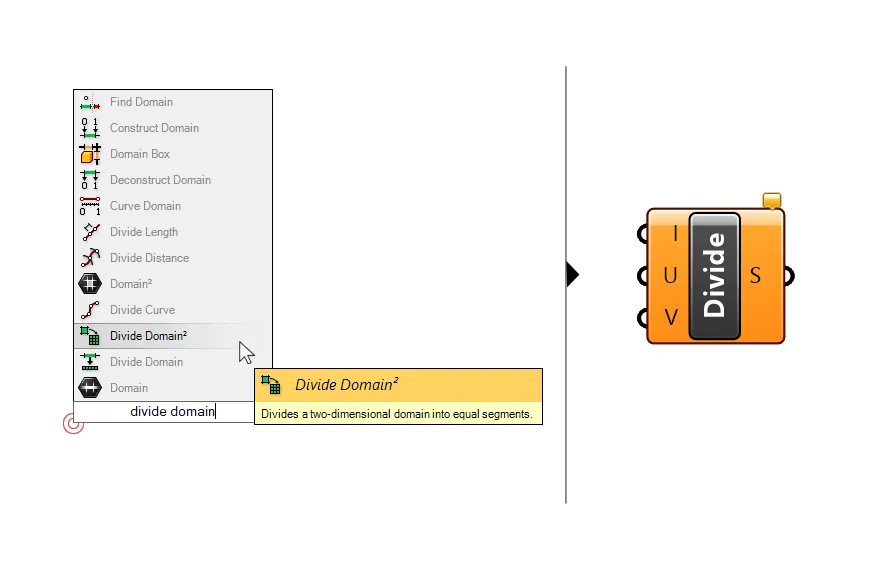
The component is called: Divide Domain². Add it to the canvas by double-clicking onto an empty spot on the Grasshopper canvas, typing its name and selecting it from the results. Make sure to pick the one with the ‘²’ sign.
The component has three inputs. The first input (I) asks for a surface input. The component will then extract the surface domain from the surface automatically.
The following two inputs define the number of divisions we want to divide the surface domain into, for both the U and the V direction.
This part is similar to the Divide Surface component, which creates a grid of points on the surface, only that now we are dividing a two-dimensional domain.
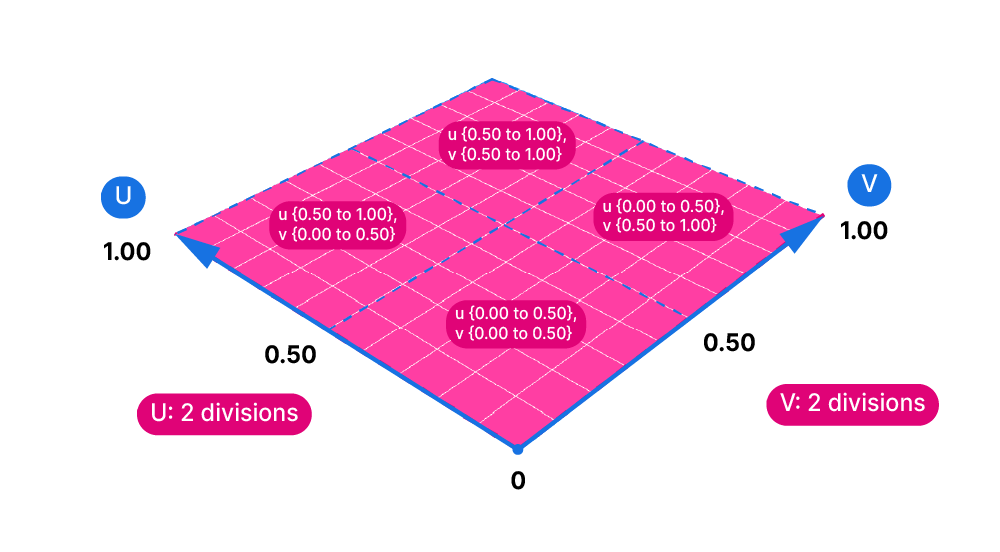
Note: Unlike the Divide Surface component, the numbers we specify for the U and V divisions, will be the actual number of resulting subsurface.
The output will be a list of two-dimensional domains that we can then connect to the ‘D’ input of the Isotrim (Subsrf) component.
Note: Make sure that both the IsoTrim and the Divide Domain² component have the same surface input, including the same parametrization. If you reparametrize the input of one, but not the other, the domains won’t match and you won’t get the right results!
The output will be a flattened list of a grid of sub-surfaces. You successfully divided a surface into a grid in Grasshopper!
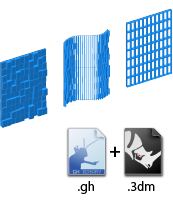
Application Example
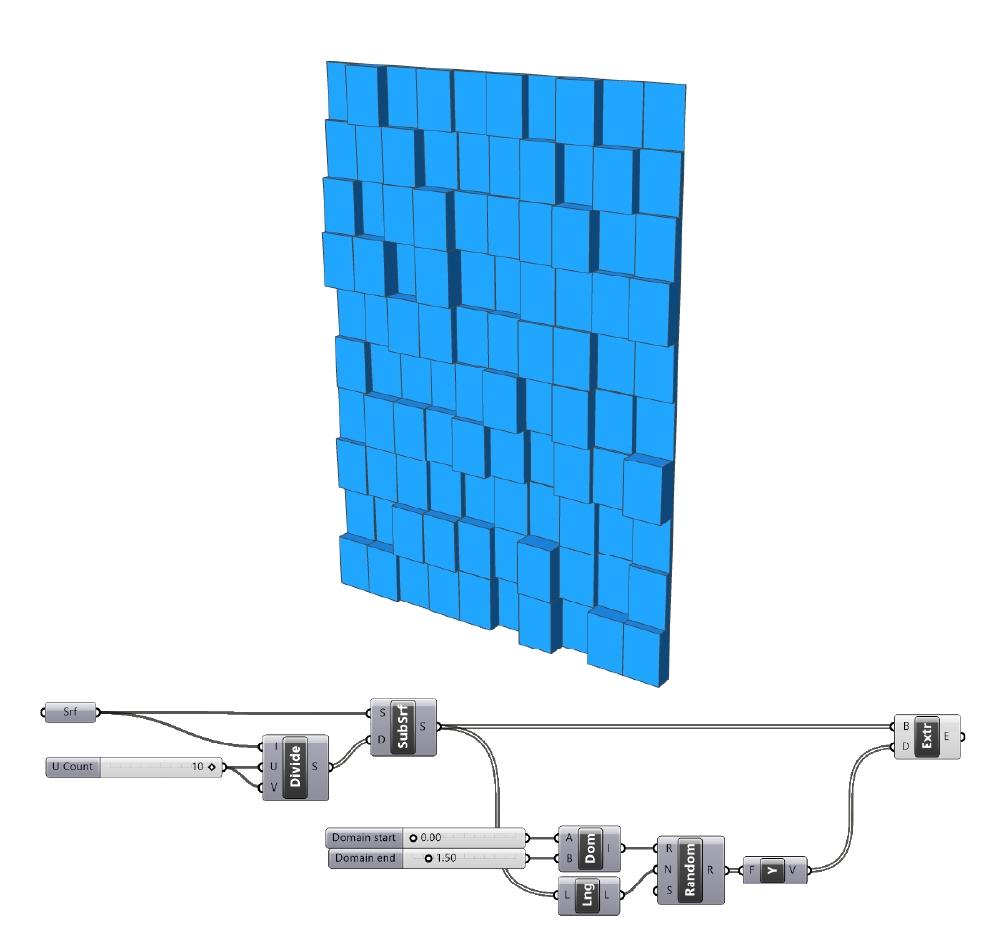
Here is an example of what you can do once you divided a surface into a grid of sub-surfaces.
First I divided the surface into a grid of sub-surfaces. Then I generated a list of random values within a domain I constructed. I used those values for the length of an extrusion vector (in this example the vector points into the Y direction). Finally I extruded the sub-surfaces by the vectors to create polysurface or Breps. To bake to Rhino, select the Extrude component and hit ‘Insert’ on your keyboard.
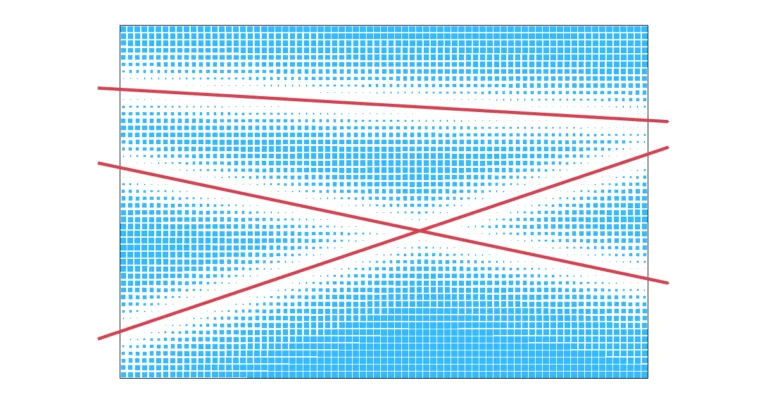
Limitations of this Approach
By using this approach we are completely reliant on the surface domain and extents of our base surface. This means that unless the surface has a very specific dimension, for example 10x the length of the subdivision width we want to have, we will get sub-surfaces with arbitrary heights and widths.
In professional architectural design applications, we’ll want to have complete control over the dimensions of any elements we create.
If you need to precisely define the dimensions, the better route is to construct the panels from curves. By using the different curve subdivision tools available, you can build your custom panels while keeping full control over the dimensions.
Concluding Thoughts
In conclusion, knowing how to subdivide a surface in Grasshopper can bring a new level of complexity and creativity to your architectural designs. The IsoTrim and Divide Domain² components are essential tools for extracting subsurfaces and dividing surfaces into grids. Understanding UV values and how to create two-dimensional domains is crucial for precise control over the extracted surfaces. With these techniques, you can take your Grasshopper skills to the next level!
If you’re interested in learning more about advanced Grasshopper techniques, consider taking hopific’s Grasshopper Pro course, which is specifically designed to teach professional architects how to use Grasshopper in professional practice.
Happy designing!