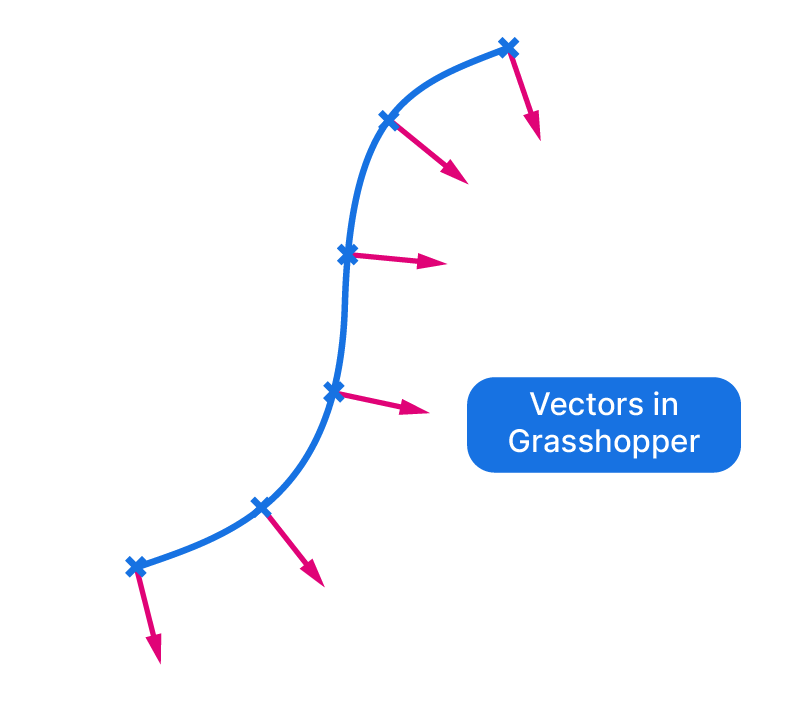
Vectors in Grasshopper are the secret ingredient to mastering parametric design in Rhino. There are several object types in Grasshopper that we never encounter within the Rhino modeling environment. One such datatype is the vector. Vectors are an essential tool for controlling and changing the location of any objects in 3D space.
In this post we are going to cover everything you need to know to master vectors in Grasshopper!
Let’s get started!
What is a vector?
Let’s begin by understanding what a vector is. Vectors are not specific to Rhino, they are a universal mathematical entity that describes a linear, relative movement in space.
Vectors are described with three numbers, so when never actually see them in our viewport (unless visualized, more on that later). If visualized, this is what a vector might look like:
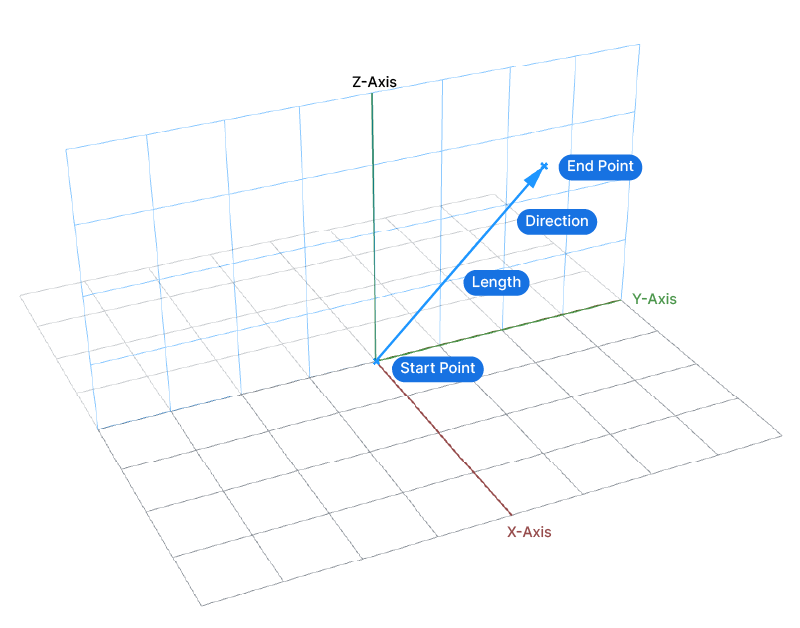
We can see all three defining characteristics of a vector:
- The start and endpoint
- The direction (from start to end)
- The length
A vector is defined by two points in 3D space, defined by three values: an X, Y and Z coordinate.
Vectors always describe relative movements in space, meaning that the vector doesn’t need to be close to the object we want to move. For that reason, vectors can always described as a movement from the origin of our 3D coordinate system. This means that the start point of any vector is always:
{0, 0, 0}The numbers describe the position along the 3 axis in the following order:
{X-coordinate, Y-coordinate, Z-coordinate}Consequently, it’s the second point in space that really gives the vector its direction and length. The second point is also defined through point coordinates:
{0.55, 2.64, 0}Each of the X,Y,Z values can be positive or negative, which means that the vector can point into any direction – allowing us to describe any movement in 3D space!
Since the start point of the vector is always the origin by convention, a vector can be described by one point or X,Y,Z coordinate.
The numbers we specify as coordinates can be of any size, and the distance from the origin to the resulting point in space is what defines the length of the vector.
What is a Unit Vector in Grasshopper?
Unit vectors are vectors that have a length of 1. To achieve that, the X,Y, and Z values are ‘unitized’ to meet this length requirement, while still pointing into the same direction.
You can recognize a unit vector by the fact that none of the coordinate values are larger than 1.
Here are a few examples of unit vectors:
{-0.83205, 0.5547, 0} but also
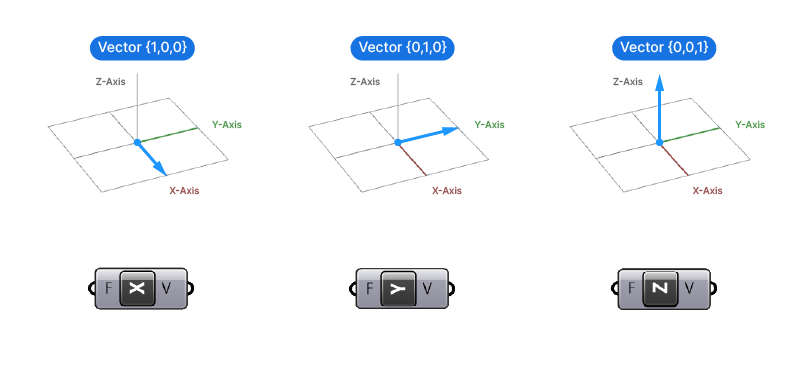
{0, 0, 1}We don’t really need Unit vectors very often in Grasshopper. The only ones we are likely to use are the predefined X, Y, and Z Unit vectors, which are 1 unit long in their respective direction:
X Unit Vector: {1, 0, 0}
Y Unit Vector: {0, 1, 0}
Z Unit Vector: {0, 0, 1}
You can find them by double-clicking on an empty spot on the Grasshopper canvas and simply typing X, Y or Z. The result closest to the search field is the Unit vector.
How to create a vector in Grasshopper
Vectors are omnipresent in Grasshopper, and there are several ways to create vectors either manually or by extracting them as part of geometric properties of existing objects, for example tangents or surface normals. In this section we’ll go though each method one by one.
Let’s start with the simplest.
X,Y, Z Unit Vectors
If we want to move objects along one of the main spatial axis, we can make use of the X, Y or Z Unit vectors. As mentioned before, these are ‘ready-made’ vectors with a length of 1 that point in the main coordinate directions.
If we want to move an object vertically for example, we would use the Z-vector. Look in the bottom left corner of the Rhino viewport to double-check the X,Y,Z directions.
Now if we just use this Unit Z vector to move an object, the object will be moved up by 1 unit. To control the distance, we need to specify a length.
Defining the length of a Unit Vector in Grasshopper
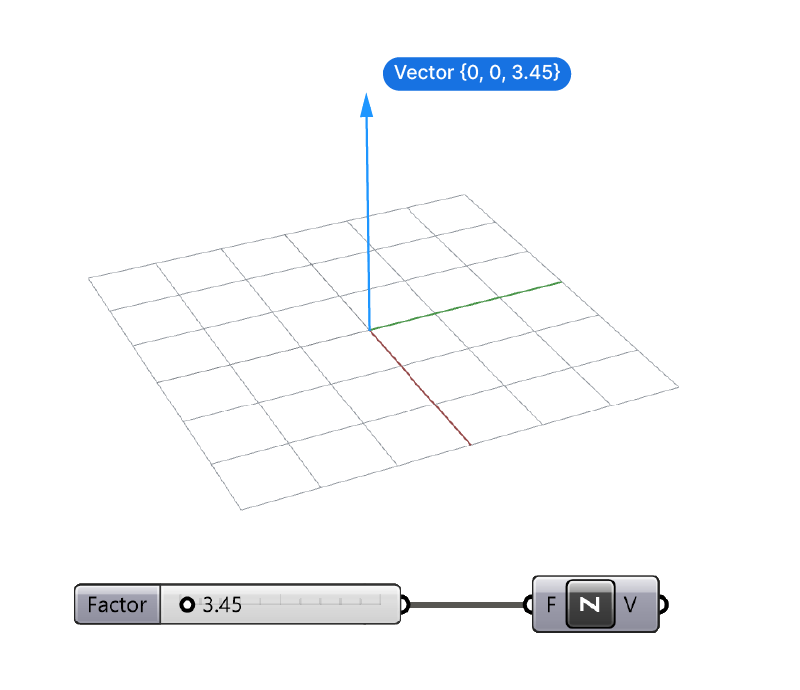
Next to the direction, the second most important feature of a vector is its length. We want to control whether the object is moved 1 unit or 100 units in a certain direction after all!
Any Unit Vector component has one input F, which stands for factor. We can specify the desired length of our vector here, using a Number Slider for example.
Creating a vector from a line in Grasshopper
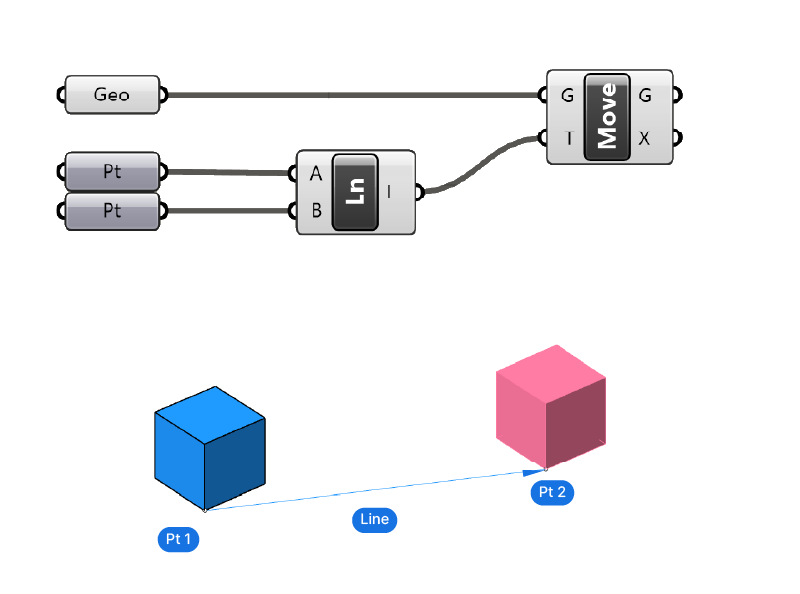
Since a vector can be thought of as a line, it’s natural to wonder if we can use actual line geometry as vectors to move geometry. The answer is yes, with some limitations.
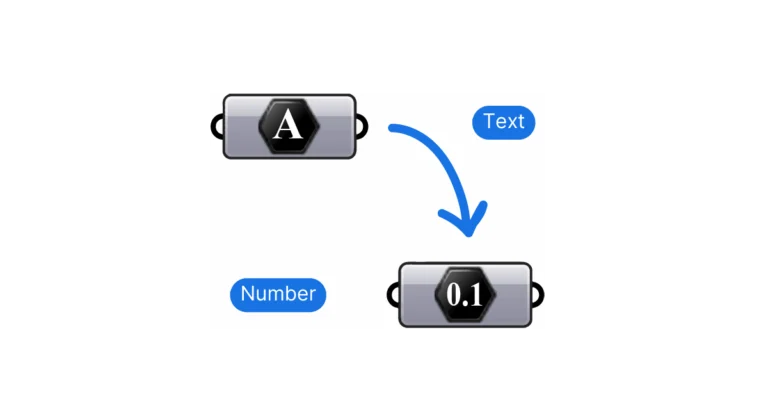
To do so we can leverage Grasshoppers build-in data-transforming functionality, which transforms objects for us when possible, in this case from a line to a vector.
This only works under a specific condition: we need to provide the datatype ‘Line’ as input. A vector is defined by two points, so we can only use simple, linear lines defined by two control points as vectors. Higher degree, curvilinear curves cannot be used as vectors.
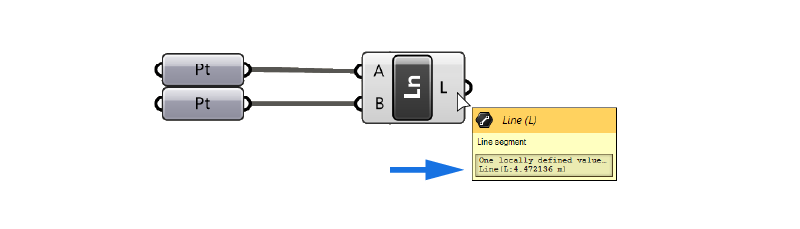
The line can also not be stored in a ‘Curve’ container. It must come from a Line Container component or be the result of a Line creation component, like Line SDL. If in doubt, hover over the output – it should show the following in the popup tooltip:
Line(L:3.50 m)
To use the line as a vector, simple plug the line geometry directly into the Vector input of the move component.
While this works, it’s better to create an actual vector in most cases, to avoid expected errors in your script.
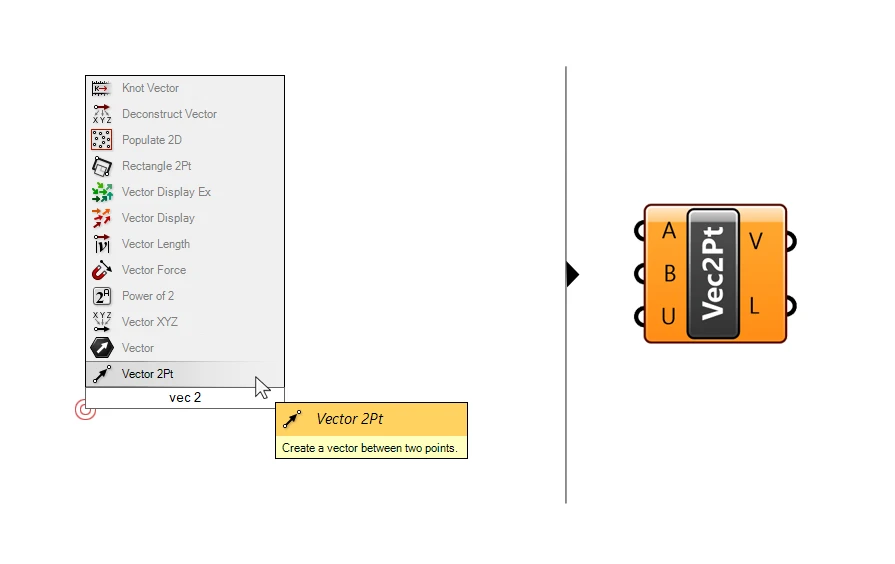
Vector 2 Point in Grasshopper
To construct a vector using two points, we can use the Vector 2Pt component. You can find it by double-clicking on the empty canvas and typing ‘vec 2’, it will show up at the bottom.
The inputs are straight-forward: the A and B inputs represent the start- and endpoint of the resulting vector. This method is particularly useful if we trying to construct vectors using geometry we already have in our script. For example to create a vector from the middle of a curve to the middle of another curve. In the example below we are just using two referenced points.
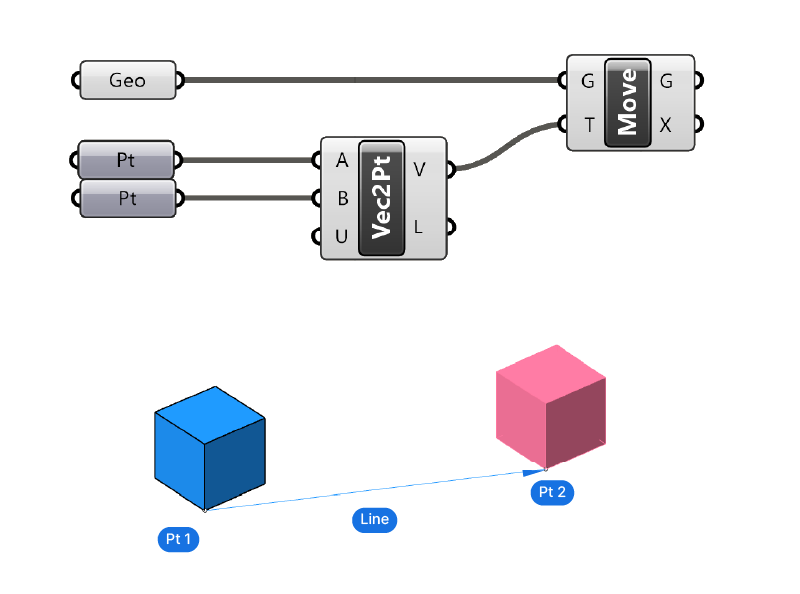
The Vector 2Pt component has a third, optional input (U) which allows us to define whether the resulting vector should be unitized, meaning that it will be ‘resized’ to a length of 1.
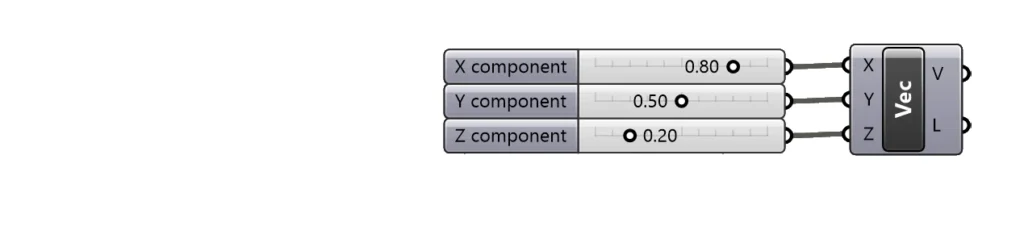
Constructing Vectors Manually using X,Y,Z values
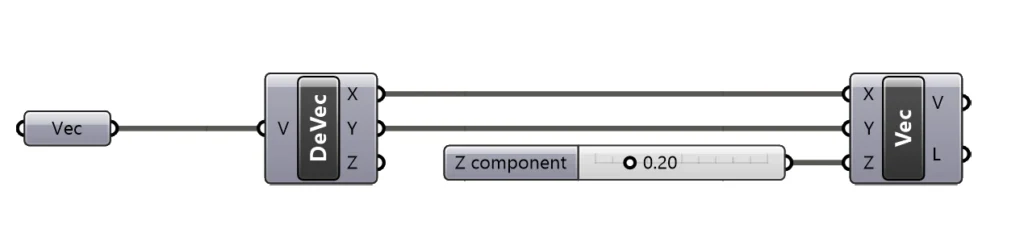
In some rare cases, it might be useful to construct a vector manually, using all three X,Y, and Z coordinates. To do so you can use the Vector XYZ component.
It can be handy when we want to modify a single coordinate value of an existing vector, when used in combination with the Deconstruct Vector component, as shown below where we are taking an existing vector and just changing one coordinate.
Vector perpendicular to a Surface in Grasshopper
Whenever we are dealing with surfaces in Grasshopper we are going to reach a point where we want to extrude a surface along its normal direction. If the surface is not aligned to any of the coordinates system axis, constructing a vector ourselves that does the job can be tricky.
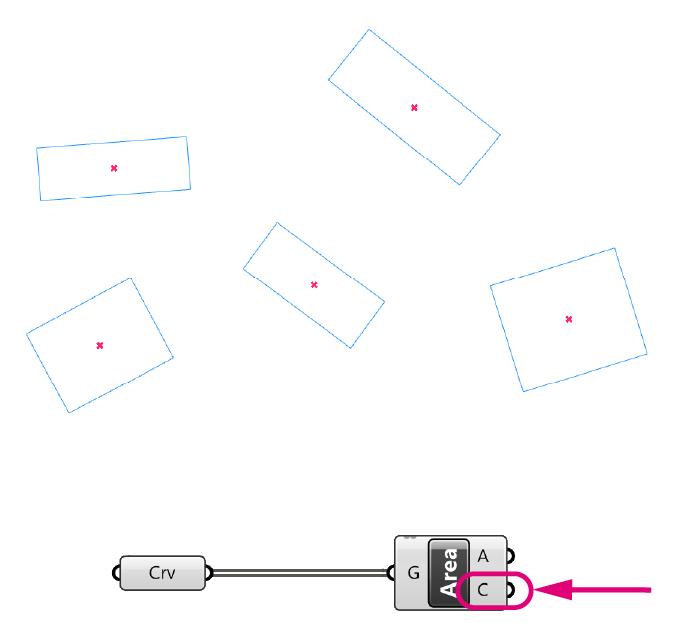
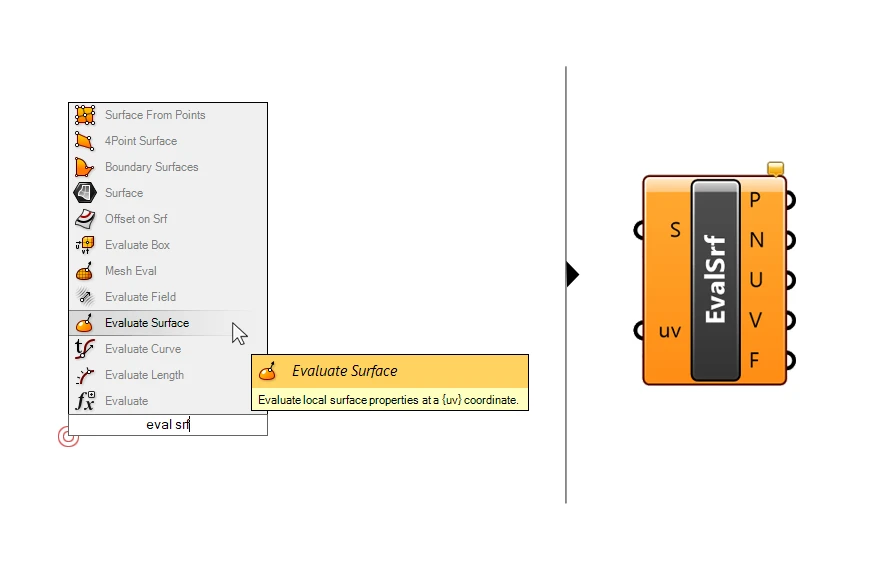
In those cases we can extract the vector perpendicular to the surface from the surface itself. To do so, we need to evaluate a point on the surface, using the Evaluate Srf component.
We will use this component to get the properties of the surface at a specific point on the surface. Among those properties is the surface normal.
Add the component to the canvas by double-clicking and typing Eval Srf into the search bar, and hitting enter.
The component has two inputs: the first input (S) is the surface to evaluate. The second input is the UV coordinate to evaluate. If we just want to evaluate a single point on the surface, a quick and intuitive way to do it is to add a MD Slider to the canvas.
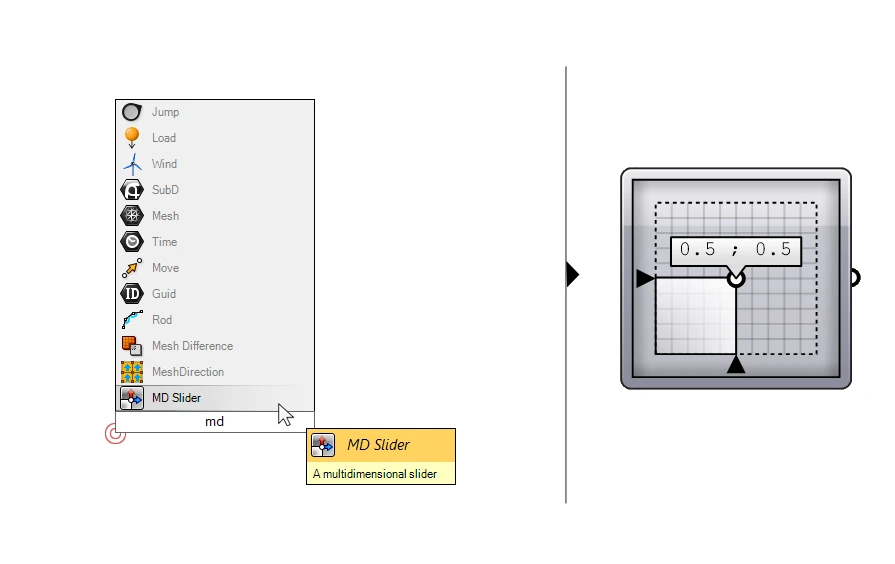
MD stands for multi-dimensional. It’ the 2-dimensional equivalent of the number slider, and allows us to generate a number pairing (which a UV value is) by sliding the point in the widget.
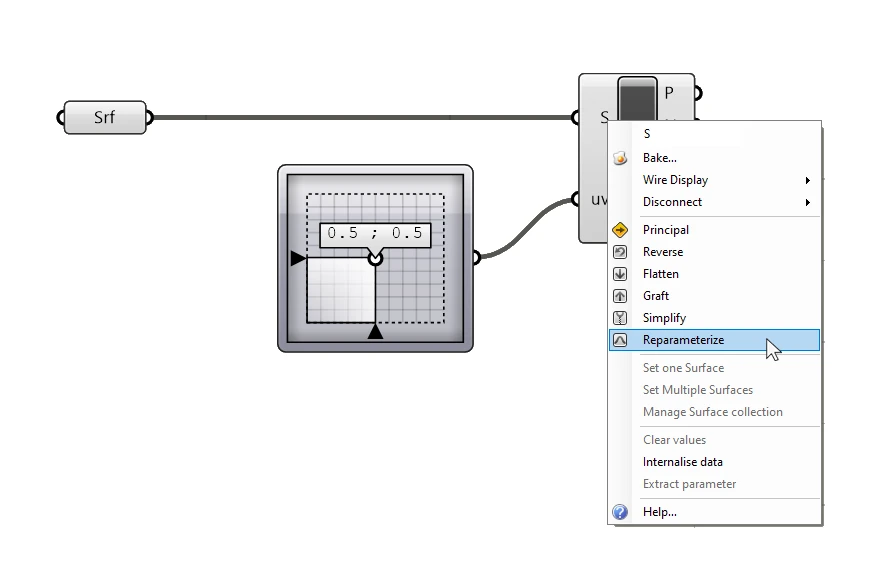
Make sure to reparametrize the surface input, so that the 0 to 1 UV domain of the MD Slider matches the surfaces’.
The output we are interested in is the N output – the surface normal. This is the vector describing the direction perpendicular to the surface at the evaluated point.
This surface normal will always be as a unit vector, which means it has a length of 1. To specify a custom distance, we need an additional component:
Defining the length of a vector
For the X,Y,Z Unit vectors, we were able to define the length of the vector with a simple numerical input. In this case we already have the vector as an output, and we want to modify the length after the fact.
To do this we need an additional component named Amplitude. Add it to the canvas by double-clicking on an empty spot on the Grasshopper canvas, typing its name, and hitting Enter.
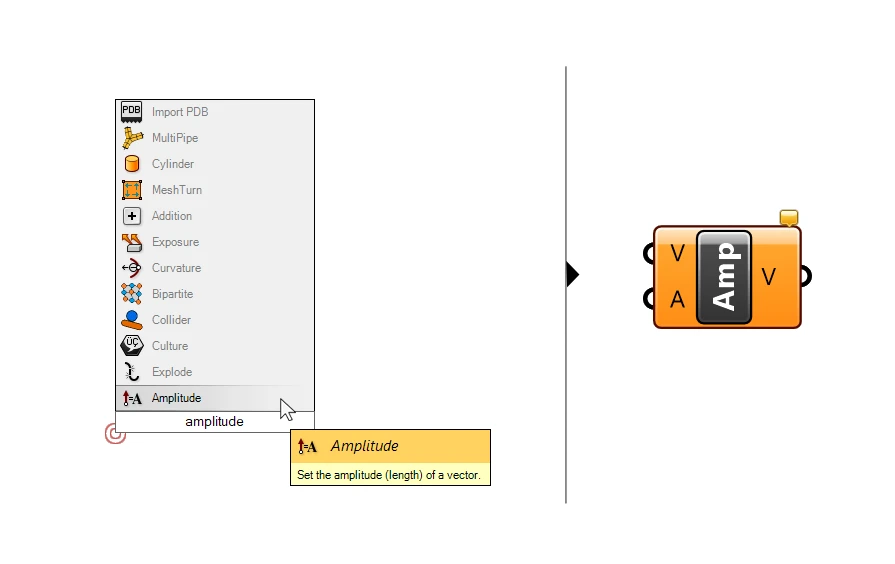
The component is quite straight-forward: we get two inputs: the first input (V) is the vector we want to define the length of, and the second input (A) is the length we want to give it. In this case A stands for Amplitude. But it is in fact simply the length of the vector.
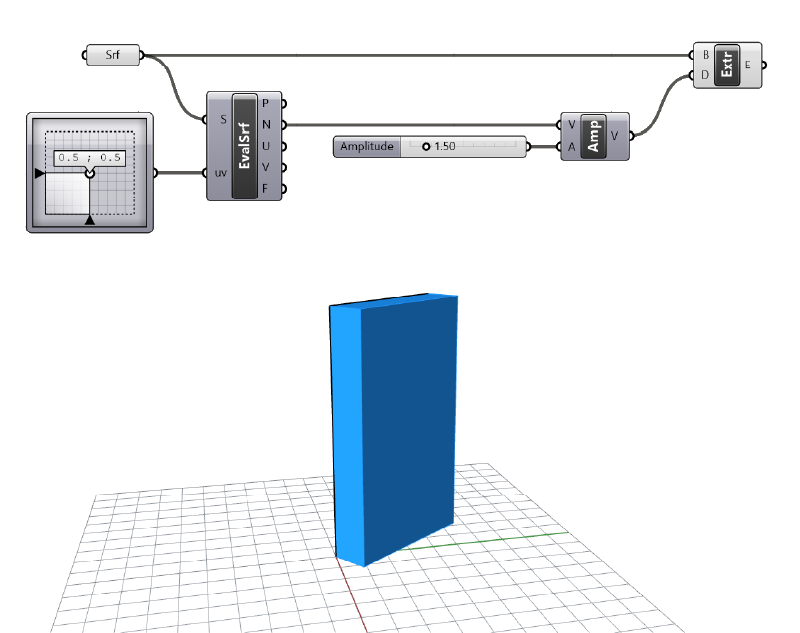
The Amplitude component is essential when it comes to handling and controlling vectors in Grasshopper.
Below the Amplitude component is used to specify the extrusion distance of a surface:
Extracting Vectors from curve tangents
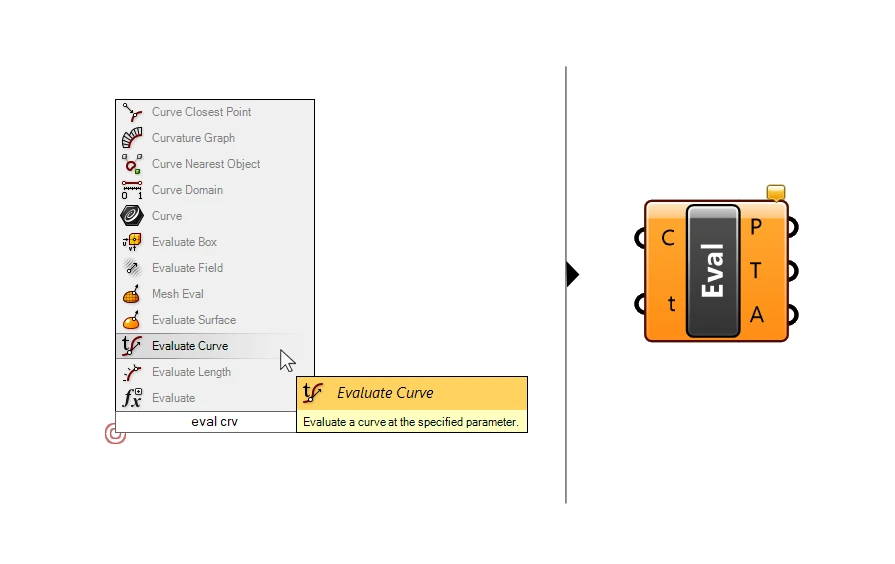
When working with curves we sometimes want to extrude or create elements that are perpendicular to a curve. To extract the vectors in question, we need to evaluate the curve at specific points with the Evaluate Curve component.
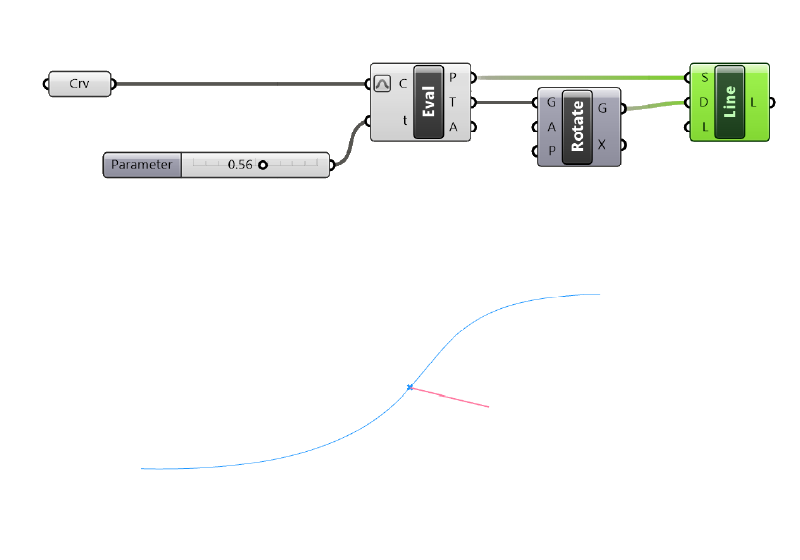
We plug the curve into the first input, and a number slider with a value range between 0.00 and 1.00 to the t input (which stands for Curve Parameter). Make sure the reparametrize the curve by right-clicking on the Curve input and toggling ‘Reparametrize’.

The second output T represents the tangent vector at the chosen point of the curve. To get a vector that’s perpendicular to the curve, all we need to do is rotate the resulting tangent vector 90 degrees.
To do so, add a Rotate component and connect the tangent the the first input.
Tip: We don’t need to specify a rotation point, we can leave the default rotation point of 0,0,0 (the origin) because all vectors start at the origin.
I added a SDL Line component (the inputs match the name: Start point, Direction, Length) to visualize the resulting line.
What to use vectors for
Now that we know what vectors are, let’s talk about what we can use them for and why they are so essential when using Grasshopper.
There are two main use cases for vectors:
- Moving objects
- Extruding objects
- Defining the direction of objects
Moving objects with vectors
As mentioned before, the main use of using vectors is to move objects in 3D space. This movement is also referred to as ‘translation’. Our vector will be called ‘translation vector’ in this case.
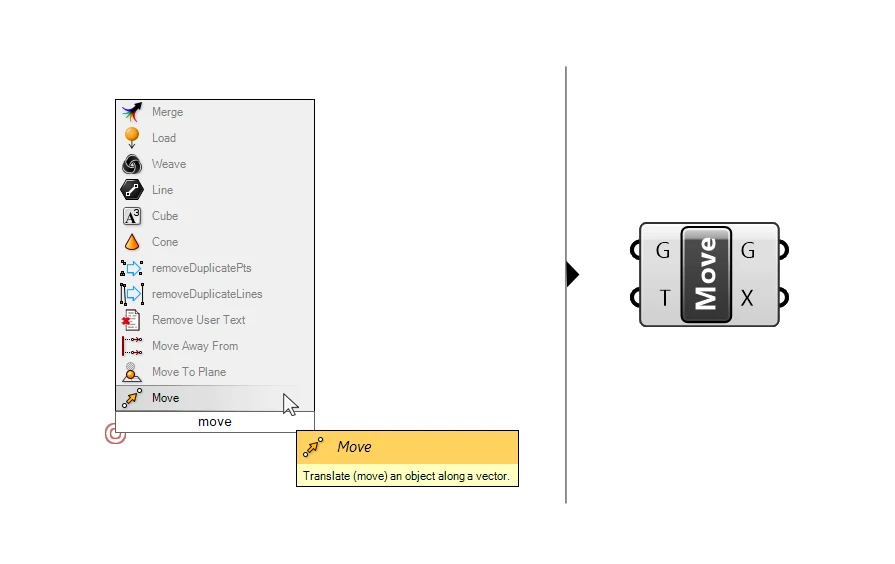
To move objects in Grasshopper, we use the ‘Move’ component. The component has two inputs:
The geometry to move (G) and the translation vector (T).
All we need to do is to connect a vector created with the any of the methods above to the T input, and our objects will be moved!
Extruding objects with vectors
Extruding objects, be it a curve or a surface, also requires a vector. In this case the vector is referred to as ‘Extrusion direction’.
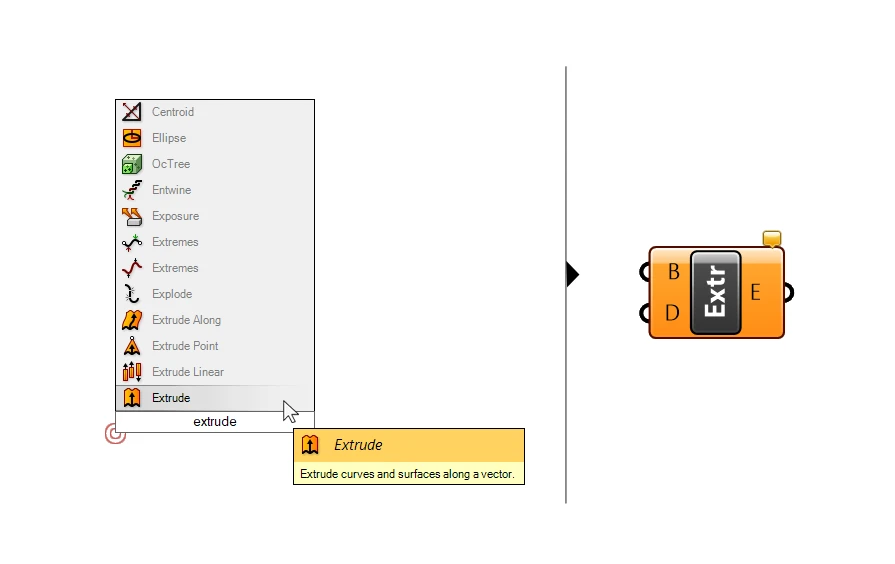
The extrude component has two inputs, akin to the move component, with very similar inputs:
The geometry to extrude (B), and the vector to extrude it along (D, the extrusion direction).
In a way a linear extrusion is the movement of a base geometry, only that the space between the original and the moved object becomes a geometry on its own.
Defining the direction of a line
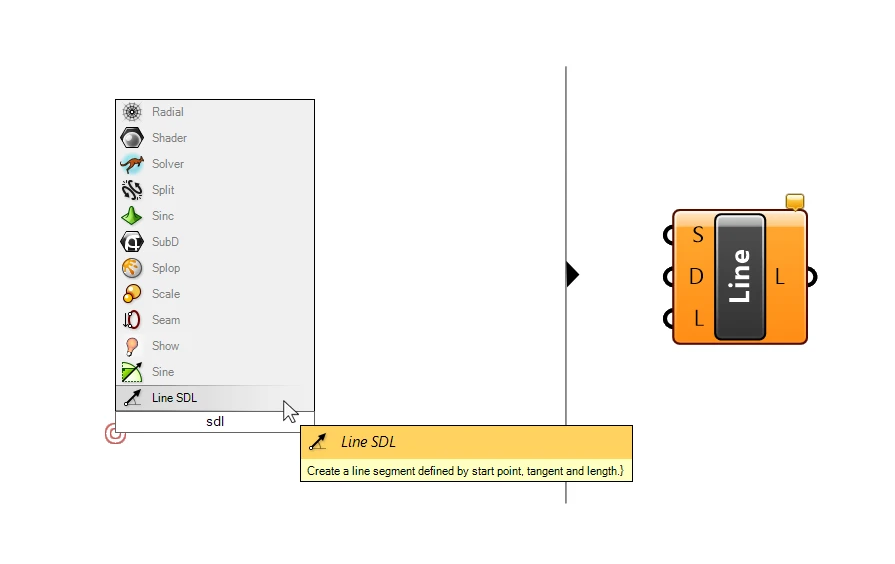
We can use vectors to define the direction of a line when using the ‘Line SDL‘ component. This component allows us to create a line by providing a start point (S), a direction (D), and a length (L).
The Line SDL component is useful for cases where want to create actual lines from vectors we generated, to be able to extrude them or process them further as curves.
Since vectors are not visible, the Line SDL component is also a way to check whether the vectors are behaving as we intend them to, by visualizing them.
Vector Preview in Grasshopper
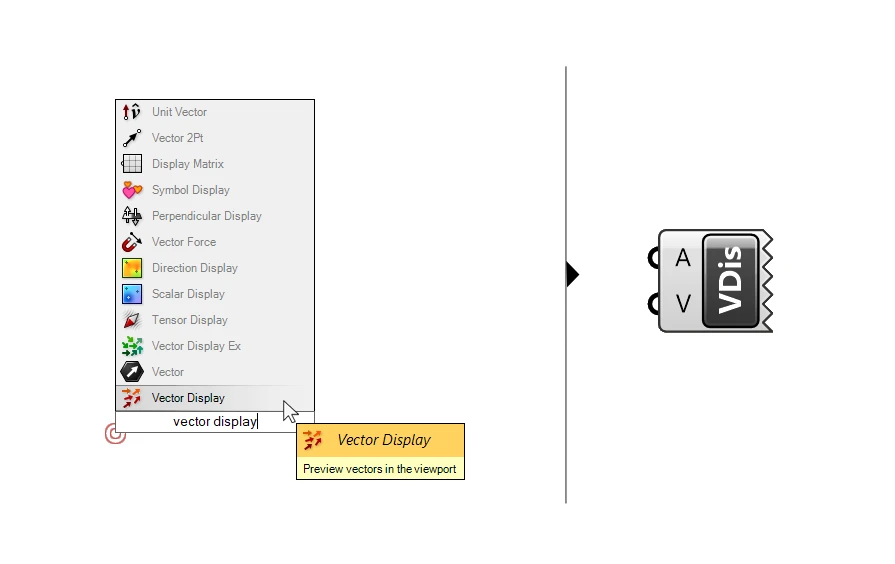
When dealing with vectors, it can be helpful to visualize the vectors we are working with, especially when it comes to their direction. There is a component that helps us to display vectors in Grasshopper: it’s called Vector Display.
Type Vector Display into the canvas search bar to add it to your script.
Since the startpoint of vectors is the origin of the Rhino 3D coordinate system, visualizing the vectors there would be of little use in most cases. That’s why the Vector Display component allows us to define where the vector should be displayed, by defining a custom starting location of the vector display – a so-called anchor.
That’s what the first input A is for: the anchor points of the vectors to be displayed in the form of Point locations.
The second input V is the actual vectors to be displayed.
See a simple example of the vector display in action below.
The Vector Display component is visualizing the tangent vectors of a curve at its division points after having been rotated 90 degrees. This setup would allow us to extrude elements perpendicular to the curve.

Final thoughts
Vectors are an essential building block of anything we create in Grasshopper. I hope this guide could shed some light on how to use vectors in Grasshopper.
If you an architect and you want to learn more about Grasshopper, check out our online course Grasshopper Pro – Grasshopper for Rhino training for architecture professionals
In it you’ll learn how to master Grasshopper for Rhino to create high-end architectural designs and boost your productivity. No prior experience required. Made specifically for architectural designers.
See you next time!