Grasshopper provides several ways of displaying text in the Rhino viewport, but the main two components are the Text Tag and Text Tag 3D components. In this post we’ll do a deep-dive on how they work in an easy-to-follow guide.
Let’s dive in!
How to Display Text with the Text Tag Component
The quickest way to display a parametric tag in the preview is to use the Text Tag component.
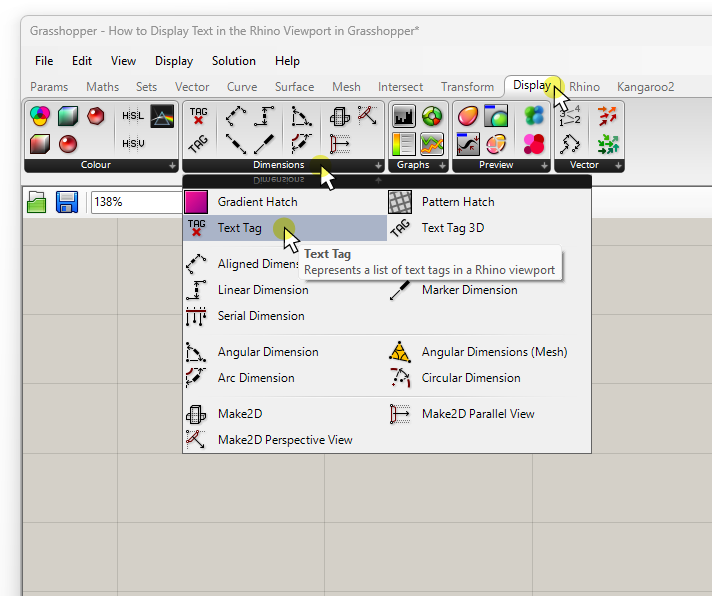
You can find the Tag component in the ‘Display‘ component tab, in the ‘Dimensions‘ group.
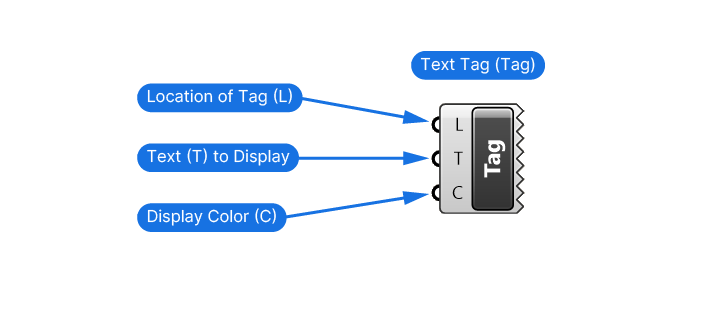
The inputs are:
- Location (L) specifies the Tag’s position, denoted by a list of Points where the tag should appear.
- Text (T) to Display. This can be a number, or any type of text.
- Display Color (C)
If this is the first time seeing a display component in Grasshopper, you may be surprised to see that instead of an output, we get a jagged edge on the right!
Don’t worry, the component isn’t ‘broken’, it’s simply Grasshopper’s way of letting us know that we can’t further process the output. The output is ‘just’ the display. Parametrically speaking, a dead-end.
Application Example
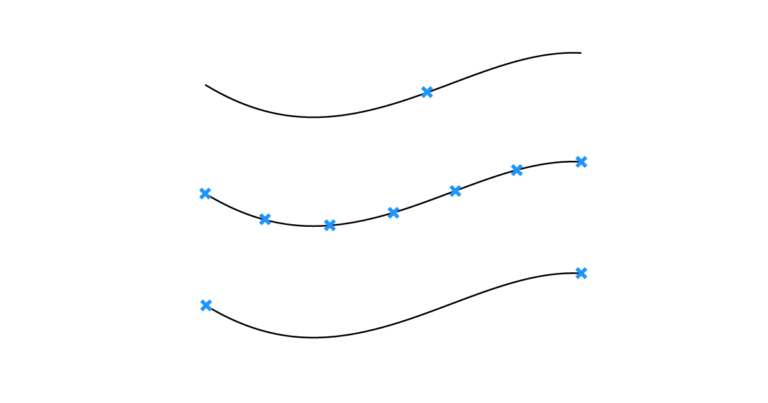
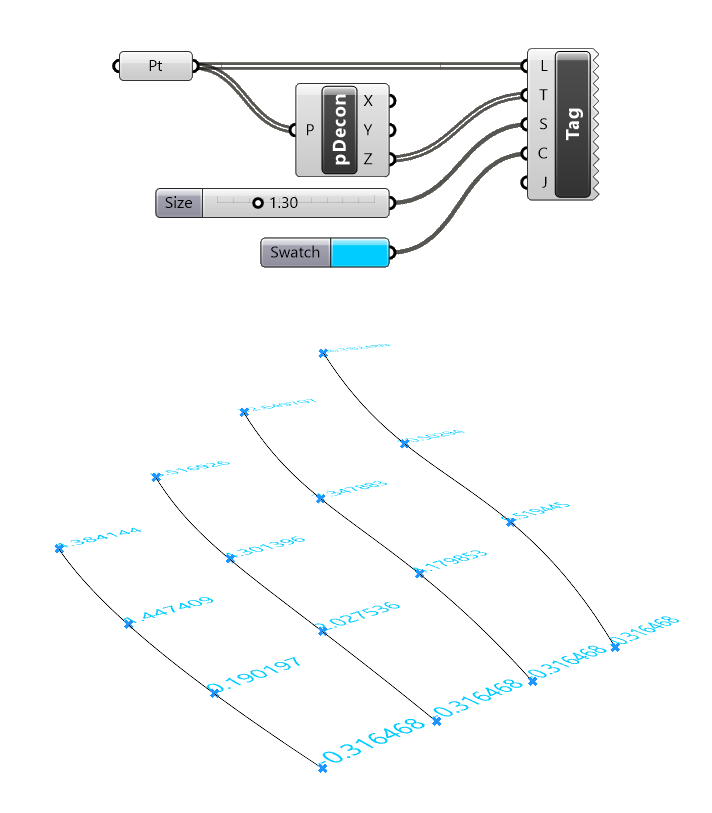
Now let’s see it in action. Here is my simple use case: I want to display points’ heights with a text tag.
For simplicity I referenced the points to a Point container component. These points will be the Location (L) input.
To extract the height or z-coordinate of each point, let’s use the Deconstruct (pDecon) component to deconstruct the point into its constituent x,y, and z coordinates, each shown in a dedicated output. In doing so we get an individual tag for each individual point.
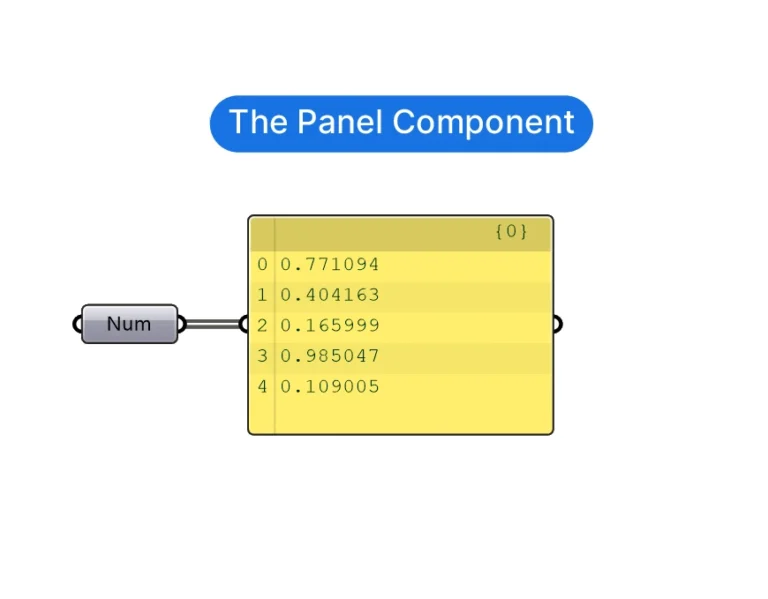
Keep in mind that we have complete freedom when it comes to the Text (T) to display. We could for example write text into a Panel and display that text at each point location.
To control the color, we can use a Color Swatch. You can find it in the ‘Params‘ component tab, under ‘Inputs‘. To change the color, simply click onto the colored area and use the color picker.
This is the result:

You’ll notice that there is no Tag Size input! The size of the Text Tag component is special in that it is:
- always oriented towards the screen (i,e, always readable)
- the text is displayed with a fixed size that doesn’t change when we scroll in or out.
How to Adjust the Text Tag Size
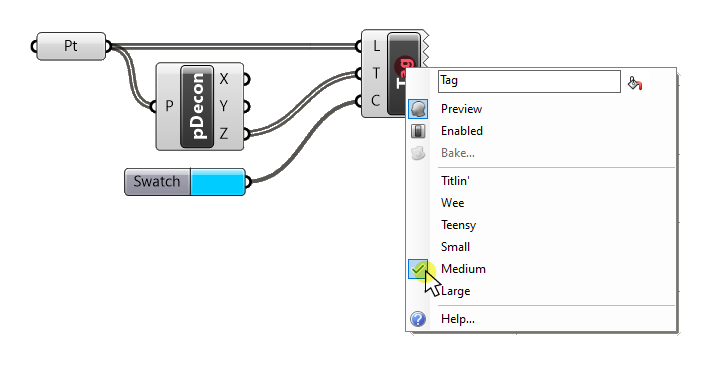
While there is no input, we can still control the size to some extent, by right-clicking on the Text Tag component and choosing from the listed sizes, as shown below:
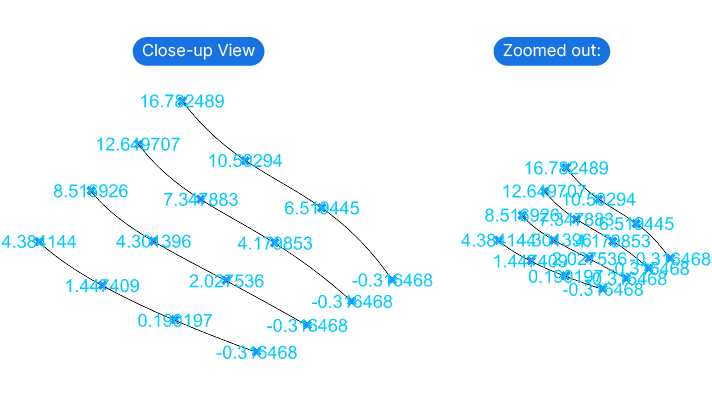
The Text Tag Grasshopper component can be useful for ‘quick-and-dirty’ text display, but it’s not really practical due to it’s fixed size. Once you zoom out, you’ll end up with a cloud of overlayed text that’s of little use as shown on the right:
Wouldn’t it be nice if we could control both the size and the orientation of the text tag?
Enter: Text Tag 3D!
More Control: Text Tag 3D in Grasshopper
The Text Tag 3D component is the text display component in Grasshopper that comes closest to Rhino’s native text. Besides location, size and color, we can also control the orientation.
Let’s take a closer look.
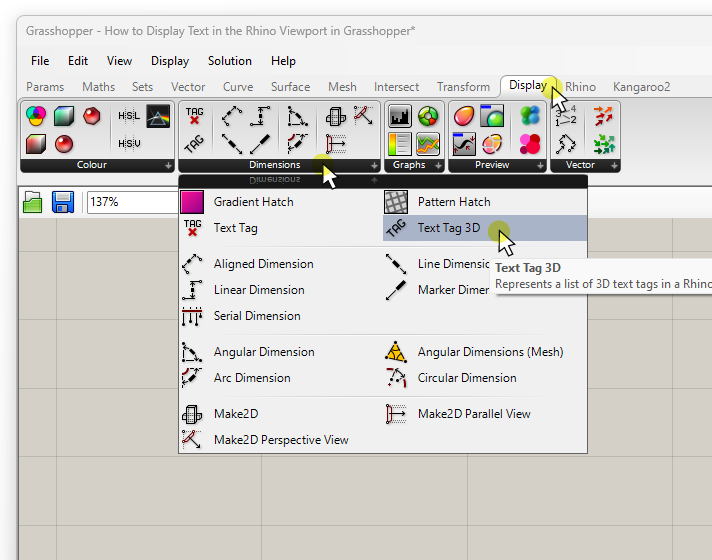
You’ll find the Text Tag 3D component right next to the ‘normal’ Text Tag component: In the ‘Display‘ component tab, grouped in ‘Dimensions‘.
Text Tag 3D – Inputs Explained
The additional capabilities of Text Tag 3D come with additional input options. Let’s go through them:
The Location (L) input is similar to the Point List and Text Tag component, but with a twist. This input asks not just for the location (as in Points), but for the orientation as well.
The orientation relates to the plane the text will be oriented in. The Text Tag 3D component allows to define whether the text should be vertical or horizontal in relation to the World Plane, as well as whether it has any rotation.
The required input is a Plane. I’ll show you how to generate the planes in the example below. For now it’s good to know that you can also simply connect Points: in that case Grasshopper will use the Point to define the location and use the World XY Plane orientation.
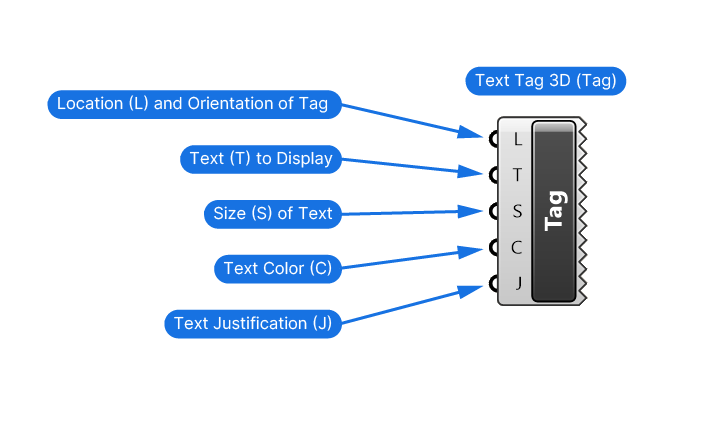
The Text (T) to display, the Size (S) and the Text Color (C) are straightforward. The Text can be a number or text, the size is controlled with a Number Slider, and the Color with a Color Swatch component.
The last input ‘Text Justification‘ define the text’s position in relation to the text location. We can choose between any combination of Top to Bottom and Left to Right justification, more on that in the upcoming example.
Let’s learn how to use it in a script.
Application Example
Let’s use the same example as before: We are connecting the Points to Location (L) input, and we’re using the Points’ z-coordinate value as the Text (T) to display.
A Number Slider controls the Text Size (S) and a Color Swatch the Text Color (C).
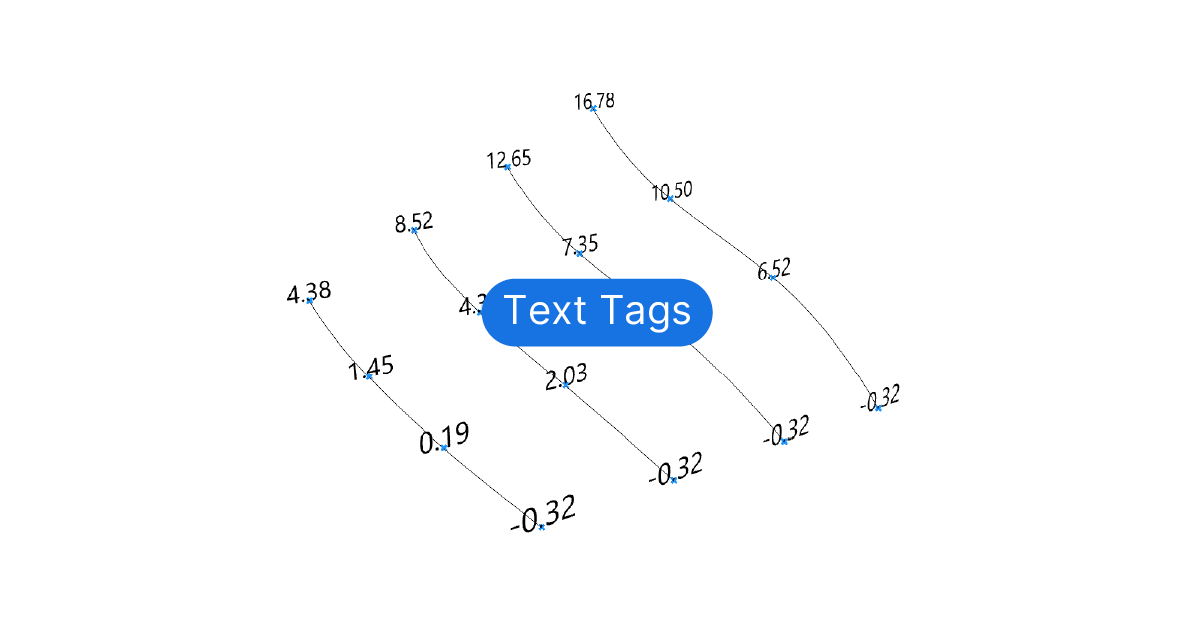
Here’s the result:
Now notice how the Text is not oriented to the screen, but how it has an actual 3D orientation in the viewport.
Since we just connected points in the Location (L) input (and not an actual plane), Grasshopper uses the default horizontal plane for the orientation.
Let’s learn how to adjust the orientation!
How to Orient Text Tags in Grasshopper
We’ll need a Construction Plane to control the orientation. There are countless ways to generate Planes in Grasshopper, but the most useful methods when it relates to Text Display is to use Grasshopper’s preset Plane components.
These components come with ‘ready-made’ planes that we can just use straight away.
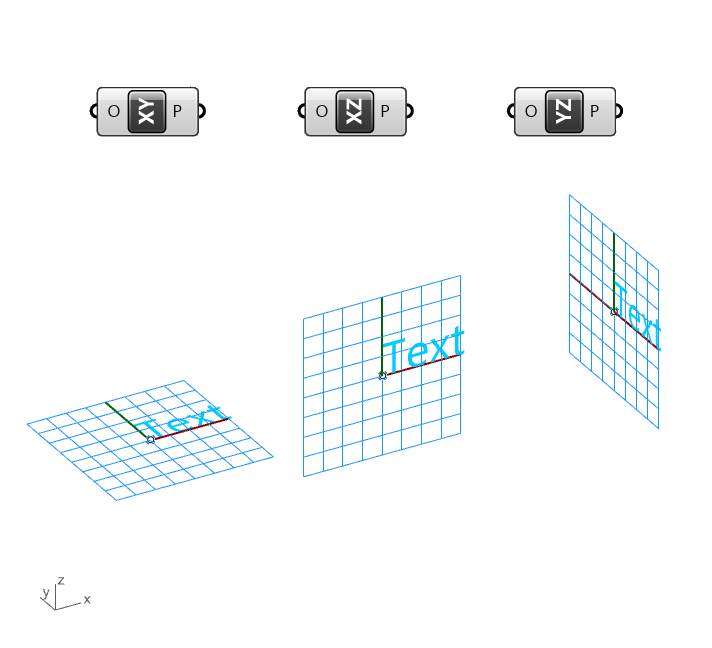
There are three predefined construction plane components in Grasshopper: the XY-Plane, XZ-Plane, and YZ-Plane.
Describing a plane in 3D requires two vectors, and the letters in the component names indicate which two world axes define the plane.
You can find these predefined plane components in the ‘Vector‘ component tab, under ‘Plane‘.
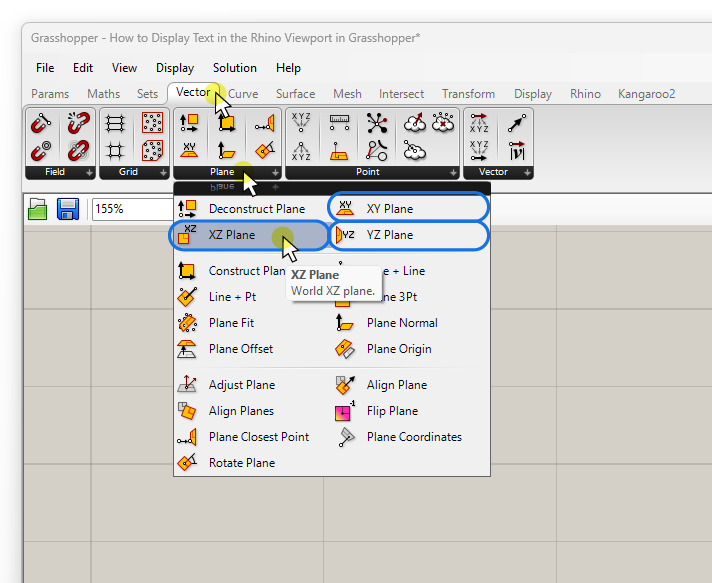
These components have a single input: the Origin (O). While the components define the plane’s orientation, the can use the Origin (O) input to define where the planes are to be located. And the required input data type is points.
So let’s use this new-found knowledge to orient the Text Tags vertically!
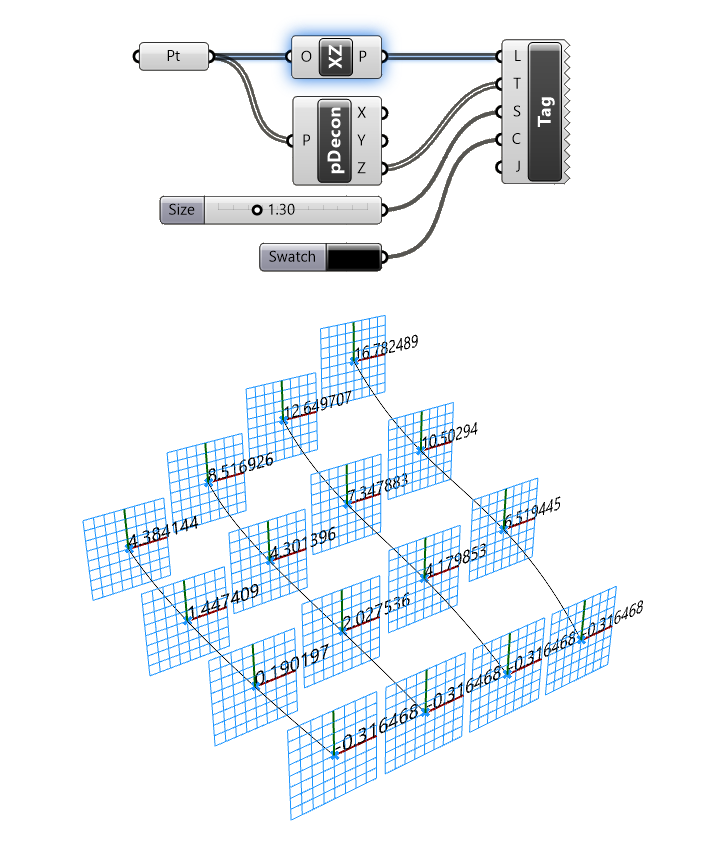
All we have to do is insert a XZ-Plane component between the Points and the Text Tag 3D’s Location (L) input. In doing so we are generating a XZ-Plane at every input points’ location.
The text will then be oriented onto that plane as shown below.
Of course you’ll want to turn off the preview of the XZ-Plane component, since we are only interested in seeing the text. You can do so quickly by selecting the XZ-Plane component and hitting CTRL + Q.
How to Justify Text in the Text Tag 3D component
Now let’s talk about the Justification (J) input. Depending on the length of the text to display, we may want to define the justification of the text in relation to the tag location. The easiest way is to right-click on the Justification (J) input and choose your preferred justification mode. Like this:
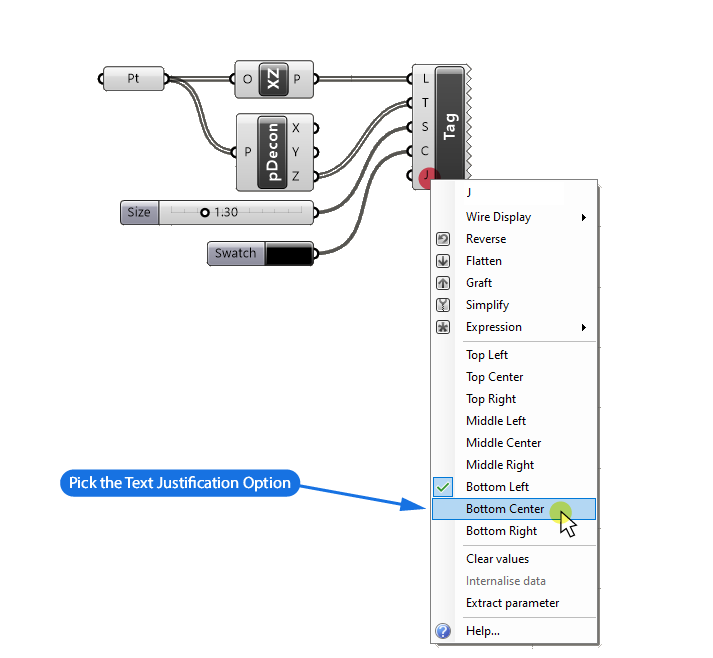
When it comes to text justification, I recommend Bottom Center, as it nicely centers the text around the point and keeps it readable by placing it above the point.
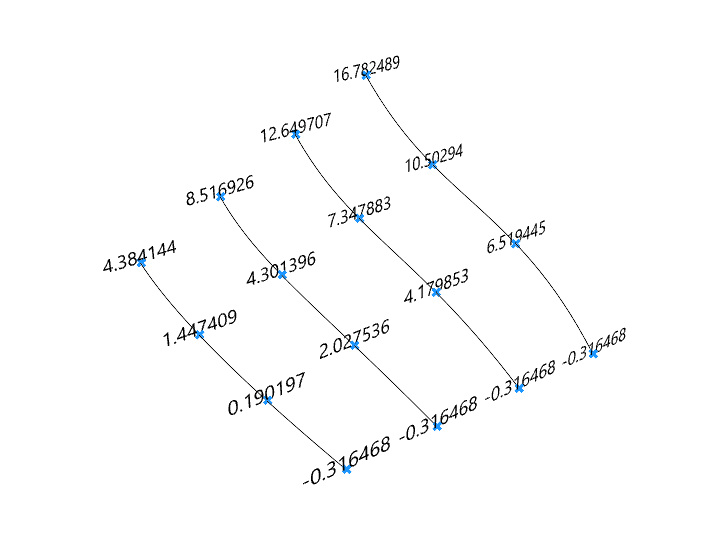
Of course you can keep tweaking the Tag’s display, for example by formatting the number to fewer decimal numbers, or by moving the text higher above the points for readability. It really comes down to your preference and case specific requirement.
Now you may be wondering, how can you bake this preview text into the actual Rhino file?
How to Bake Text Tags in Grasshopper
You’ve got the text nicely previewed just as you wanted it, and you now want to bake it to the Rhino file.
But you run into a problem…
Unlike most other Grasshopper components, where you can just right-click and hit the ‘Bake’ button, Display components have this option disabled.
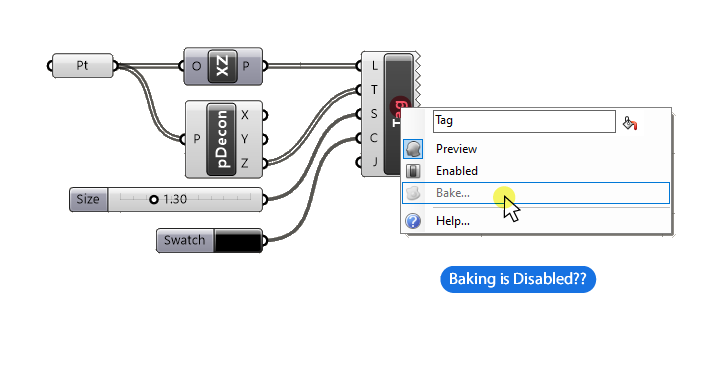
The Bake button is grayed out. Now what?
Text Tag components aren’t really meant to be baked like common geometry. Still, there is a workaround.
Simply select the Text Tag or Text Tag 3D component you want to bake, and hit Insert on your keyboard. ‘Insert’ is the universal shortcut in Grasshopper to bake any selected component’s contents. And it works for Tags too!
Keep in mind that the this ‘quick-bake’ option will bake directly into the document’s active layer (the layer with the checkmark).
Once baked, the preview will turn into normal Rhino Text geometry. At times, the baked text has a different size compared to the Grasshopper Preview, which we can easily adjust in the Text Properties Panel. Change the Model Space Scale to 1 and you’ll be good to go.
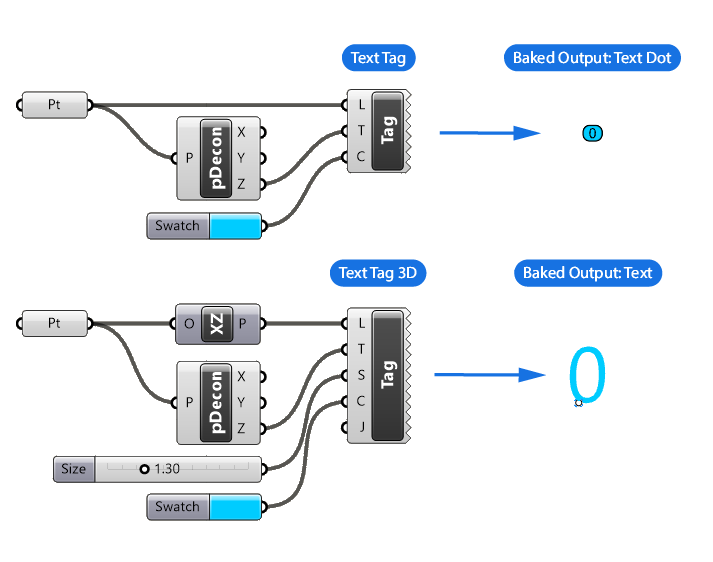
The bake output of the Text Tag and Text Tag 3D components is different. Text Tag 3D contents will turn into normal Rhino Text, while the Text Tag‘s output will result in a Text Dot.
Concluding thoughts – Tags in Grasshopper
Whether you need to quickly display a certain numerical property of a design or get ready to documentation, the Text Tag components in Grasshopper offer everything you need to leverage parametric annotation.
If you are just starting with Grasshopper the Text Tag component is your friend – it’s easy to use and gets the job done. If you want more control, the Text Tag 3D is your weapon of choice!
Happy designing!