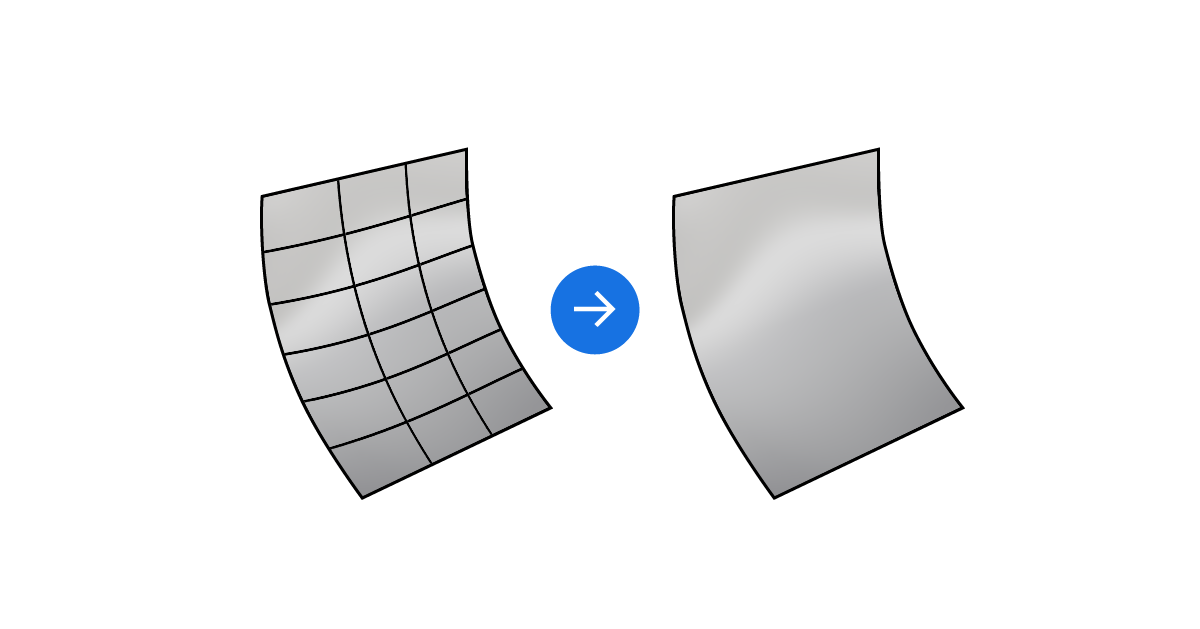
Isocurves can be incredibly useful to visualize and understand the curvature of a surface, but in many cases they just clutters up the viewport with additional curves nobody asked for! In Rhino, we can turn off the Isocurves of individual objects or disable isocurves altogether with a custom Display Mode.
Turning Off Isocurves For a Specific Object
Isocurves help us understand the shape of curved surfaces in Rhino. While shading alone can help suggest a surface’s curvature, the isocurves further help by drawing curves in the U and V direction of a surface at certain intervals.
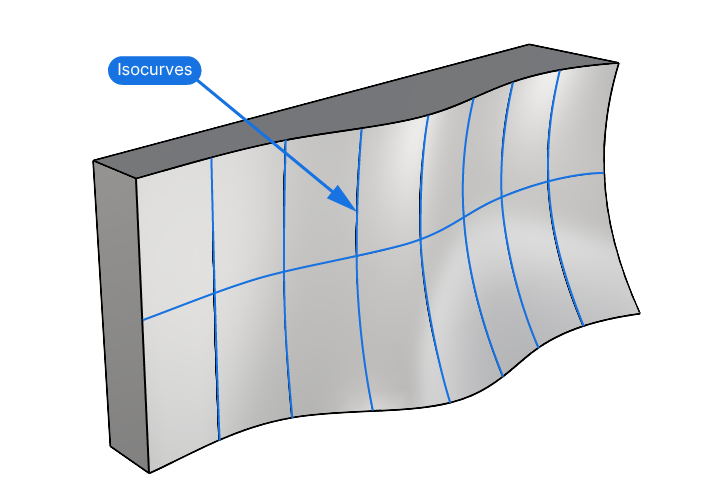
With complex surfaces, these isocurves can become a dense web of lines that distract from the actual 3D geometry.
Here’s how to turn them off:
Select the object you want to turn off the isocurves for and go to the object properties. If the Properties Panel is not open, type “Properties” into the Rhino command line to open it.
At the bottom of the object properties, you’ll see a section called “Isocurve Density“.
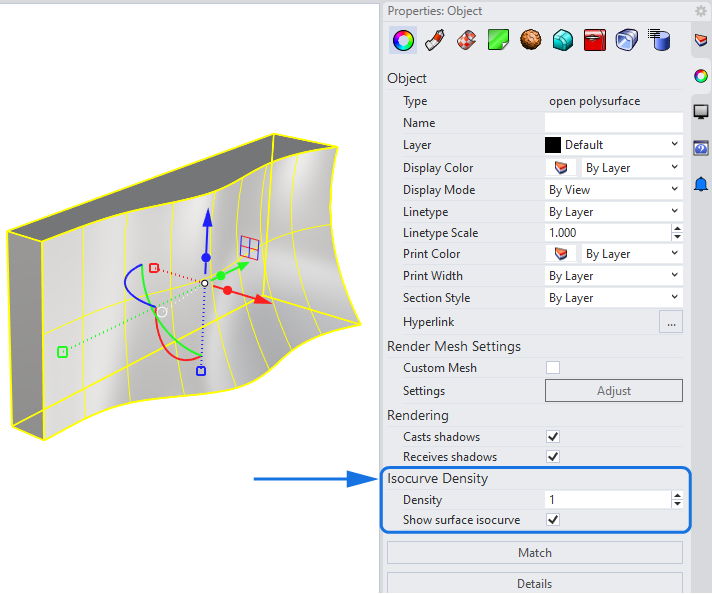
The number (by default “1”) controls the number of isocurves to display for this object. (Yes, you can choose to show even more isocurves!)
Below it, we can disable the isocurve display entirely by unchecking “Show surface isocurve”.
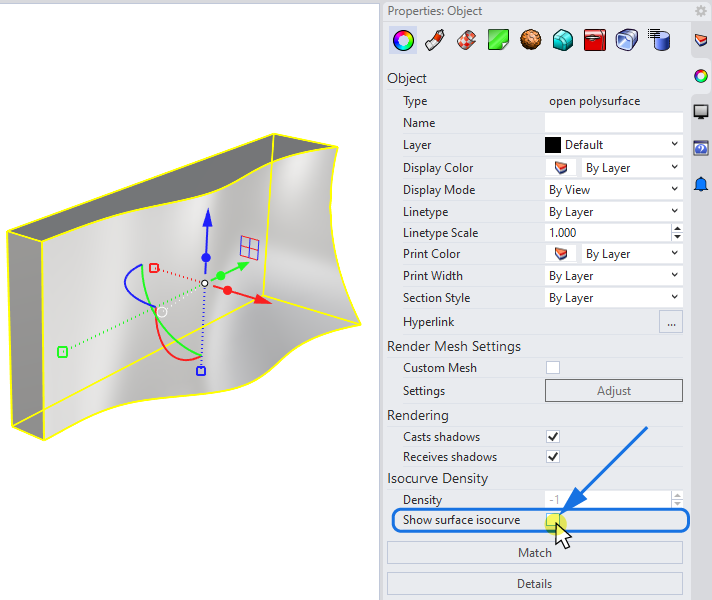
This works great for individual surfaces. However, any new object you create will still have the isocurve display enabled.
If you can’t stand isocurves and you never want to see them again, you can turn off the display of isocurves on the display mode level with a custom display mode:
Turning Off Isocurve Display with a Custom Display Mode
If you want to turn off the isocurves on all the objects visible in the viewport, you can do so by changing the Display Mode settings. The benefit of changing the isocurve display there is that any new surface you create won’t show isocurves.
Here’s how to do it:
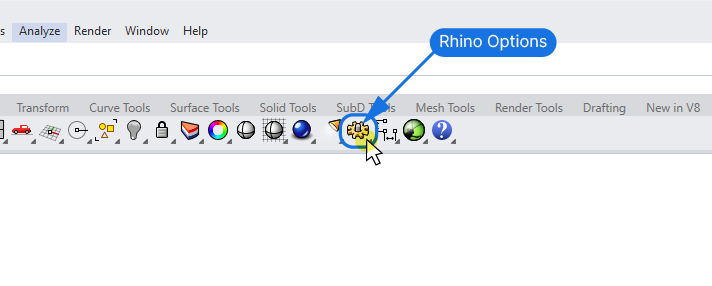
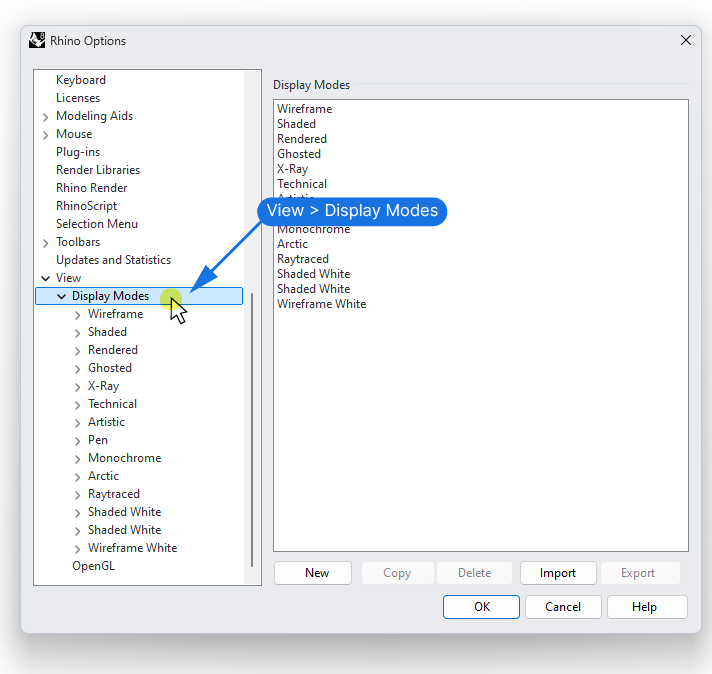
Open the Rhino Options by selecting the gear icon in the Standard toolbar or by typing “Options” into the Rhino command line and hitting Enter.
Browse to the “View” item at the bottom of the options list.
Click on “Display Modes” to show all the display modes available.
Select the Shaded Display Mode and click “Copy” at the bottom of the window to create a copy of the Shaded mode.
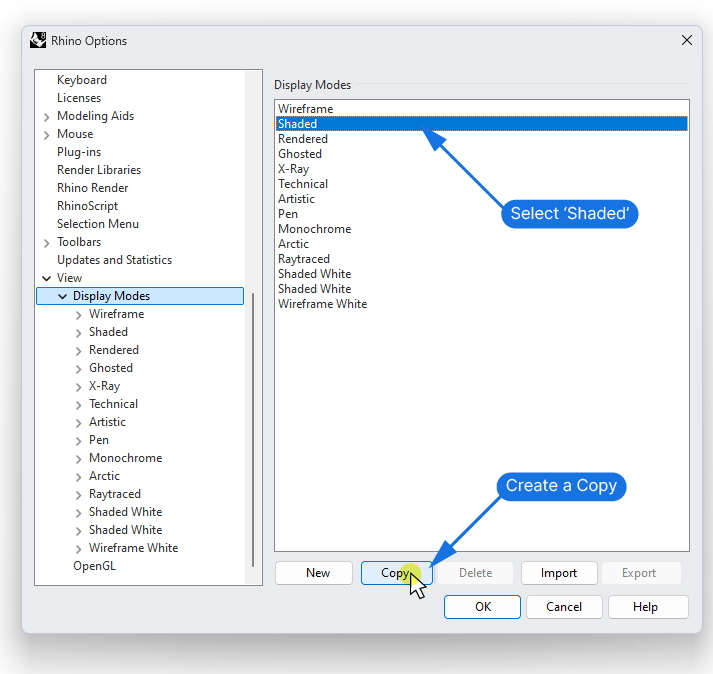
This will add a new submenu in the Display Modes menu and open it.
Start by giving this new, custom display mode a descriptive name, like “Shaded No Isocurves“.
Then scroll down to the “Visibility” section and uncheck “Show isocurve”.
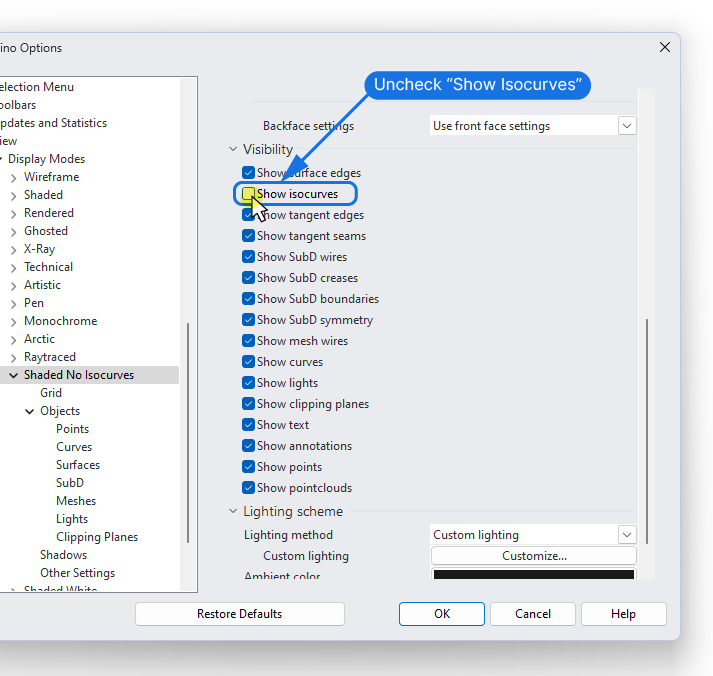
Confirm with OK and close the Rhino Options.
Now change the display mode of the viewport by right-clicking on its title and selecting the new display mode you just created.
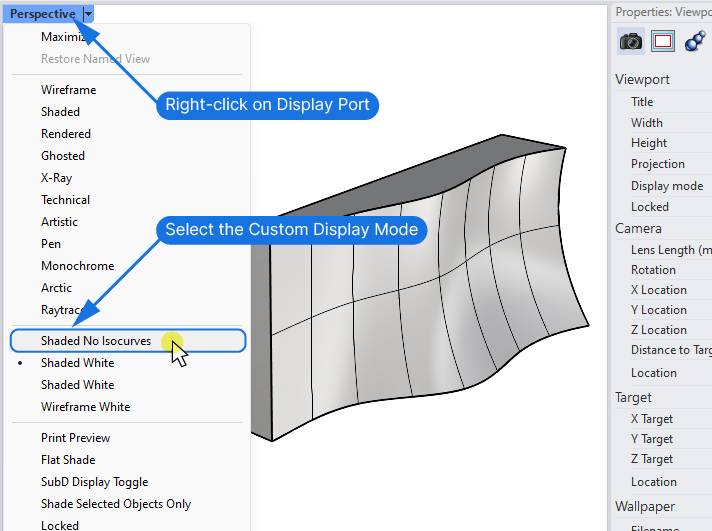
Voilà! Isocurves gone!
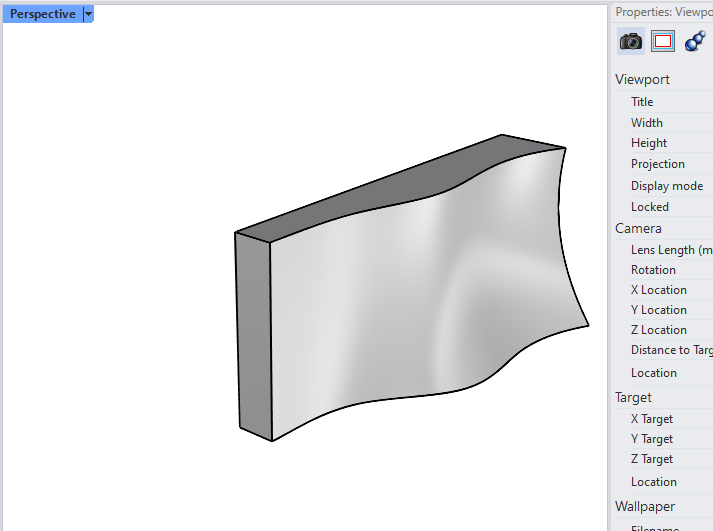
The custom display mode will override any isocurve settings that the objects in the scene may have.
This is a great option if you want to be able to easily switch between isocurve and no-isocurve display modes.
Conclusion
Even though isocurves can be irritating, they do serve a purpose and disabling them entirely may make your modelling experience a bit less intuitive. Whether you just want to turn off the isocurves of a single object in Rhino or all the objects in your scene, you now have the tools to do so!
Happy designing!

