If you’ve used Rhino before, you’ve probably used the “Explode” command to break down a polysurface into its component surfaces. In Grasshopper, a similar function exists but it goes by a different name: “Deconstruct Brep.” In this article, I’ll go through what the Deconstruct Brep component does, why it can be useful, and show you how to use it with an example script.
Adding the Deconstruct Brep Component
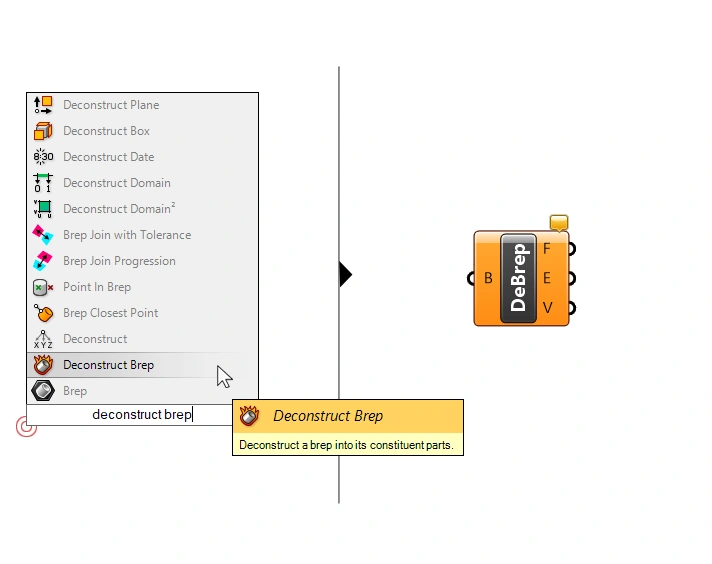
To use the Deconstruct Brep component, start by double-clicking on the Grasshopper canvas and typing “Deconstruct Brep.” You’ll see the component appear in the list—click it to drop it onto the canvas.
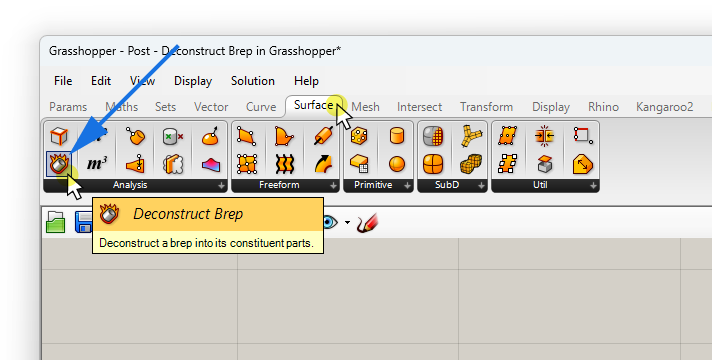
Alternatively, you can find it in the “Surface” tab under the “Analysis” panel.
The Deconstruct Brep component has one input and three main outputs:
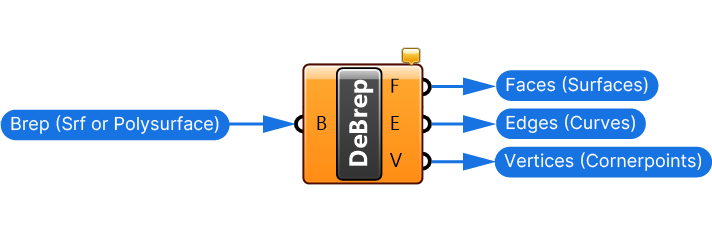
Input:
- Brep (B): The Brep you want to deconstruct. This can be a single surface, an open Brep (polysurface) or a closed Brep.
Outputs:
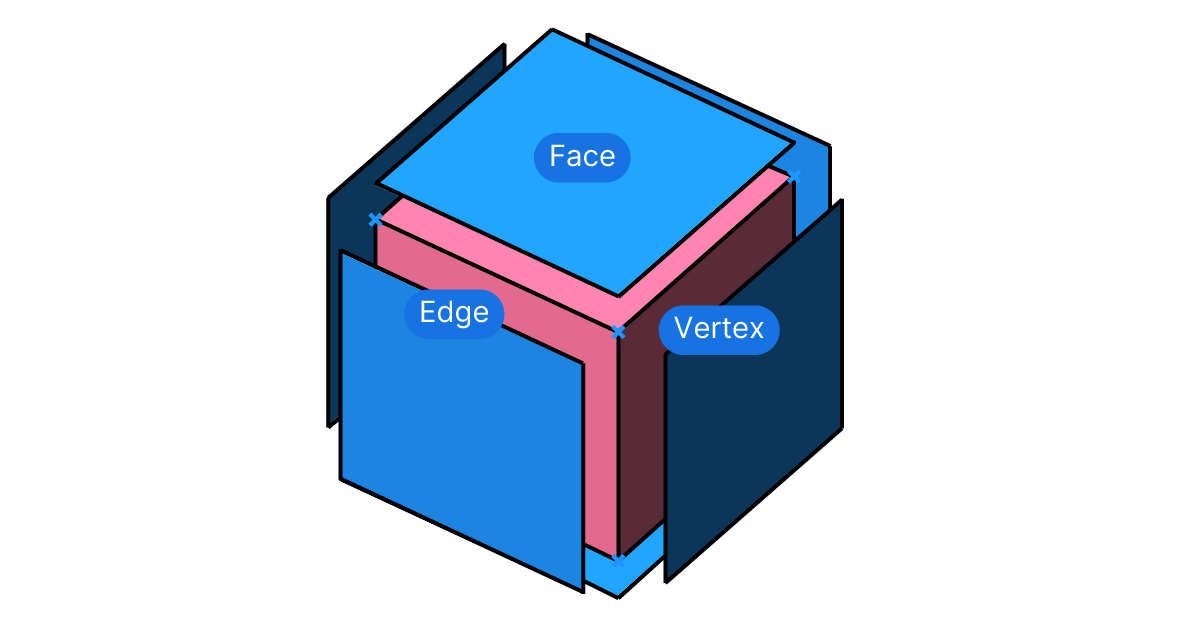
- Faces (F): Outputs the individual surfaces of the Brep (also called “faces”).
- Edges (E): Outputs all the edges of the Brep.
- Vertices (V): Outputs the vertices where edges meet. In other words the corner points of the Brep
When to Use Deconstruct Brep?
In Grasshopper, the main geometry types all have specific properties that we can access. For example, we can get the volume of a closed polysurface (brep), the area of a surface, or a point at a curve parameter of a curve.
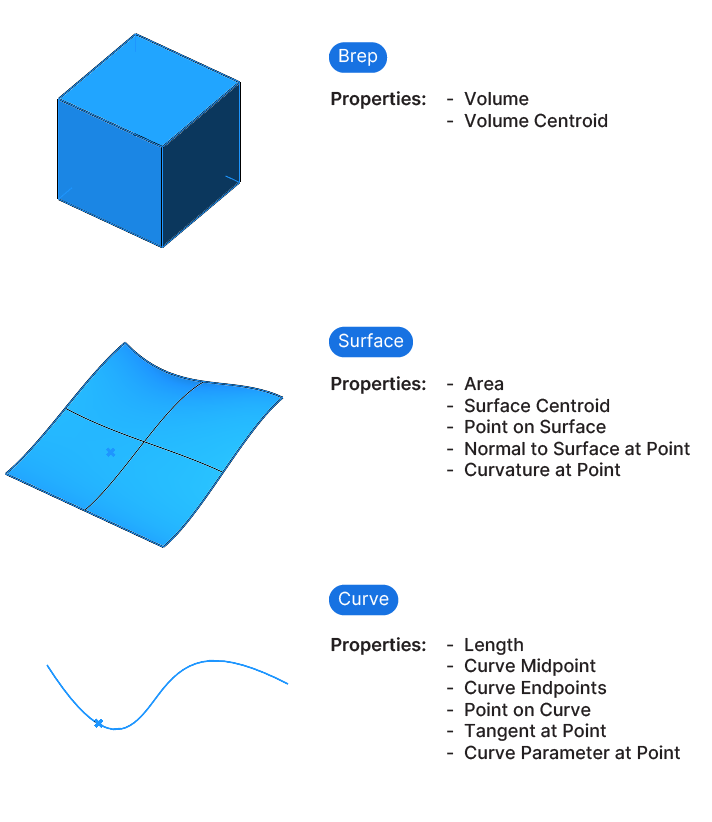
However, when working with higher-level geometry, such as a polysurface, we can’t directly access the properties of its subelements. In these cases, we need to extract the subelements first and then operate on them individually—that’s what the Deconstruct Brep component is for.
As the illustration above shows, the properties we can extract from a closed polysurface are comparably few.
Practical Application Example: Extracting the Top Surface of a Box
Let’s say we have a box geometry in Rhino, and we want to extract its top surface. For simplicity’s sake, I referenced a box from Rhino. Here’s how to get the top surface:
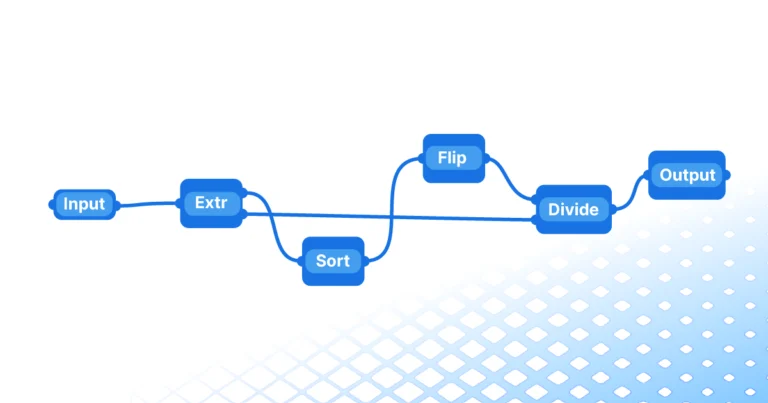
Step 1: Deconstruct the Brep: Start by referencing the box from Rhino and connecting it to the Deconstruct Brep component.
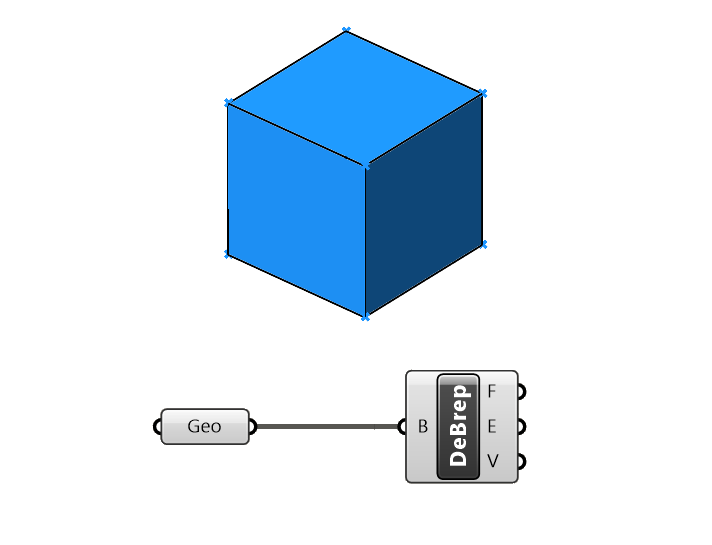
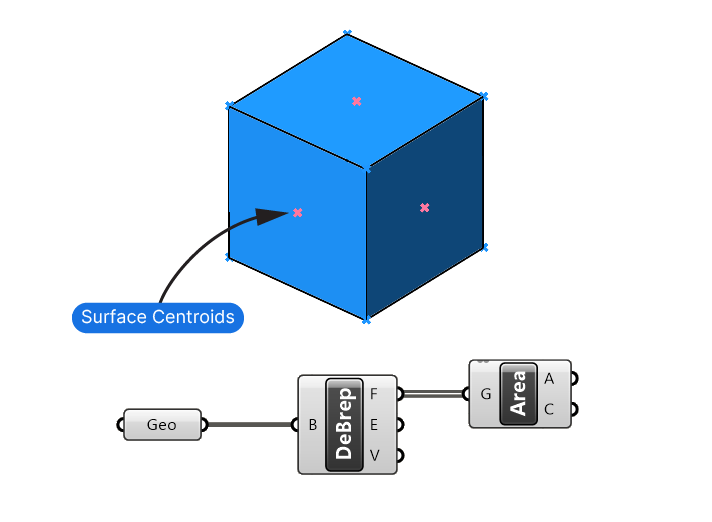
Step 2: Get the Surface Centroids: The Deconstruct Brep component will give you all the surfaces the box is made of through the Faces (F) output. However, they are in no particular order, so we need to sort them to determine which one is the top surface.
To sort the surfaces by height, we need a proxy value for each surface. We can use the centroid of each surface as that proxy. Connect the “Area” component to the Faces (F) output of the Deconstruct Brep component. The Area component will not only provide the area but also the Centroid (C) (midpoint) of each surface.
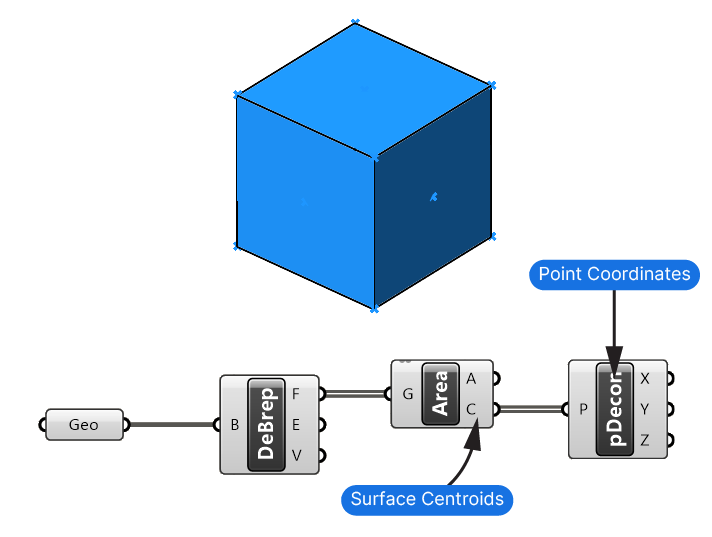
Step 3: Extract the Centroids’ Z Value: Since we want to find the top surface, we need to sort the centroids along the z-axis. To get the z-values, we can use the “Deconstruct (pDecon)” component to extract the X, Y, and Z coordinates of each centroid. (Yes, this is a different deconstruct component!)
Step 4: Sort and Pick the Top Surface: Use the “Sort” component to sort the Z values (the vertical location) and sort the extracted faces in parallel. Finally use the List Item component to pick the first item in the sorted list. Since the Sort component will sort from the smallest value to the largest, we need to right-click on the List (L) input and select ‘Reverse‘.
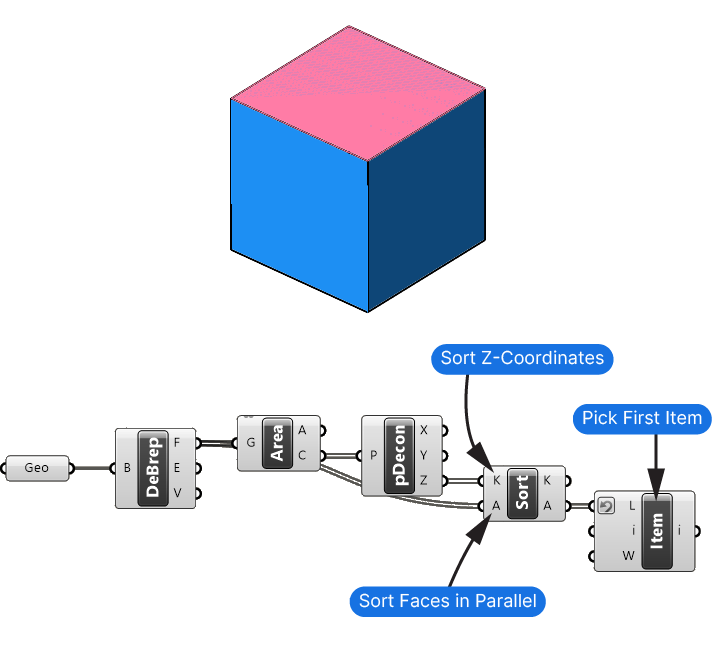
By following the steps above, you can extract the top surface for further operations.
Deconstruct Brep vs Extract Edges
If you specifically want to extract the edges of a brep, consider using the “Extract Edges” component instead. As we’ve seen, the Deconstruct Brep component does outputs the edges, but all edges are provided without distinction in a single list.
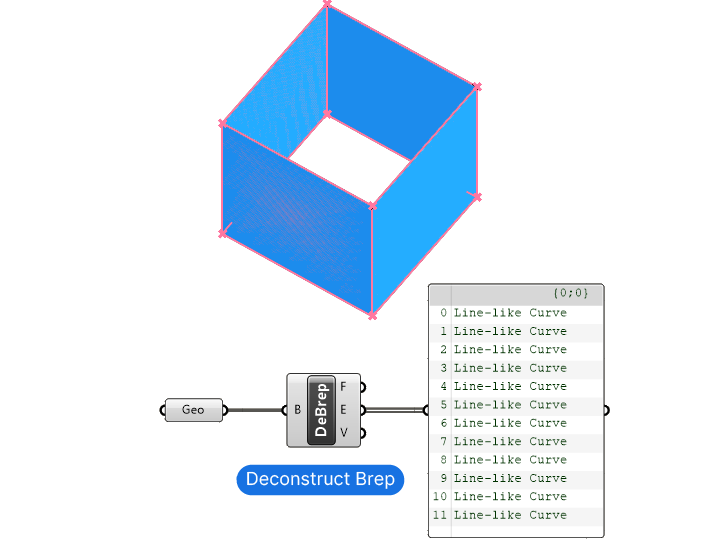
In contrast, the Extract Edges component splits the edges into three distinct outputs:
- Naked Edges (En): Edges that are only part of one surface (shown in magenta below).
- Interior Edges (Ei): Edges shared between two surfaces or where two edges of the same surface meet (shown in black below).
- Non-Manifold Edges (Em): Edges that are shared between more than two surfaces. (These edges are usually a sign that something went wrong).
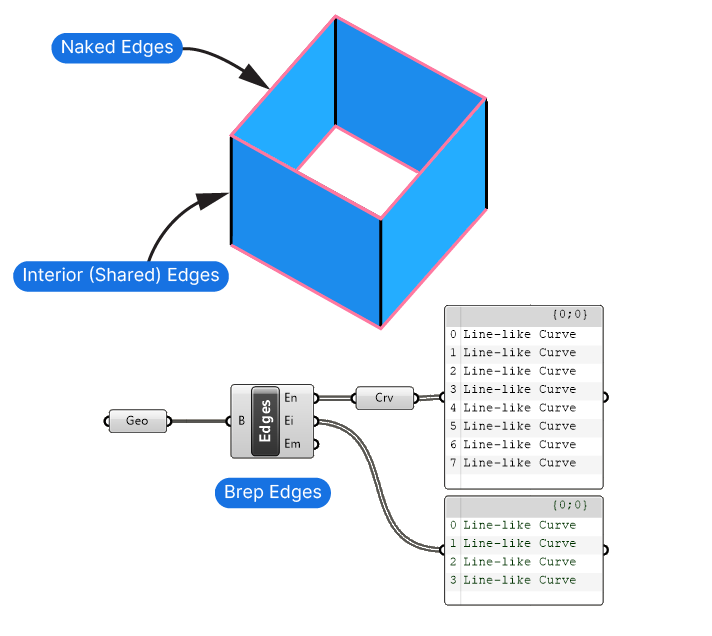
In the example above for example, extracting only the naked edges could be useful to cap the openings. With the Extract Edges component you can easily extract those by picking the ‘Naked Edges (En)‘ output.
If you want to get to specific edges, the Extract Edges component is the way to go.
Concluding Thoughts
Understanding how to Deconstruct a Brep in Grasshopper opens up many possibilities when working with Breps. I hope this guide has helped clarify what the Deconstruct Brep component does, how you can use it effectively in your Grasshopper scripts, and when to use the Extract Edges component instead.
Happy designing!

