Trimming a surface in Grasshopper is a fundamental skill for anyone diving into parametric design. While many may be familiar with the simplicity of the ‘Trim’ command in Rhino, Grasshopper presents a more intricate dance of steps to achieve the same result. In this easy-to-follow guide you’ll learn how to trim a surface in Grasshopper, breaking it down step-by-step, ensuring you have a comprehensive understanding by the end.
Ready to master the art of trimming in Grasshopper? Let’s dive in!
Trimming a Surface With a Curve in Grasshopper
Before we dive into the components to use to trim a surface, let’s understand how the ‘Trim’ command works in Rhino to better understand how to trim in Grasshopper.
In Rhino, trimming a surface is as simple as selecting the trimming geometry, and then clicking on the surface we want to trim, on the side we want to trim it.
While trimming in Rhino is a single command, there is actually a number of things going on:
- Rhino automatically calculates the intersection on the surface where the surface will be split
- Rhino splits the surface at the intersection curve
- Rhino deletes the part of the surface we clicked on.
Just like when trimming a curve in Grasshopper, to trim a surface using a curve we’ll need to recreate these three steps manually. Let’s go through the process of trimming a surface step-by-step, using an example to illustrate how it works.
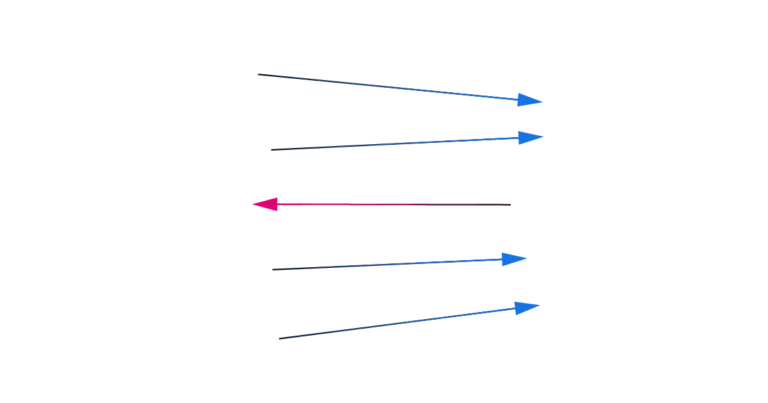
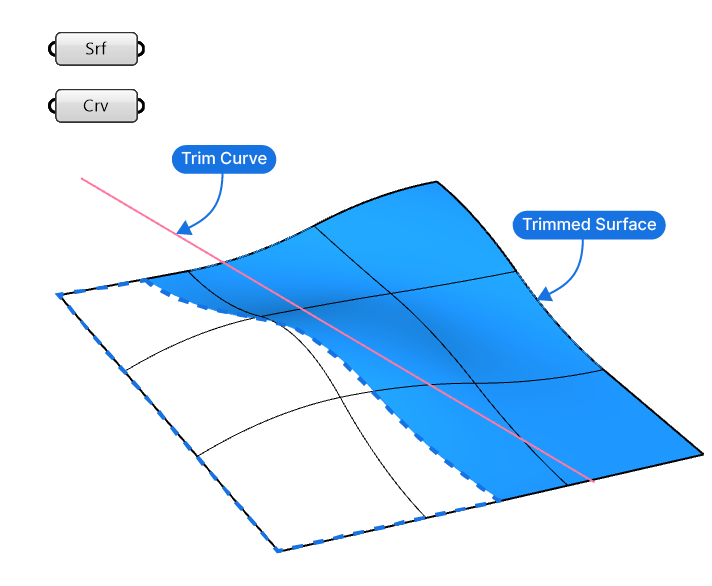
We’ll start with a basic example: we have a surface (not flat) and a line that we would like to use to trim it.
Generating the Intersection Curve
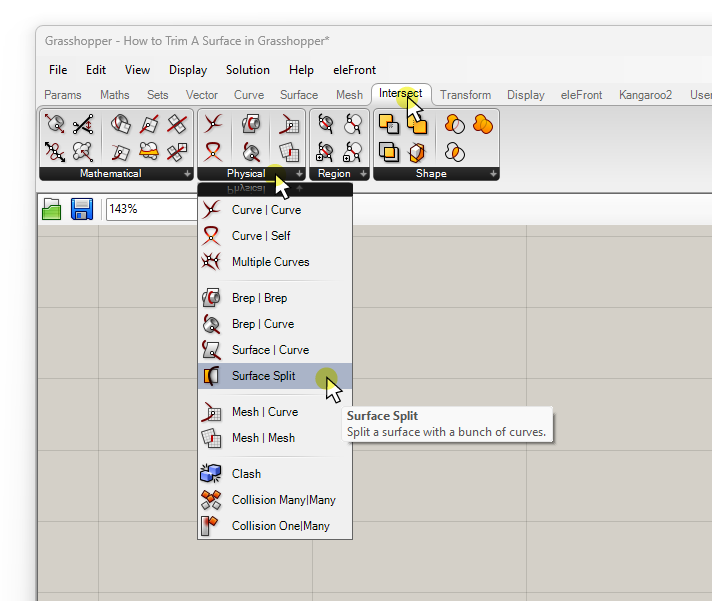
The core component for trimming a surface is the Surface Split (SrfSplit) command. Let’s add it to our script. You can find the component in the ‘Intersect’ component tab, within the ‘Physical’ group. Click on Surface Split and then anywhere on the Grasshopper canvas to add it to your script.
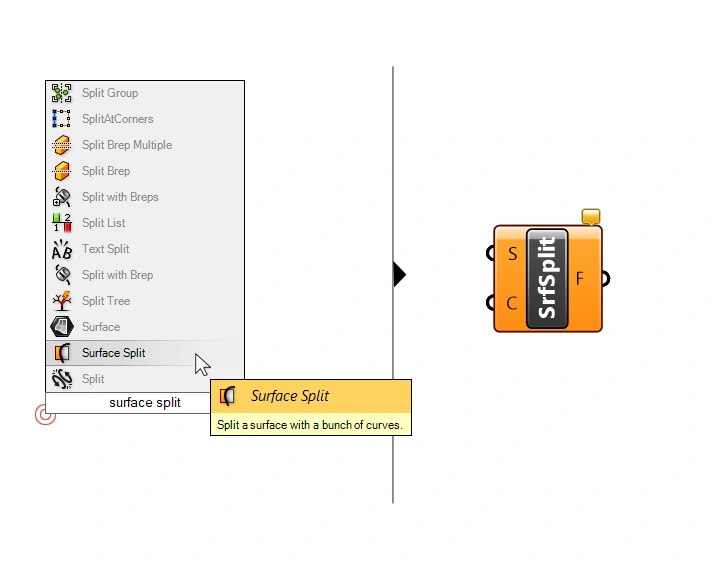
An alternative way of adding the component to your script is to double-click where you want to place the component, and type ‘surface split’ into the component search bar. Select the right result to add it to your script.
Understanding the Surface Split Component’s Inputs and Outputs
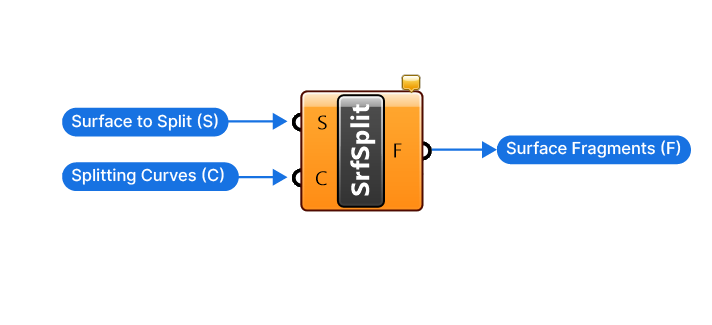
The component has two inputs: the Surface to Split (S), and the Splitting Curves (C).
The splitting curves must be located on the surface, meaning that they are in direct contact the entire way. This provides Grasshopper with the necessary splitting information. If we connect a curve that is located away from the surface, Grasshopper will try to still make the splitting operation work by pulling the curve onto the surface. But this leads to imprecise models – as we’ll see in a second.
The output contains the Surface Fragments (F) – this means it contains all the parts of the split surface. It will be our task to pick the ‘fragments’ to keep in a following step.
Let’s go ahead and connect our surface and curve.

While this looks fine at first sight, a quick look in the top view shows the issue: the outline of the split surface fragments doesn’t match the trim curve we specified, and looks jagged and irregular.
Top view of the same surface:
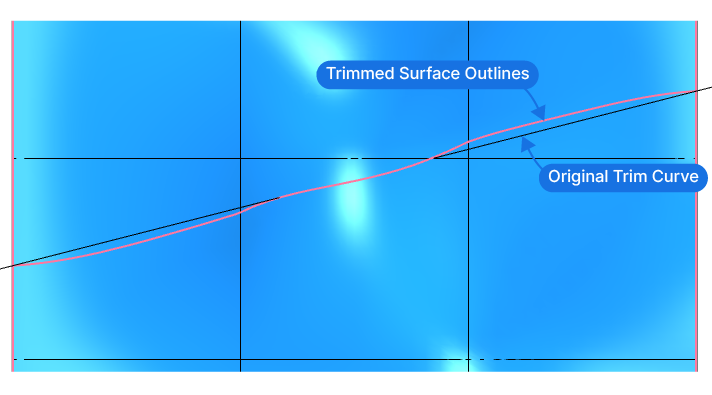
Now why did this happen? Since we didn’t provide a trim curve located on the surface, Grasshopper ‘pulled’ the curve onto the surface and used the result to split the surface with. In Grasshopper ‘Pulling’ means that the curve will be projected to the closest point on the surface for each point on the curve. Since our surface is bent, the closest point is not always vertical, leading to the distortion of the curve in the top view.
So how do we fix that?
We need to control how the trim curve is being projected onto the surface.
Projecting the Curve Onto the Surface
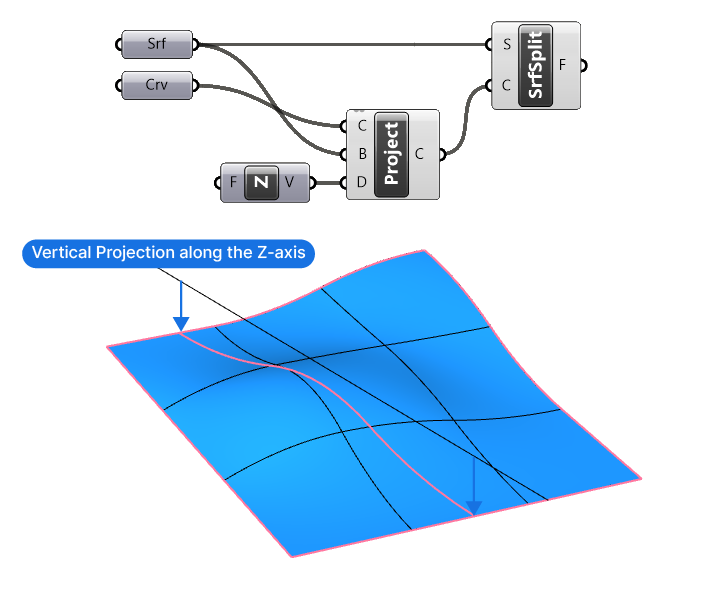
In this example, we want the line to be projected onto the surface vertically. So let’s add a ‘Project’ component. There are two components named ‘Project’, pick the one with the description that says: “Project a curve onto a Brep”.
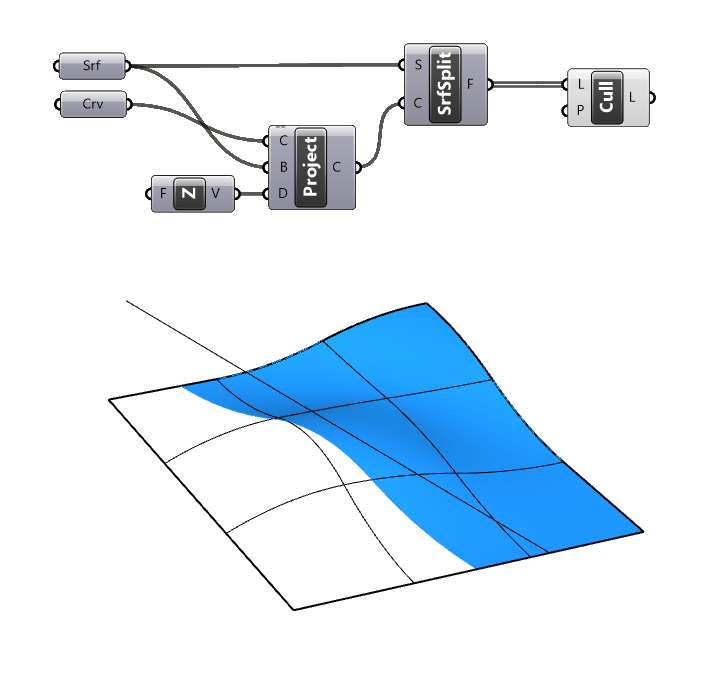
The component asks for three inputs: the Curve (C) to project, the Brep (B) to project onto (in our case the surface), and the Projection Direction (D). Let’s connect our surface and curve accordingly, and add a ‘Unit Z’ vector, to ensure a vertical projection direction.
As a result, we now get a straight, linear split.
Selecting the Split Surface to Keep
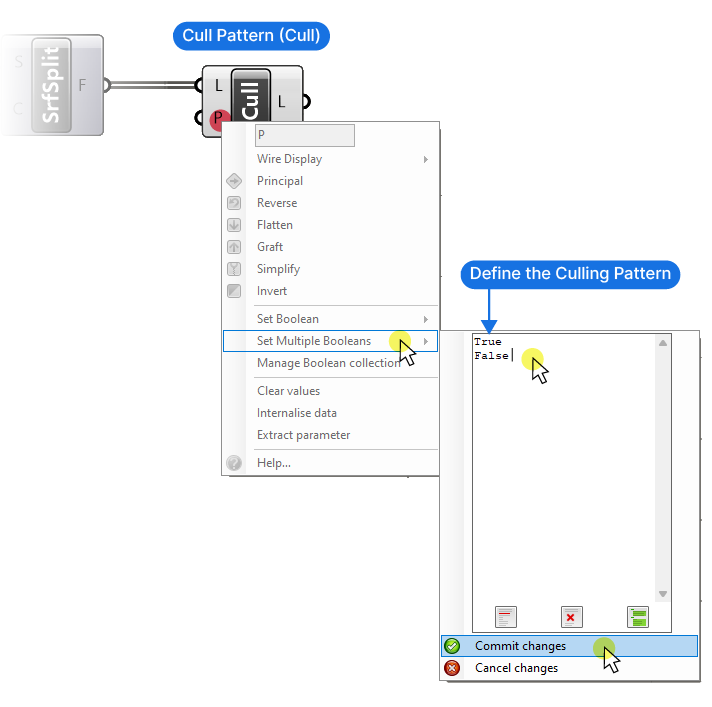
The next step is to select the surface fragment we want to keep. The exact selection procedure depends on the use case, but a robust way to make the selection is to use the ‘Cull Pattern’ component.
The Cull Pattern component will keep or delete elements in a list following a list of True or False inputs. In a simple case as the example shows, where we only have two elements resulting from the splitting, we can adjust the ‘Culling Pattern’ directly inside the component, by right-clicking on the Cull Pattern (P) input, clicking on ‘Set Multiple Booleans’ and changing the default pattern to True and False. Simply type ‘True’ and ‘False’, each in a separate line. Finally confirm with ‘Commit Changes’.
After turning off the preview of the other components, the Cull Pattern component output will show one of the two surface segments. To select the other one, change around the True and False values inside the Pattern input.
You can also copy the Cull Pattern component, right-click on the Pattern input and select ‘Invert’, to invert the culling pattern. That way you can separate the two split surfaces and continue to edit them independently.
If you’re trimming the surface with several curves, entering the Cull Pattern manually may not be efficient anymore – in that case define a parametric relationship that allows you to single out the surfaces to keep. For example the split surface, closest to a point, or the surface fragments located within the curve – the possibilities are endless!
Trimming a Surface in Grasshopper – Final thoughts
Trimming a surface in Grasshopper is akin to mastering a precise dance of logic and design. By following the steps outlined in this guide, you’ve taken a significant stride in harnessing the power of parametric design. As you continue to refine and apply these skills, remember that mastery is a journey, not a destination.
If you are eager to further accelerate your expertise and dive deeper into Grasshopper, check out our course: Grasshopper Pro. It’s a comprehensive online course crafted specifically for architects, ensuring you’re not just keeping pace, but leading the way in design innovation.
Happy designing!