Whether you want to ask a colleague to look over a portion of a script or show off your parametric design skills in your portfolio, at times it’s useful to export a hi-res image of your Grasshopper script. But taking a normal screenshot and cropping the image will only get you so far, especially since you won’t be able to capture large scripts.
Luckily, Grasshopper offers two practical ways to export an image of your script. In this article we’ll cover both:
- Exporting a screenshot of the visible Grasshopper Canvas
- Exporting a hi-res image of the entire script
Let’s dive in!
1. Exporting a Screenshot of the Visible Grasshopper Canvas
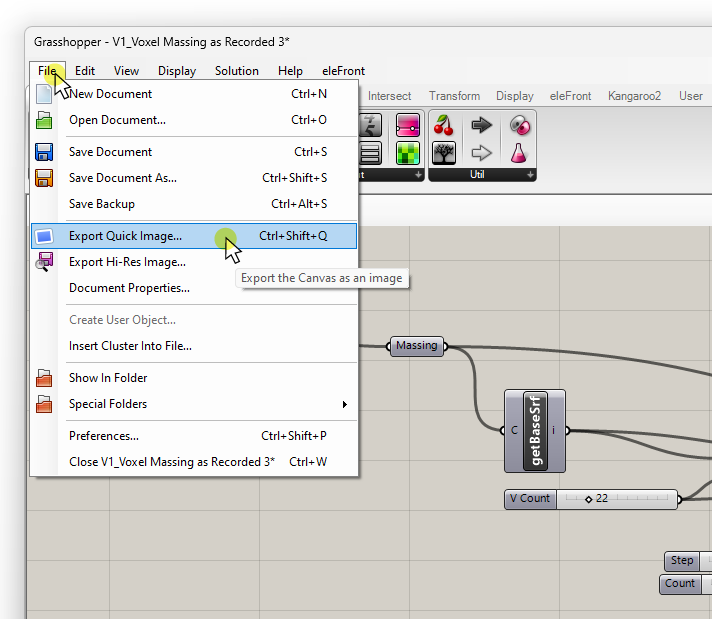
If you need to share a portion of a script to ask a question or give instructions, Grasshopper’s Export Quick Image feature is the tool for the job.
The Export Quick Image tool allows you to export an image of the currently visible part of your Grasshopper script.
To run it, go to File / Export Quick Image… or use the keyboard shortcut Ctrl + Shift + Q.
As soon as you click, a new window will open: the Quick Image Editor. The editor shows the portion of the image it will export, and allows you to either copy it to your clipboard or save it to your drive.
I find the copy (to clipboard) option really handy as it can be quickly shared via any instant messaging apps.
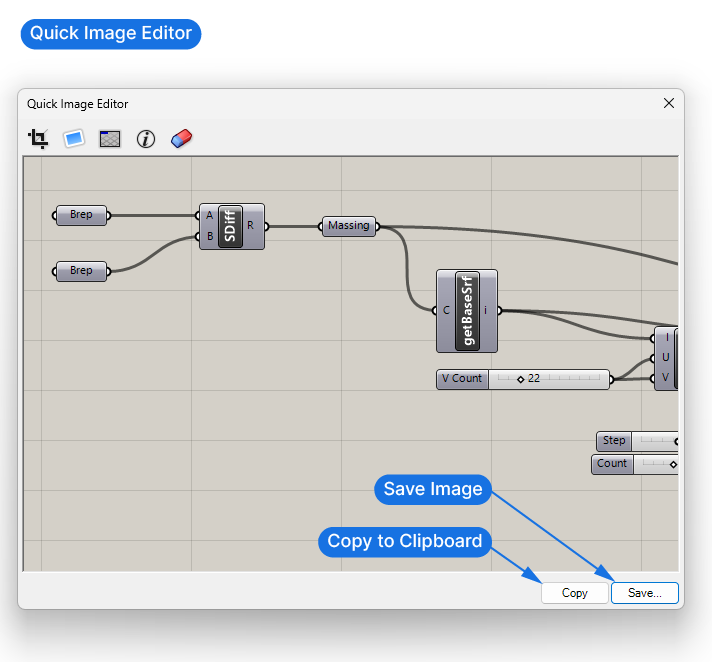
The Quick Image Editor offers a few simple tools to edit the screenshot before saving, which can be found in the bar in the top left corner. By selecting the icons we can crop the image (first button) or highlight a portion of the script (second button).
At times, you might also need to demonstrate what the script’s preview is (or isn’t) displaying in the viewport. The Quick Image Editor facilitates this by allowing you to add a viewport frame that shows the contents of the active viewport.
To activate it, select the third icon on the top bar.
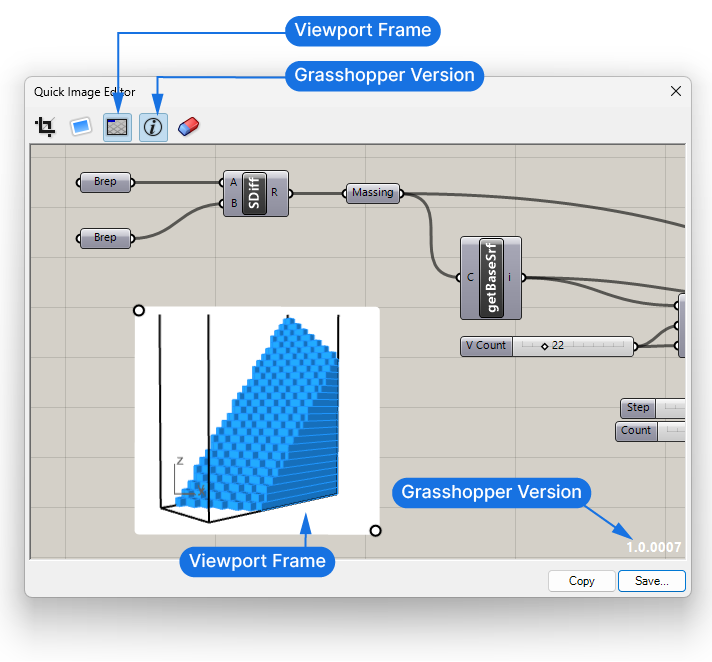
You’ll be able to resize and position the widget to keep the relevant part of the script visible.
You can also choose to display your current Grasshopper version on the bottom right corner.
To reset all the edits, click the eraser button on the far right.
2. Exporting a High-Resolution Image of the Entire Grasshopper Script
Picture this: you are putting together your design portfolio and you want to show off your Grasshopper skills. You have a rendering of your final design but you also want to show the Grasshopper definition that goes with it.
The challenge of displaying the entire script arises from the limited resolution of your screen, especially as Grasshopper scripts can be quite large. To make things worse, as you zoom out, Grasshopper’s display of the components simplifies and makes them essentially unintelligible.
Your first reaction may be to take a bunch of screenshots and then stitching them together in Photoshop, but there’s a better way!
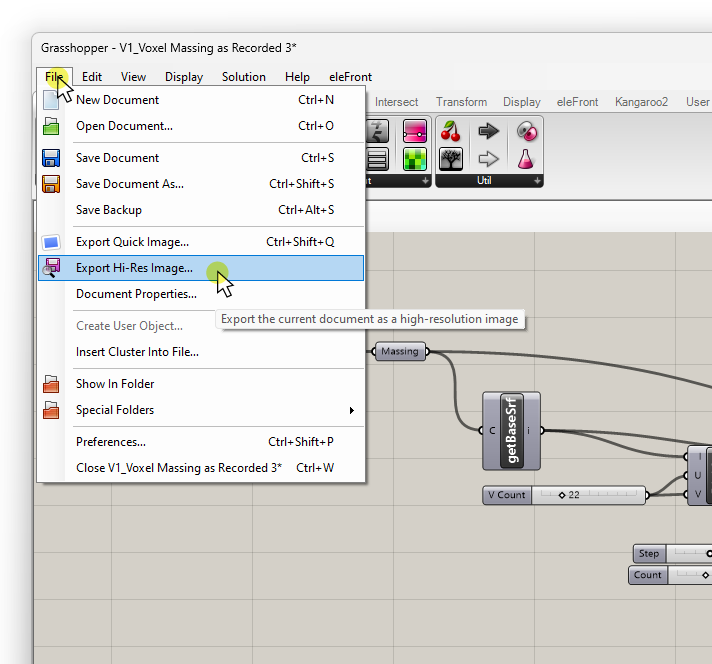
Grasshopper has a built-in feature that captures an entire script at a high resolution. To activate it, go to File / Export Hi-Res Image…
Adjusting the Export Settings
A new window will open. This little widget allows us to define three things:
- File name and location
- the zoom level of the final image
- The background color of the script

Click the button with the three dots (…) on the far right of the ‘Image File‘ field, and browse to where you want to save the file. Specify a name and also the filetype. You can choose between .bmp, .jpg and .png.
Next define the zoom level. In practical terms, this slider controls the resolution of the hi-res image export. A zoom level of 1.0 corresponds to the normal component display in Grasshopper.
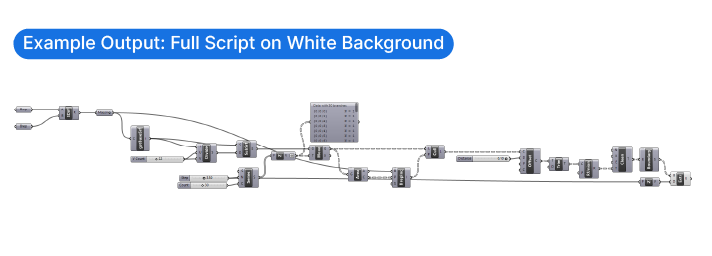
Finally adjust the canvas background. The Grasshopper canvas is gray and doesn’t look that great when shown in any presentation. In most cases a white or transparent background is what you need. Use the color picker widget to pick the color you need.
For a transparent background, especially when saving as .png (which supports transparency), set the ‘A’ (alpha) slider, the bottom one, to ‘0‘.
Once you’re happy with the settings, hit OK!
Grasshopper’s image stitcher utility
A separate command line window will open. Don’t worry, it’s safe! It’s a tiny program called ‘Grasshopper high resolution image stitcher utility’ made by McNeel. This tool will create a series of screenshots of your script and stitch them together to create a high resolution image. It will open and close on its own, no need to intervene.
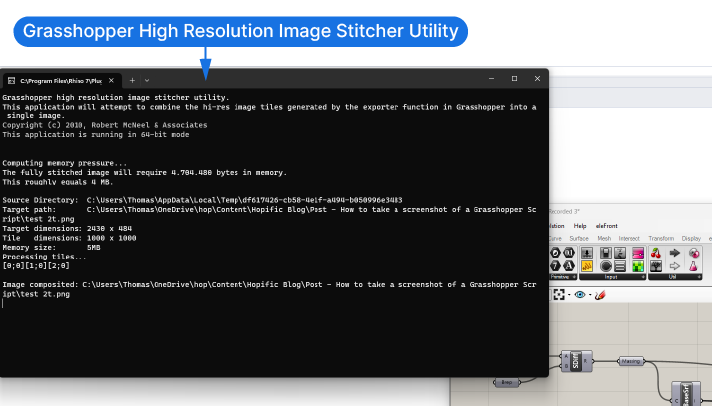
Once it closes, Grasshopper will have saved a high-resolution image of the script in the folder you specified.
That’s it! You now know how to export a hi-res image of you entire Grasshopper script!
I hope you’ve found this guide helpful!
Happy designing!