To offset a curve in Grasshopper can be a frustrating experience: the offset direction can feel arbitrary at times. In this article we’ll cover the basics of how to offset curves and learn how control the offset curve direction.
The Basics:
First let’s cover the basics:
There are two components we can use to offset a curve in Grasshopper:
- Offset Curve
- Offset Curve Loose
Offset Curve is the same command we know from Rhino. Offset Curve Loose uses a different offset algorithm, which is based on offsetting the control points instead of the curve itself. It works better when you are trying to offset a 3D curve, but the result tends to be unprecise and unpredictable which is why I recommend always using the Offset component.
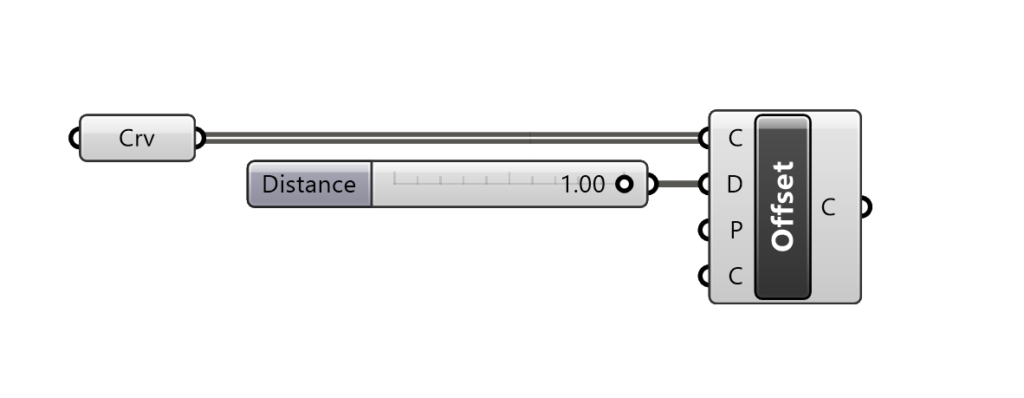
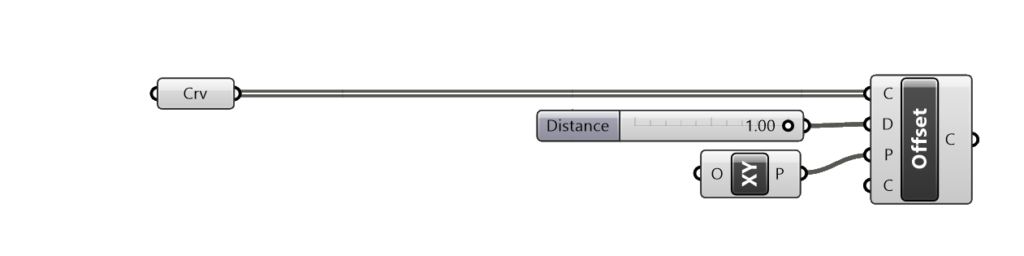
The Offset Curve component has four inputs:
- C: The curve to offset
- D: The offset distance
- P: the offset plane
- C: the corner type
For the first input we’ll need to provide an open or closed, planar curve.
Next we need to specify the Offset Distance with a number slider value.
We can also specify the Offset Plane, but we don’t have to. If we leave it empty, Grasshopper will try to find the appropriate plane for the offset operation behind the scenes.
The last input allows us to specify the corner type. By right-clicking on the input we can choose a corner type from the dropdown menu, as shown below:
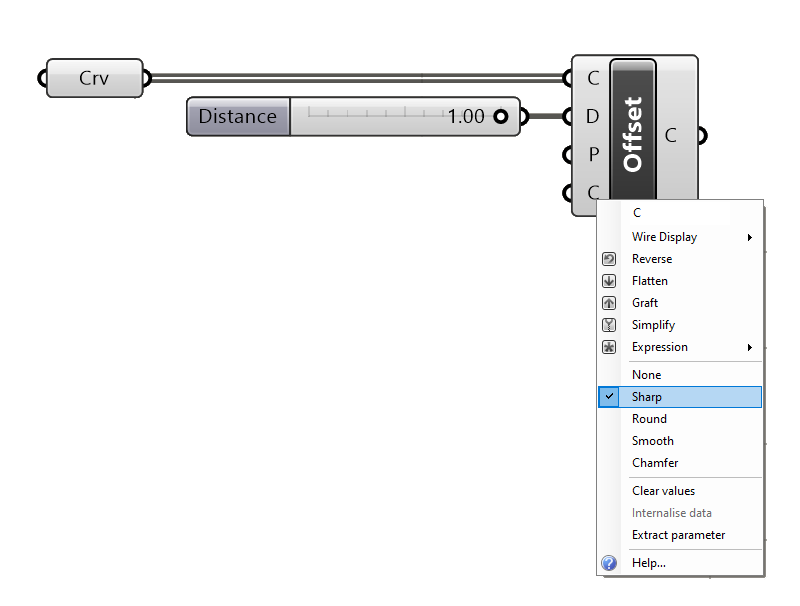
In most cases, we can leave it on ‘sharp’, which is also the default.
By providing a curve and a distance input, we already get a preview in the viewport.
Adjusting the Offset Direction
If the curve is offset to the wrong side, we can change the offset direction to a negative value, by adjusting the number slider or by adding a ‘-x’ expression directly into the offset distance input:
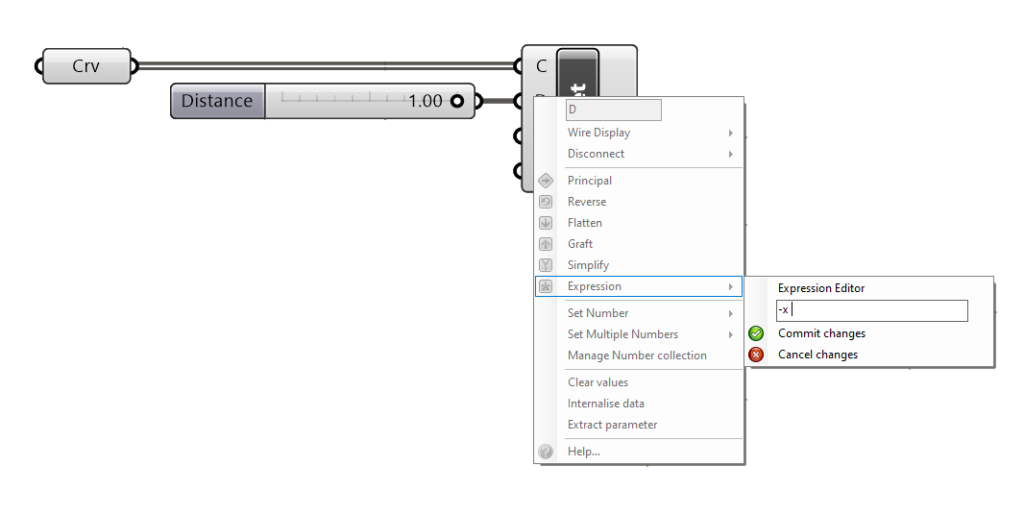
For offsetting individual curves, using this approach to control the offset direction works fine, but if we need a consistent and predictable offset behavior across multiple curves, we need to go a bit deeper:
If you want to learn more about how to get more control over the offset direction, keep reading..

Controlling the curve offset direction in Grasshopper:
The offset direction of the curve is determined by three factors:
- the curve direction
- the offset distance value
- and the offset plane.
Let’s understand how these three factors affect each other.
In essence offset direction can be determined as follows:
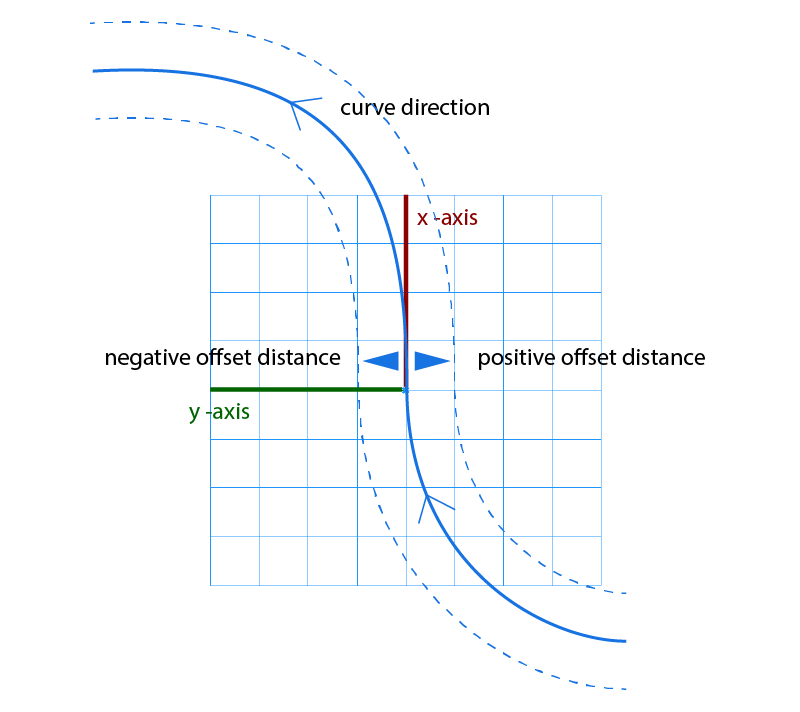
A positive offset distance will always be on the negative of the Y-axis of the local construction plane the offset operation is based on, where the X-axis of the local construction plane points in the curve direction.
Now let’s break this down step by step.
To understand how the offset plane works we need to first understand how construction planes work in Grasshopper:
Construction Planes in Grasshopper
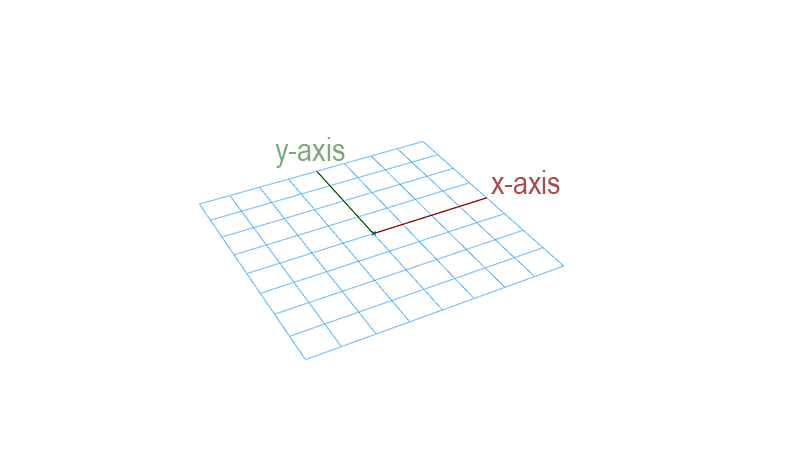
Construction planes are local coordinate systems. They have three axes X, Y and Z. In Grasshopper we don’t get to see all three in the viewport preview, only the X and Y axes are displayed, marked with a red and a green line respectively.
Although these three axes can be oriented and rotated in any direction, they always have the same orientational relationship to each other, which can be best explained with the ‘right-hand rule’.
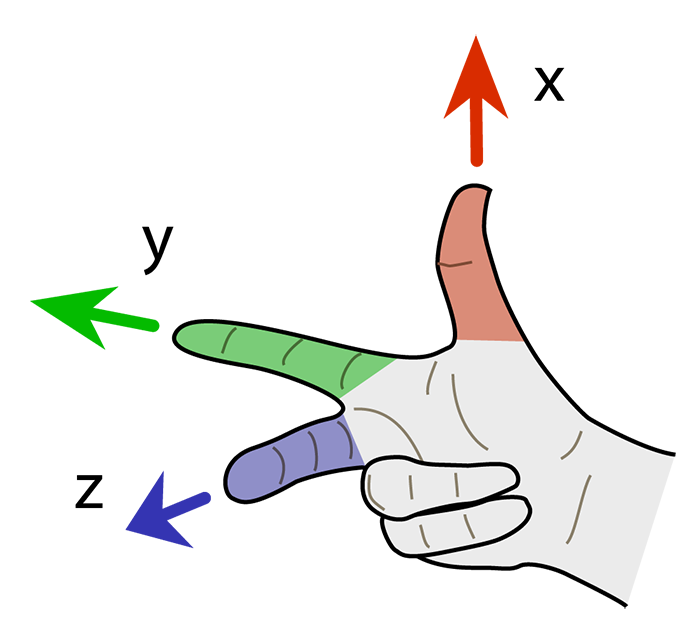
Take your right hand and spread your thumb, index and middle finger in a way so they end up roughly at a right angle to each other, as shown in the image above.
Imagine that your thumb marks the X-axis and your index finger the Y-axis – your middle finger will point in the direction of the Z-axis.
The need for this right hand rule arises from the fact that given an X and Y axis, the Z axis could have two possible orientations. To remove this ambiguity, all construction planes follow the right hand rule.
Good to know: This is also why when we construct a construction plane in Grasshopper, we can only define the X and the Y vectors, it’s because the Z vector is automatically determined according to the right hand rule.
Next we need to figure out the direction of the curve we are trying to offset, since it also influences the offset direction.
Determining the curve direction
The curve direction plays a major role in determining the offset direction. Now how can we display the curve direction?
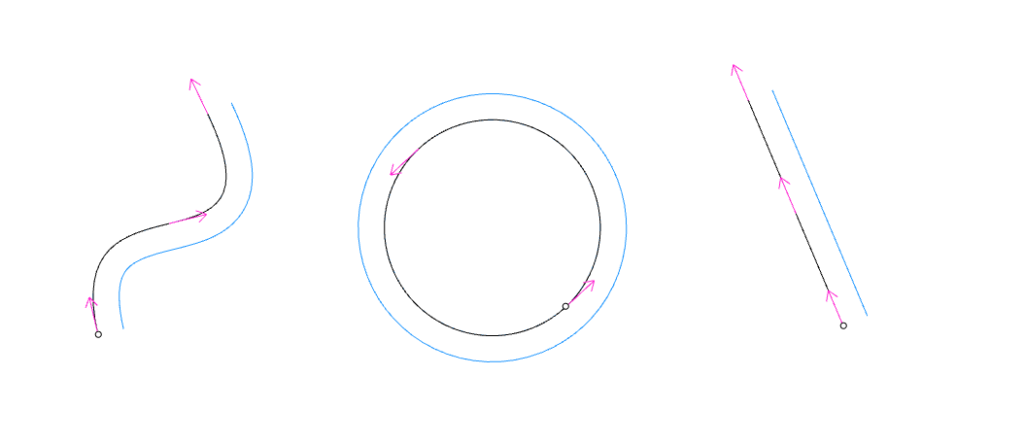
Every curve in Rhino and in Grasshopper has a start and an endpoint, which consequently describe its direction. We can find the curve direction in two ways:
- If you referenced the curve from Rhino, you can find the curve direction by typing ‘Dir’ into the command bar (short for direction). Small, white arrows are going to appear on the curve, showing the direction of the curve.
- If you created the curves in Grasshopper, the simplest way to find out the curve direction is to add an Evaluate Curve component, reparametrize the Curve input, and enter an evaluation parameter of, say, 0.25. The evaluation point will be closer to the beginning of the curve, and as you change the number slider value from 0 to 1.00, which mark the beginning and end of a reparametrized curve respectively, the point will follow the curve direction.
Putting it all together.
Now that we understand how construction planes work and we know the direction of the curve let’s see how these properties come together to define the offset direction:
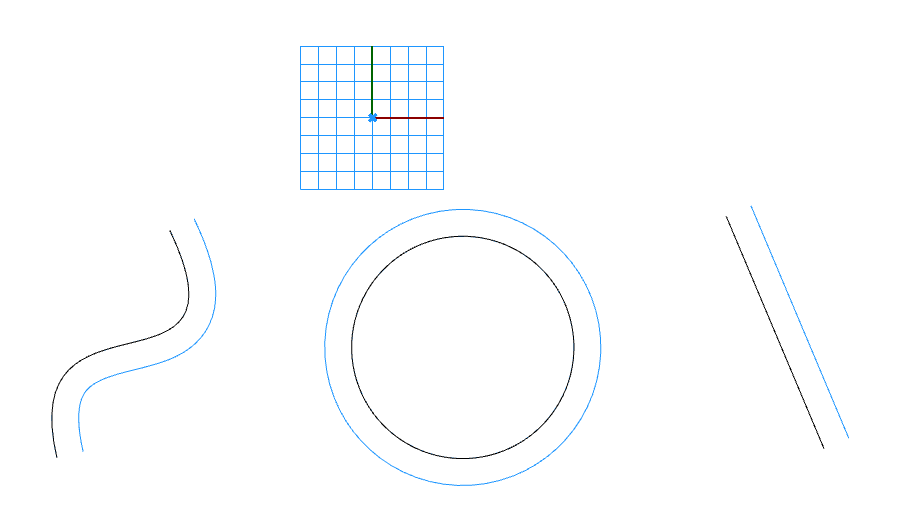
Let’s say that we want to offset the curves in the XY-Plane (the Rhino ground plane).
To do that we can simply add an XY-Plane component and plug it into the Offset Plane input. The plane preview shows up in the viewport. Following the right hand rule, the Z axis of our XY-Plane points upwards.
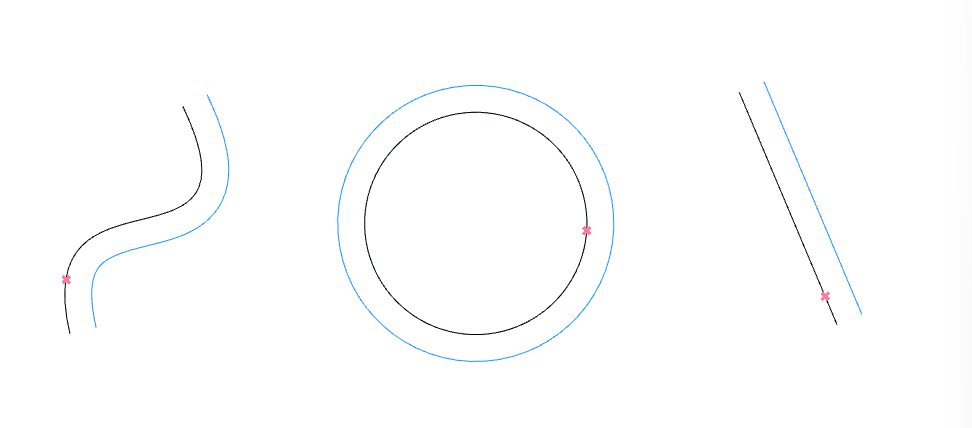
To understand where the curve will be offset to, we can do the following:
We orient our XY-Plane onto the curve so that the red X-Axis matches the direction of the curve. We can do that by using an Evaluate Curve component with an evaluation parameter of 0, feeding the resulting point into the origin input of our XY-Plane, and then using an Align Plane component to align our XY-Plane using the tangent vector at the evaluation point.

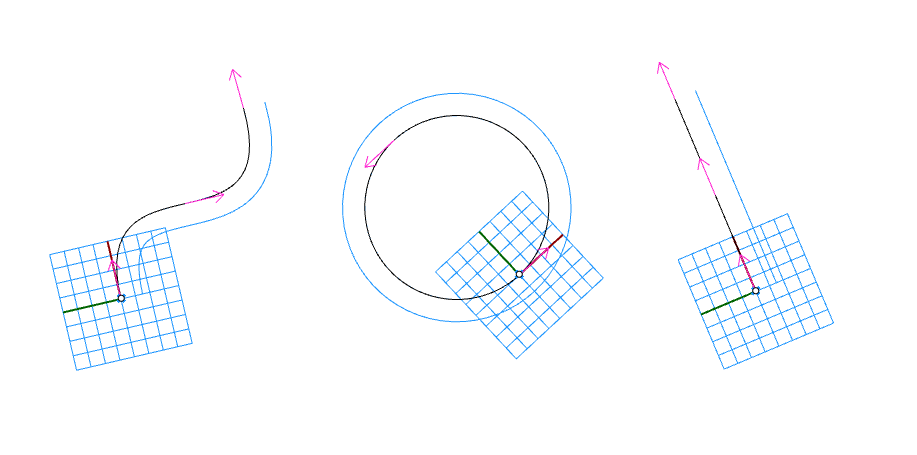
We can also do this the analog way, by using our right hand and aligning our thumb (our X-axis) in the direction of the curve.
Now is when the Offset Distance value comes into play:
A value of 0 is exactly on our X-axis, and a positive number will offset in the negative Y direction relative to our aligned plane, and a negative number in the positive Y-direction.
If we now flip our curves in Rhino or Grasshopper, the offset jumps to the other side, because our XY-Plane is reoriented into the other direction.
We can only fully control the offset direction of curves if we are in control of all three factors.
Now it’s also clear why the offset direction seems random if we don’t provide an offset plane input: although Grasshopper tries to find the right offset plane behind the scenes, mostly by fitting a plane through the curve control points. As a result there are always two possible construction planes: one with a Z-axis that points up, and one that points down, with matching X and Y axis orientations, and Grasshopper ends up picking one of the two randomly.
Conclusion:
If you have multiple curves and you are offsetting them in bulk, you need to be able to predictably control the direction of the offset. Using the combination of curve direction, offset planes and the offset distance will allow you to avoid surprises and frustration when dealing with curve offsets.
Try it yourself!