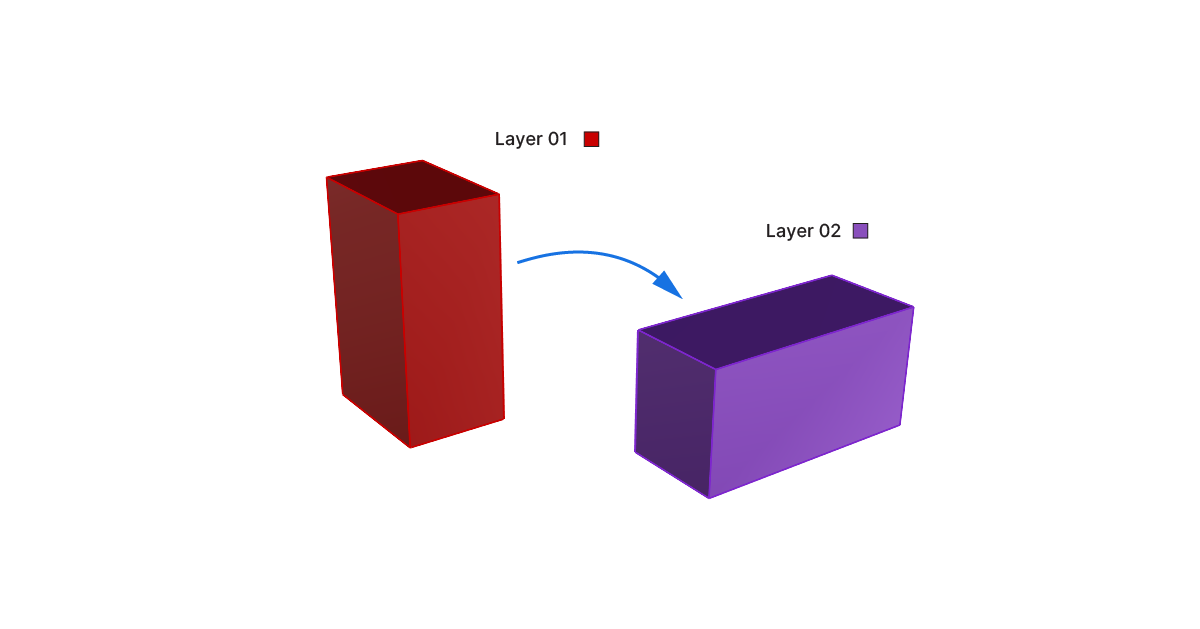
As your 3D model grows more complex, you’ll want to keep objects organized in layers. Rhino offers three ways to move objects to different layers: the Properties Panel, the Layer Panel, and the MatchProperties command.
I’ll walk you through each and tell you their benefits and disadvantages.
Moving an Object to a Different Layer With the Properties Panel
The Properties Panel shows all the object-specific information in a single panel – among them is the layer the object is located in.
To change the layer:
- Select the object you want to move to a different layer.
- Open the Properties Panel by selecting the rainbow-colored circle in the side bar or type “Properties” into the Rhino command line.
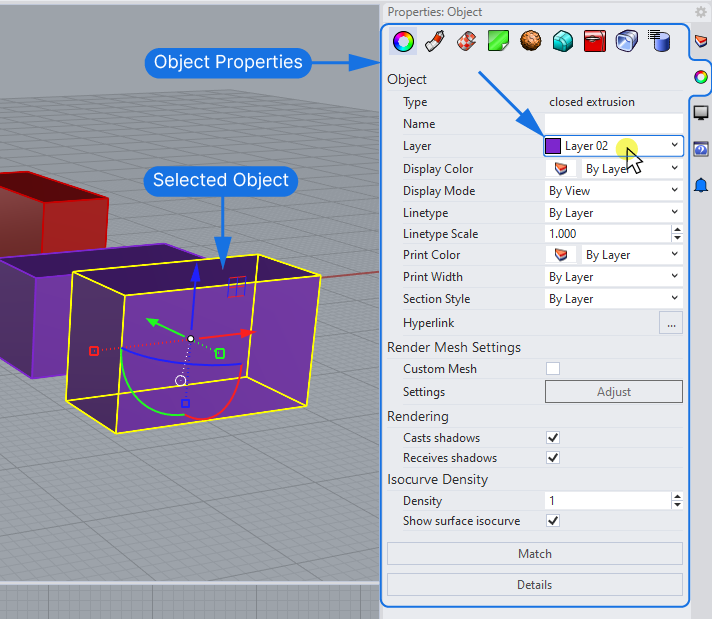
- Change the layer by clicking the drop-down arrow next to the current layer name, and selecting the layer you want to move it to.
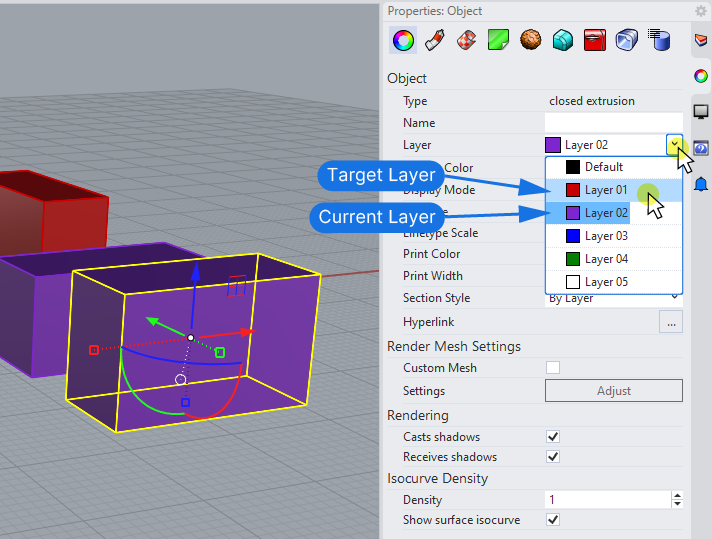
The object will be instantly moved to that layer.
The main drawback of changing the layer this way is that when you have many dozens of nested layers, it can get tricky to find and navigate the layer structure using the dropdown menu.
Changing an Object’s Layer With the Layer Panel
An alternative and perhaps quicker way of changing an object’s layer is to use the Layer Panel:
- Open the Layers Panel by selecting the pie-icon in your sidebar, or type “Layer” into the Rhino command line to open it.
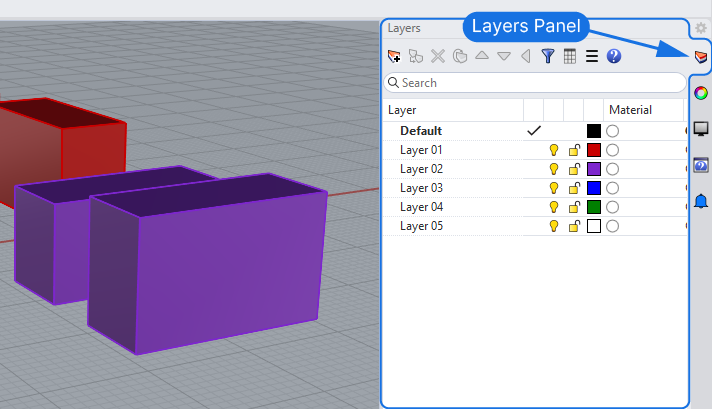
- Select all the objects whose layer you want to change.
- Right-click on the destination layer in the Layer Panel
- Select ‘Change Object Layer’
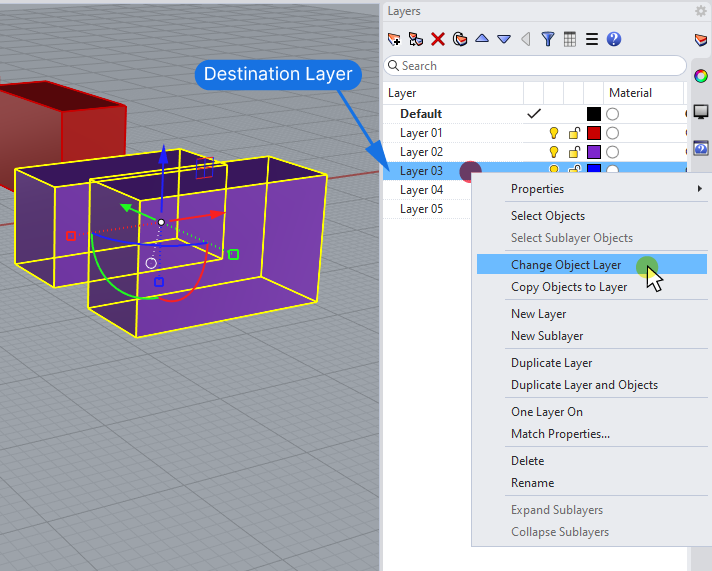
This will immediately change the selected objects’ layer.
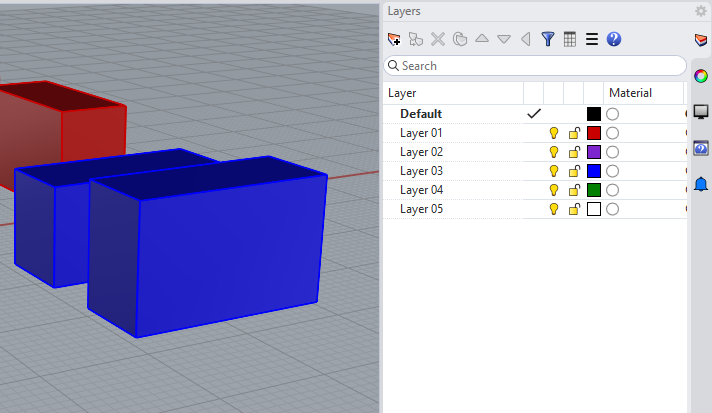
The main benefit of this method is that you can focus on the layers without having to see all the other object properties.
While layers are easier to find in the Layer Panel than in the Object Properties’ dropdown menu, finding the right layers can still be tedious. If there is an object in your scene that’s already on the target layer, you can use the ‘MatchProperties’ command instead:
Changing an Object’s Layer with “Match Properties”
A quick way to move objects to a different layer in Rhino is to match the properties of an object that is already on that layer. This is a great option if there are objects of the target layer in your scene.
Here’s how to use the MatchProperties command:
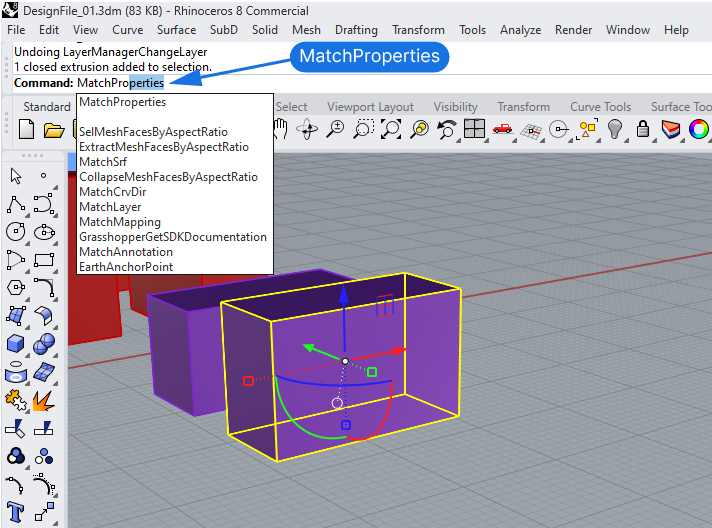
- Select the objects whose layer you wish to change
- Type “MatchProperties” into the Rhino command line and hit Enter
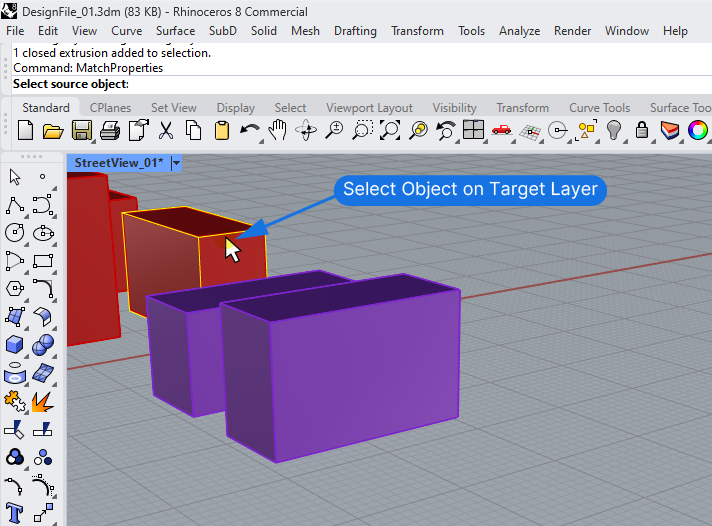
- Select the “source object” i.e. the object you want to match.
In the MatchProperties popup window, you can select which properties you want to match. By default all the properties are checked, which may not be what you want. To just match the layer of the target object, right-click on the “Layer” Object Property. This unchecks all other boxes.
Make sure to only check the properties you want to change if your objects have custom properties you want to keep.
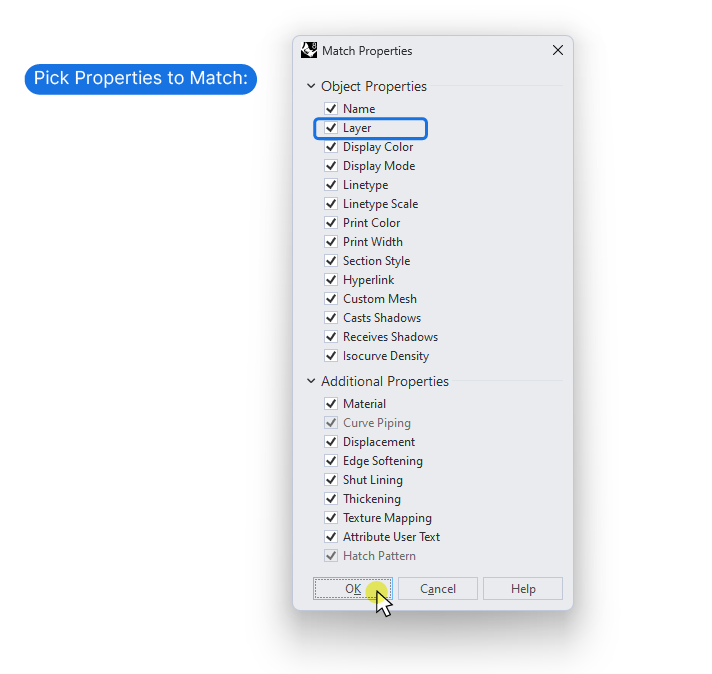
Finally, confirm with OK.
The object is now moved to the destination layer, without ever having to fiddle with the layer panel!
Tip: You can make this even quicker by creating an Alias for the “MatchProperties” command!
Changing All Objects From One Layer to Another
If you are restructuring the layers in your file and you want to move all the objects from one layer to another, the simplest way to do it is to select all the objects and then use the technique outlined above.
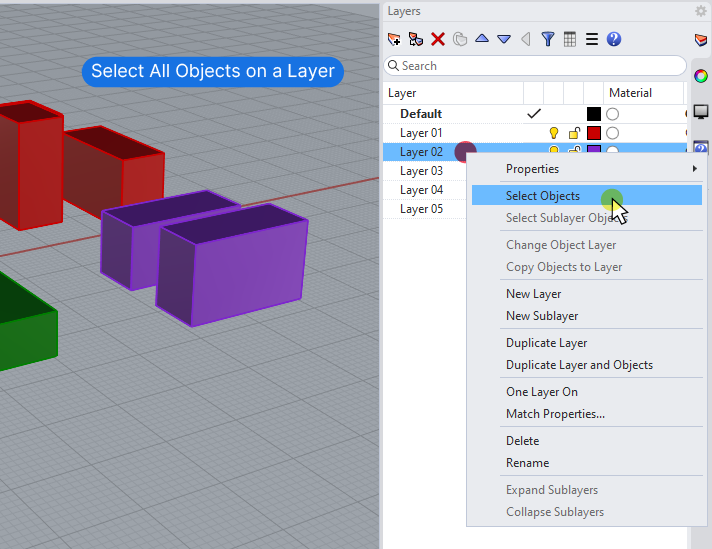
- Right-click on the layer containing the objects you wish to move
- Click ‘Select Objects‘ (or ‘Select Sublayer Objects‘ in case the layer contains sublayers you wish to change too)
- Right-click on the destination layer and select ‘Change Object Layer’.
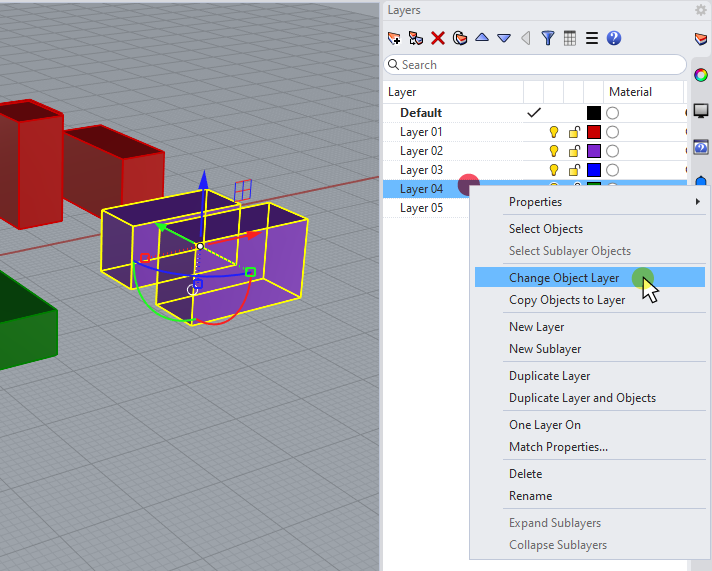
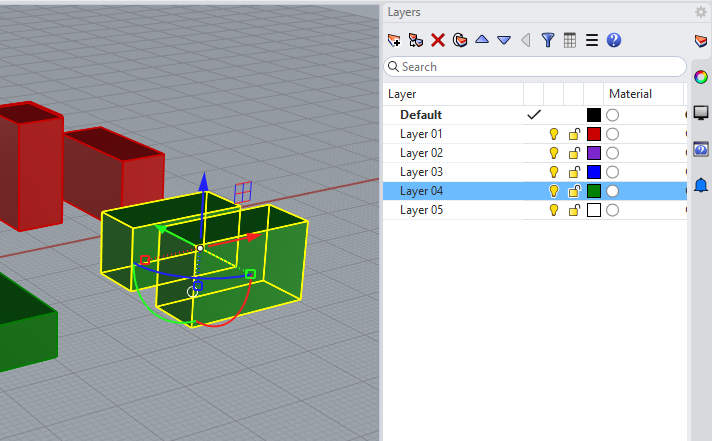
All the selected objects will be moved to the target layer.
Conclusion
As with many things in the world of modeling, there are several different ways to move an object from one layer to another in Rhino. Test and try all the methods shown in this article to find the one that feels most natural to you!
Happy designing!

