Grasshopper Clusters allow us to bundle frequently used script sequences into custom components, simplifying complex scripts and saving time.
In this guide, I’ll show you how to create a cluster component and save it as a user object, so you can easily add it from the component toolbar in any of your scripts.
Let’s dive in!
What is a Grasshopper Cluster?
A Grasshopper Cluster looks like a regular component with inputs and outputs, but it’s actually a Grasshopper script compressed into a single component.
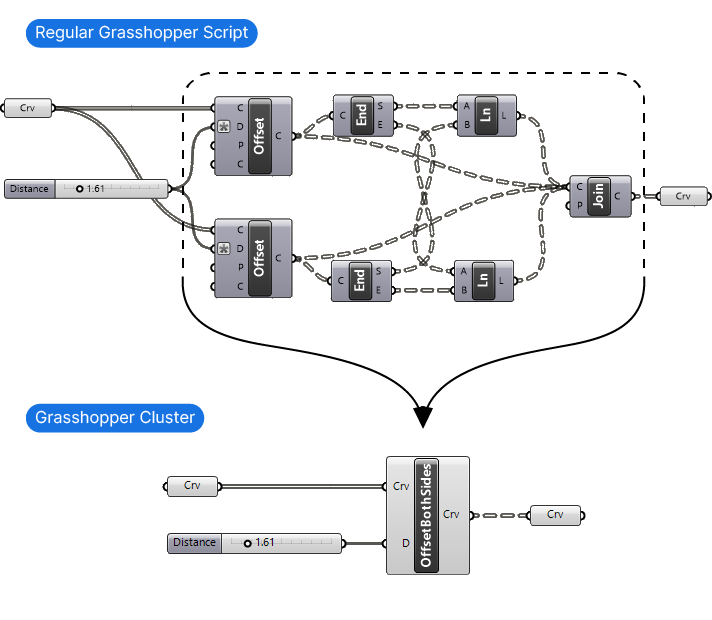
The input and output components of the Grasshopper script, like a Curve container or a Number Slider, are turned into the Grasshopper Cluster’s inputs and outputs.
Why Use Clusters?
There are three main benefits to using Clusters:
- Simplify your script: Clusters improve script readability by compressing large sections into a single component.
- Save time: Clusters can be used to create custom components of frequently used script sequences.
- Update multiple, repeating parts of your script at once: Multiple copies of the same Cluster behave like instances, which means editing one will update all instances throughout the script, saving you tedious re-wiring.
How to Create a Grasshopper Cluster
Step 1: Create the Script
The starting point of creating a Grasshopper Cluster is to first create a normal Grasshopper script.
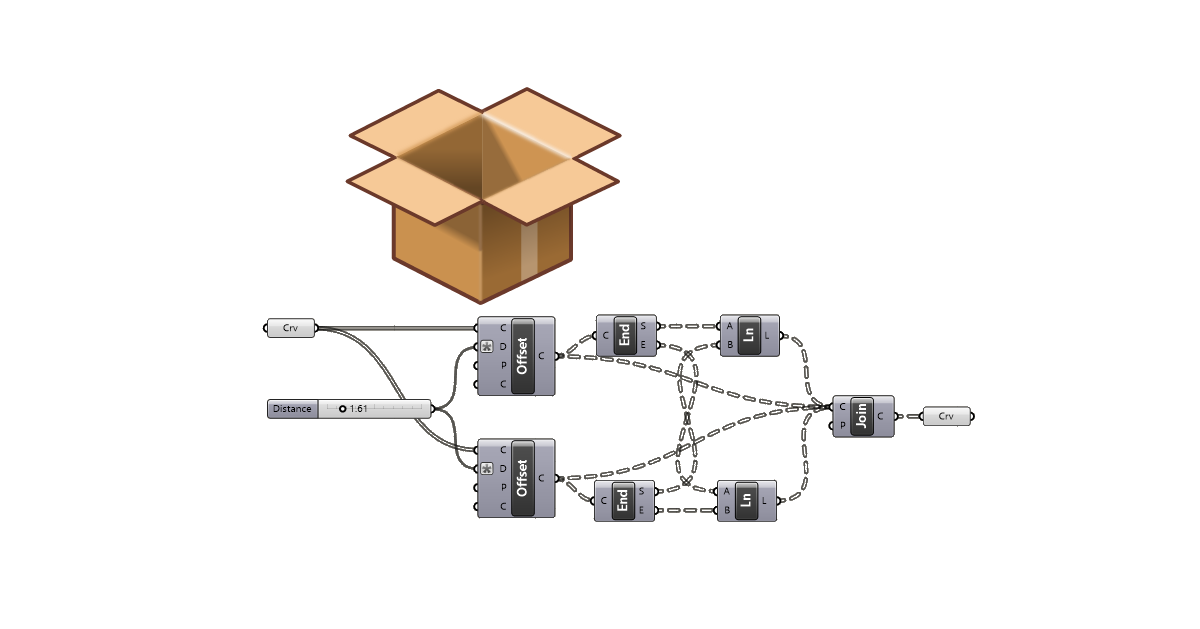
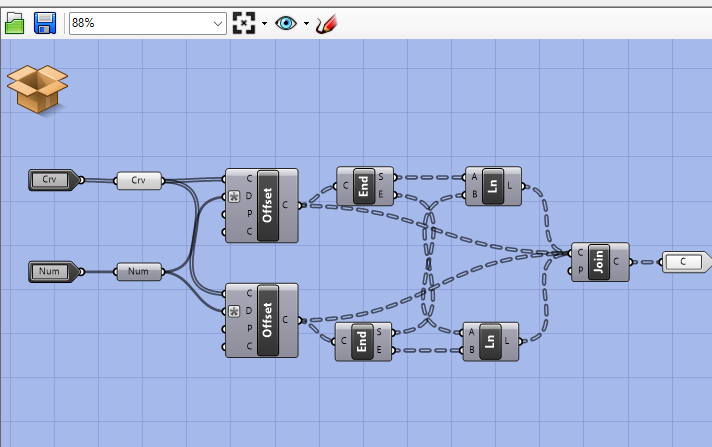
To illustrate how creating a Cluster works, I’ll use an example. I created a simple component sequence that will offset an input curve to both sides, connect the ends and return a closed curve.
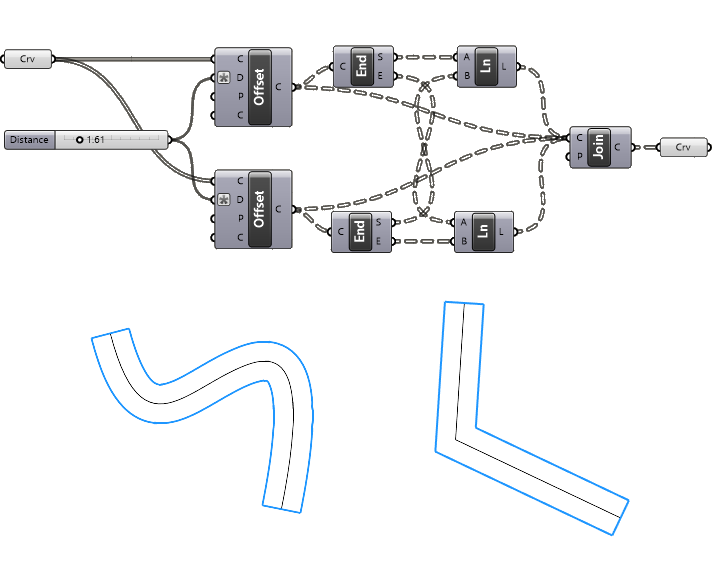
You can read more about how to create this example script in this article: Offsetting Curves to Both Sides.
Step 2: Define the Cluster’s inputs and outputs
Once the script is ready, decide which parameters in the script you want to turn into inputs.
Any parameter that we don’t select at this point will be ‘hard-coded’ into the cluster, meaning that that input will be static. For example, if we don’t define the Number Slider as a Cluster input, the offset distance will always be the same value.
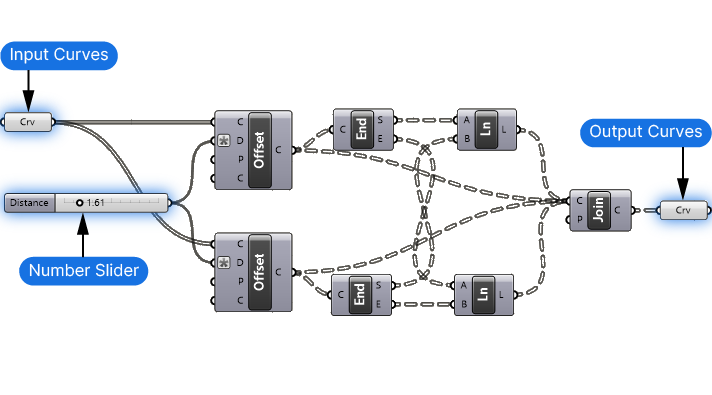
In our example, I want to be able to provide a curve input, a offset distance input. And I want a single output: the joined, offset curve.
Step 3: Add the Cluster input and output components
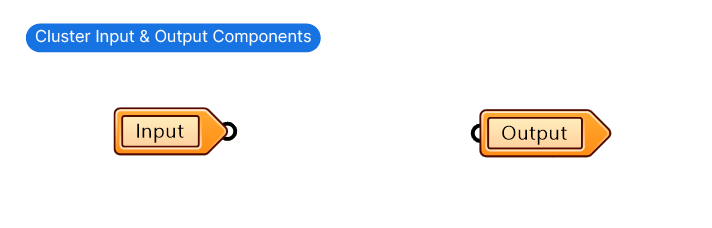
Now that we’ve identified the variables or inputs of our cluster, we can add so-called Cluster input and Cluster output components. These components will become the inputs and outputs of the final cluster component.
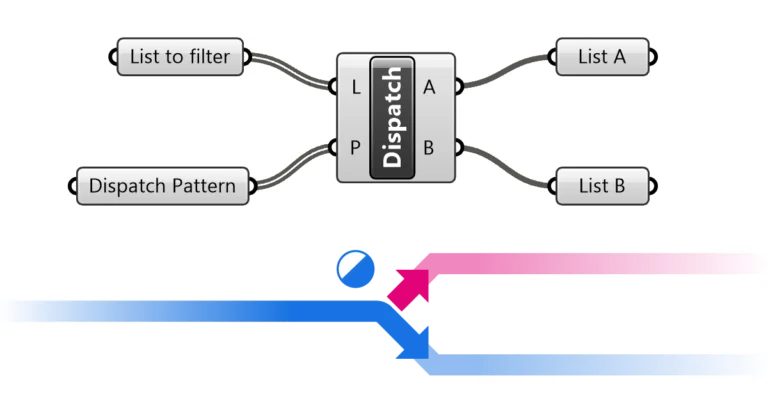
You can find the two components in the ‘Params’ component tab, in the ‘Util’ group. It’s the black and white arrows.
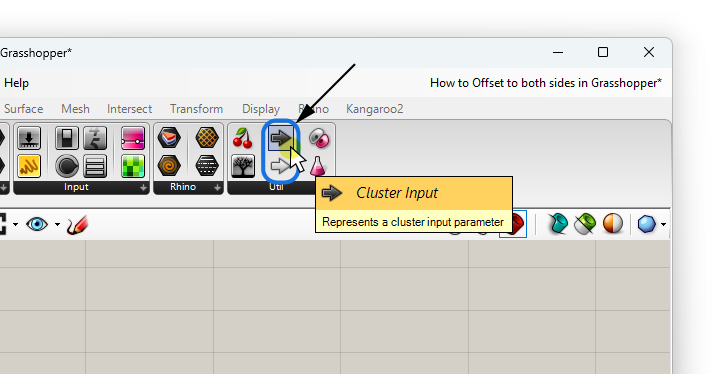
The components look a bit like data container components, except they only have a single input and output respectively.
Place a Cluster Input component for every variable you defined in Step 2. And place the Cluster Output component to the desired output. Just like with inputs you can place as many outputs as needed.
Since the Number Slider doesn’t have an input, move the existing wire connections to the input by holding Ctrl+Shift as you drag the wires from the existing output to the new one.
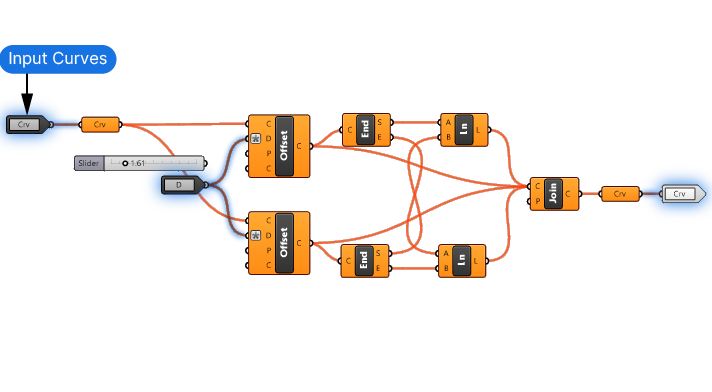
At this point the components will turn orange as no data flows through the script any longer.
You’ll notice that the Cluster Input components will inherit the name of their inputs and display them on the component. These will become the Input names of the Cluster component.
Step 4: Turn the script into a cluster
The final step is to select all the components of the script including the Cluster Input and Outputs, middle-mouse-click to open the Radial menu, and select the Cluster button on top of the menu (the brown cardboard box icon).
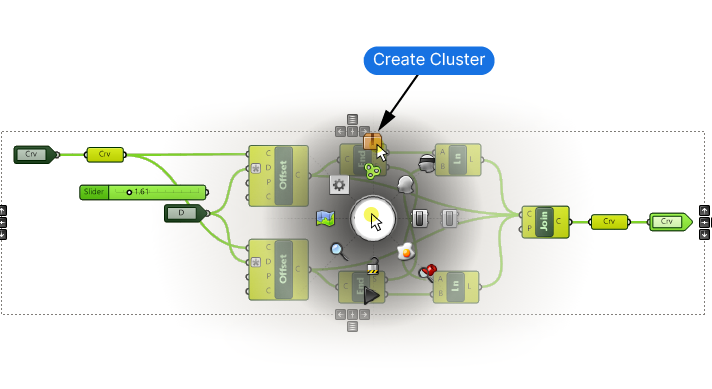
The script will shrink down to a single component (a “Cluster”). The inputs we defined in Step 3 are now the component’s inputs and outputs.

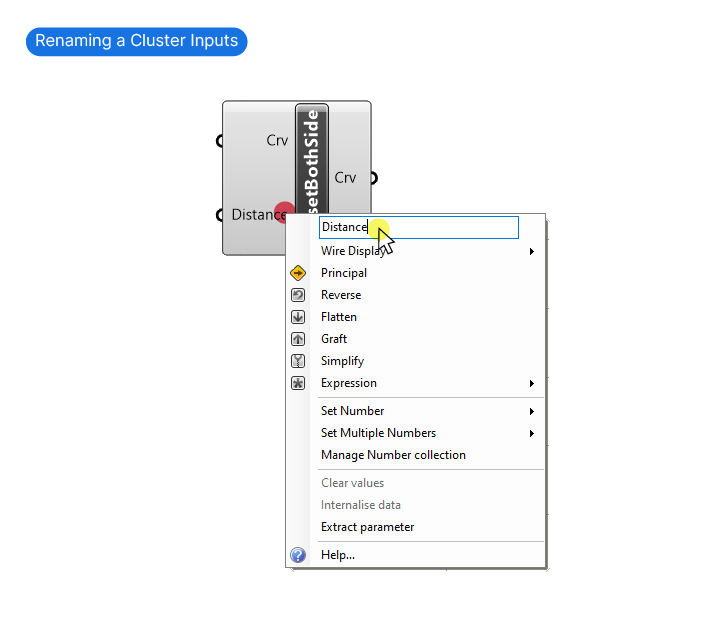
By default, the component will simply be named ‘Cluster’. Change the name by right-clicking on the component and typing in a new name in the top field.
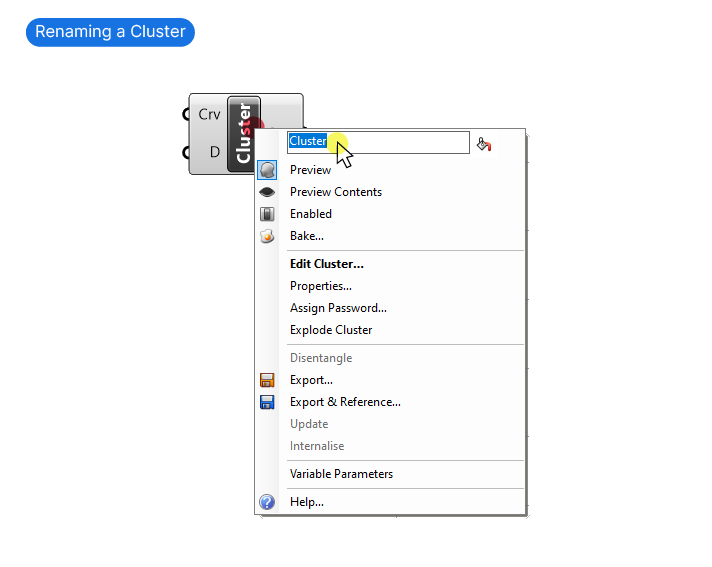
You can also change the input names to make them more readable. Once again right-click on the inputs and outputs and type the desired name into the top field.
That’s it! You’ve created a custom component!
Alternative Cluster Creation Method
There is a second way you can create a Cluster from an existing component sequence that can save you some time:
Simply select the components you want to compress into a cluster, but without the components that are providing the future components’ inputs and outputs.
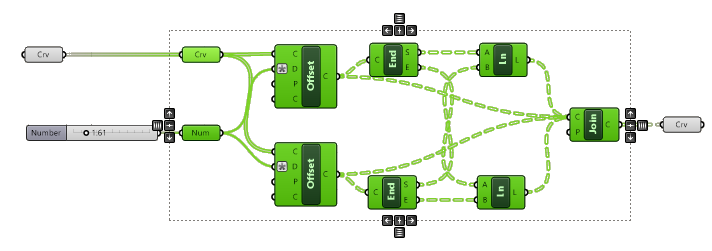
In essence all the green wires that go left and right of your selected components will become the inputs and outputs.
Once selected, repeat the final step of the standard cluster creation method: middle-mouse-click to open the Radial menu and select the ‘Cluster’ icon.
The main difference is that the former inputs will already be connected to the new Cluster component as shown below.
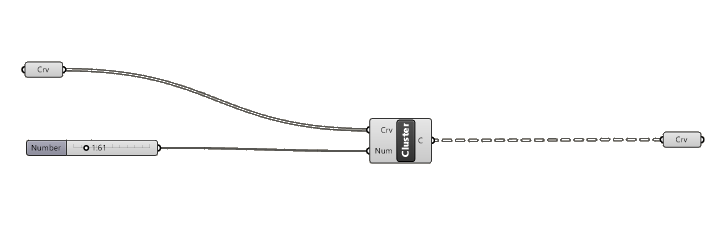
This method makes most sense if you are trying to compress a portion of a larger script since the existing wire connections will remain.
Note: For best results, add intermediate container components for inputs that are connected to two components in the cluster. In our example, the Number Slider would create two separate Cluster inputs although it’s the exact same data. Inserting a data container immediately after the Number Slider as shown above will solve this issue and result in a single component.
How to Edit Existing Clusters
The beauty of Clusters in Grasshopper is that they are not static like normal components: we can easily edit them. To edit a Cluster component, simply double-click on the Cluster.
A new Grasshopper script window will open showing a blue background and an open cardboard box icon on the top left.
You’ll see the exact script sequence you had before you created the cluster, but all of the context (any components before or after) will be gone.
It’s like a separate Grasshopper script living inside your main Grasshopper script.
You can make any changes to the cluster script, including adding and removing inputs and outputs.
Once you’re done, right-click on the cardboard box icon on the top left and select: Save & Close.

To cancel any changes made, select the Discard & Close instead. (Select ‘No’ if asked whether you want to save the Grasshopper file).
The ‘Return to Parent’ Option will switch back to the main script but keep this “subscript” open. I don’t recommend doing that since you might forget it’s open.
Managing Instances of Clusters in a Script
The real advantage of Clusters is that they behave like Rhino Blocks: Once you create a Cluster, any copy you make within the same Grasshopper script will be an ‘instance’ of that Cluster. This means if are using the ‘Offset to both Sides’ Cluster in multiple places in your script and you edit one of the Clusters and save, all of the Clusters will update!
If you create a copy of a Cluster, you can right-click on the component and check the ‘Disentangle’ Option. Here Grasshopper will show you whether there is other instances of the Cluster in the script. The number in brackets show the number of other same Cluster components are in the script.
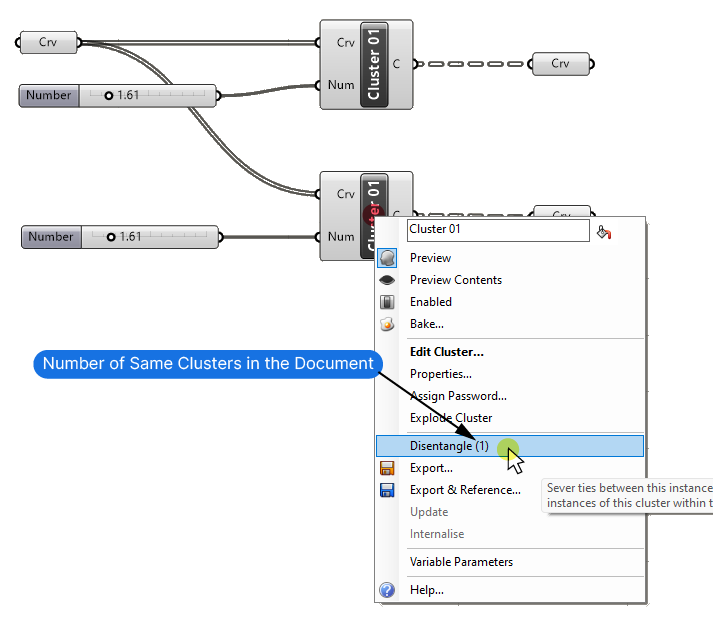
To create a separate copy of a cluster that you can edit without affecting the others, right-click on the component and select the ‘Disentangle’ option. This severs the ties to all the other Clusters and creates a new, unique Cluster.
Once ‘disentangled,’ you can’t reconnect the Cluster to its previous type.
If you disentangle a Cluster, make sure to change it’s name to make it immediately apparent that it’s different!
Saving a Cluster as a User Object for Re-Use
One of the added benefits of Clusters is that you can create custom components of script sequences you use frequently in your workflow. To avoid having to open one Grasshopper file to copy over a Cluster to a new file, you can Create a so-called ‘User Object’. This means that your Cluster or Custom Component will be stored in a dedicated component tab! You can create an entire collection of custom components to speed up your workflow.
Here’s how to turn a Cluster into a User Object:
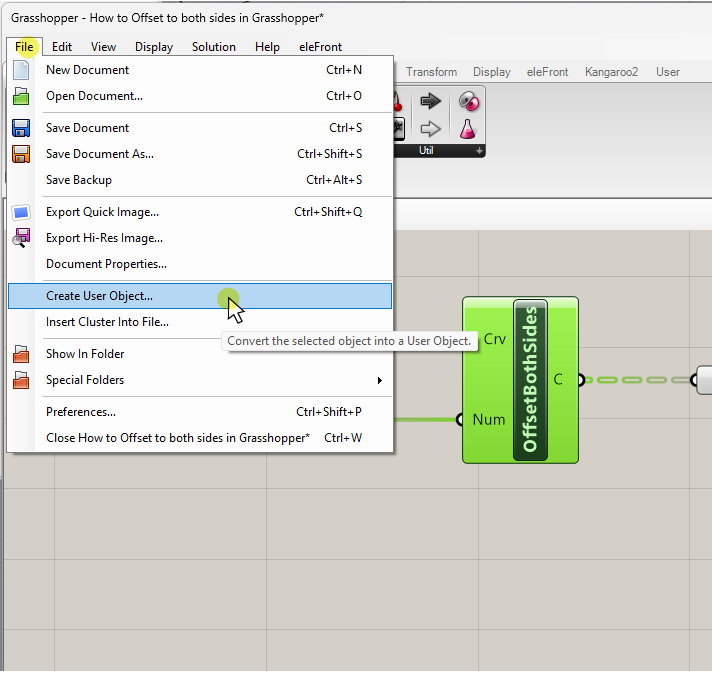
Select the Cluster component and go to File / Create User Object…
In the menu that pops up, we can change the name of the custom component, add a description and even define an icon.
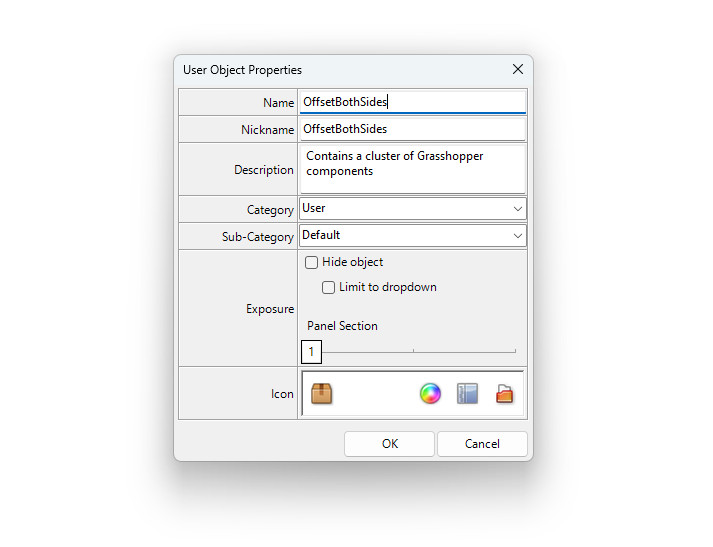
Once you confirm with ‘OK’, the custom component will be saved in a new component tab called ‘User’ that will be automatically added to component toolbar.
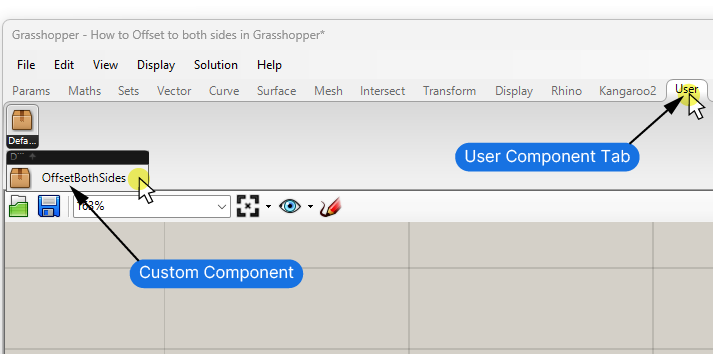
It will also appear in the component search bar if you type its name!
The component will live in the User tab from now on, even if you close the original Grasshopper file!
Concluding thoughts
While creating a Cluster in Grasshopper can be confusing at first, it can significantly boost your workflow once you know how to create them. Any Grasshopper user has certain component sequences that they use over and over again – a custom Cluster component can save you a lot of time!
I hope this guide inspired you to a custom component of your own!
Happy designing!