Are you looking for an efficient way to work with large and complex definitions in Grasshopper for Rhino? Look no further! In this tutorial, we’ll show you how to group components in Grasshopper and explain some common tasks that involve working with component groups. By the end of this tutorial, you’ll have a solid understanding of how to use component groups in Grasshopper to streamline your workflow and improve your productivity. We’ll also provide some tips and tricks for effectively grouping components in Grasshopper. So if you’re ready to learn more about how to group components in Grasshopper, let’s get started!
Quick Guide:
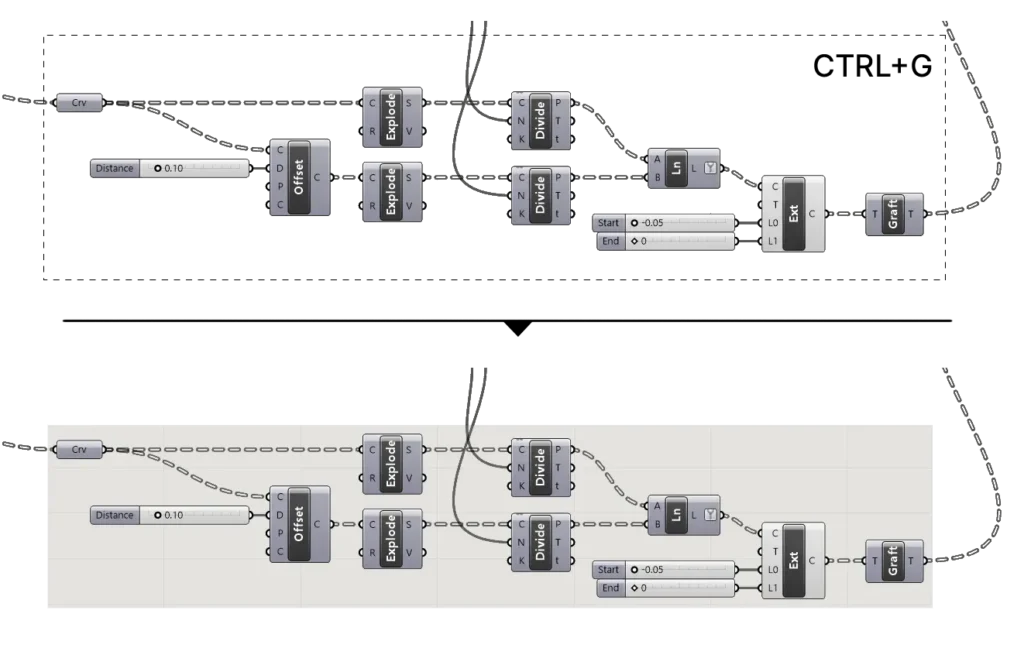
- Use the shortcut CTRL + G to group the selected components
- Right-click onto the group to find additional group options
Why group components?
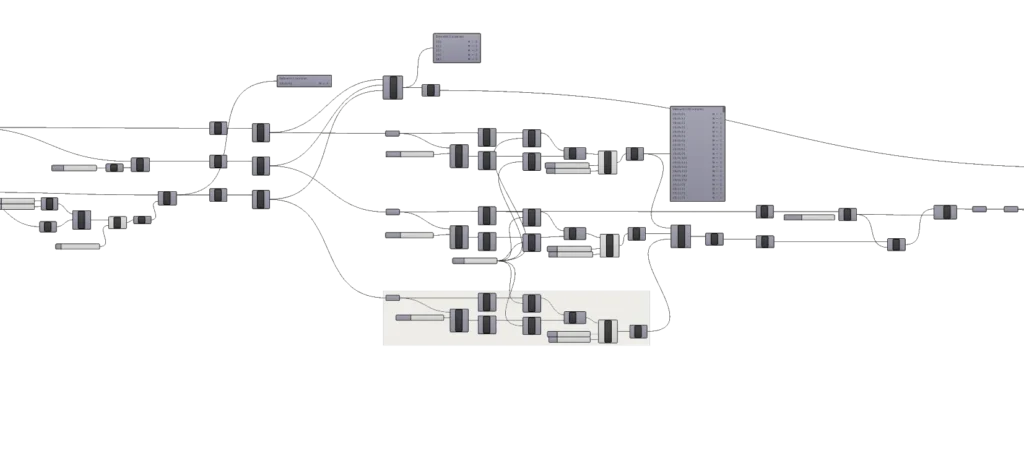
If you’ve been using Grasshopper for any length of time, you know all too well how quickly Grasshopper scripts can grow and how as it grows it can start looking like a spaghetti monster!
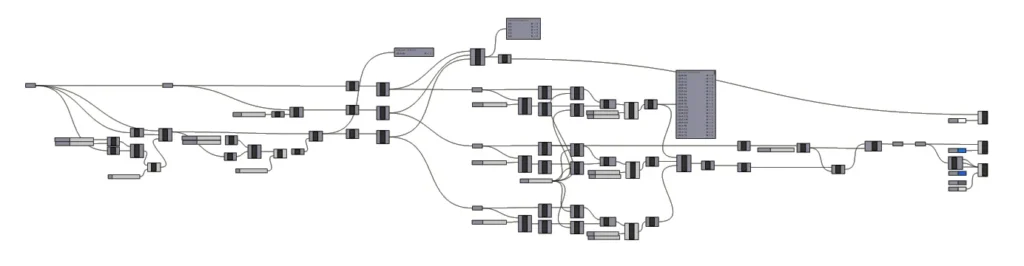
Working on such a script can get tricky, let alone revisiting it after a week!
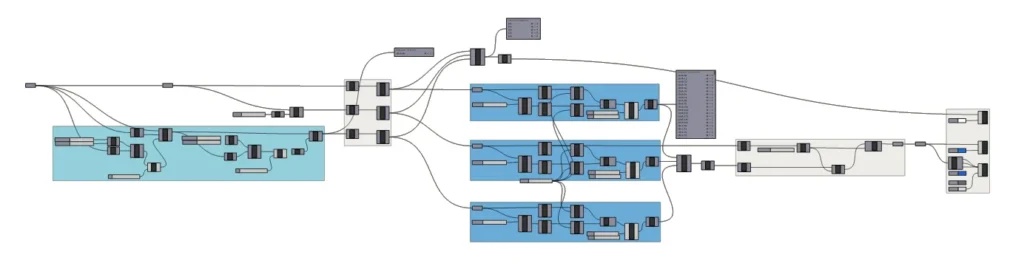
That’s why it’s a good idea to group sets of components. It’s best practice to group sets of components that are responsible for a particular subroutine of a script. That way it’s clear where components belong, and finding parameters and components will be much easier.
How to group components in Grasshopper
To group components in Grasshopper, select the components you want to group and hit CTRL+G on your keyboard. A semi-transparent bounding box box will now envelope the selected components.
The group will resize automatically if one or more of the components it contains are moved – the bounding box will update interactively.
Besides the benefit of creating graphical order on your Grasshopper canvas, you can also move components around much easier: by clicking anywhere in the group you can select the group and move all the components within it at once.
To delete a group, all you have to do is select the group by clicking anywhere into the semi-transparent group, and hit delete.
Adding/ Removing components from a group
Sometimes after re-organizing a script you notice that you included a component in the group that doesn’t belong there. You don’t have to delete the group and create a new one, you can add and remove individual components from a group.
To remove a component from a group, select the components to remove, then right-click anywhere into the semi-transparent group and select ‘Remove from Group’ in the dropdown menu. If the component is located within the bounding box of the group, nothing will change graphically, but if you move it outside the bounding box, you’ll see that the bounding box will change.
To add additional components to the group, select the components to add, then right-click anywhere into the semi-transparent group and select ‘Add to Group’ in the dropdown menu.
Naming groups
Grouping components is a big step forward from a complex script, but while it may be easy for you to orient yourself as you work on it, when you come back to it after a week or two, you’ll be wondering what exactly each group did!
That’s why it’s best to always name groups after creating them.
To name a group, simply right-click on it. In the dropdown menu that appears, click into the first field right at the top. This is the name field of the group.
You can add a short description about what the subroutine of grouped components does, for later reference.
The name will appear as a small text bubble on the center of the top border of the box outline.
The text will only appear when you are zoomed in quite closely. If you zoom out further, only the group outline will be visible.
Coloring groups
If you have a handful of groups in a large script, adding a descriptive name won’t help much since the name only appears when you are zoomed in closely.
To be able to tell the groups apart and highlight more important ones, you can add specific colors to individual groups.
To color a group, right-click into the group and click on the ‘Color’ button. A small color picker will appear. You can pick a color for the group, and even adjust the transparency of the group, with the bottom slider value.
Now finding groups in the script will be much easier.
You can also set a default color for any new groups, by selecting a group with a color you like, right-clicking on it and selecting ‘Make Colour default’ at the bottom of the dropdown menu.
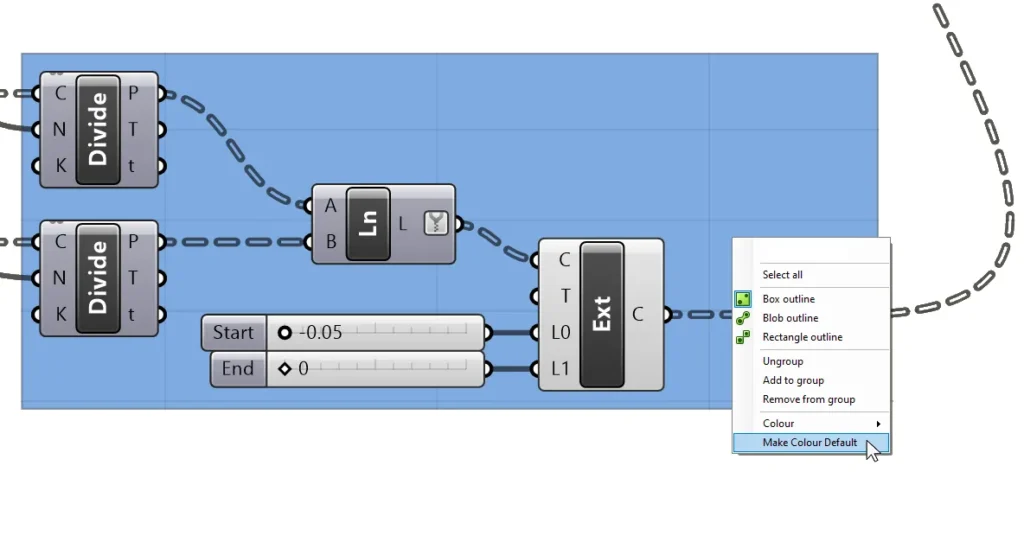
Any new group you create in that script or any future script, will have the same color.
Selecting all the objects in a group
You can select all the objects inside a group by right-clicking into the group and selecting ‘Select all’.
All components that are part of the group will be selected.
This is particularly helpful if you want to disable the preview of all the components in the group. Instead of selecting them manually, you can select them through the group. Once selected you can middle-mouse-click and toggle the disable preview button.
Group outline options
Grasshopper offers three different kinds of graphical display styles for groups, defined by their outlines. We can choose between:
- Box outline
- Blob outline
- Rectangle outline
We can access the different outlines styles by right-clicking anywhere into a group – small green icons show a preview of their graphical display style.
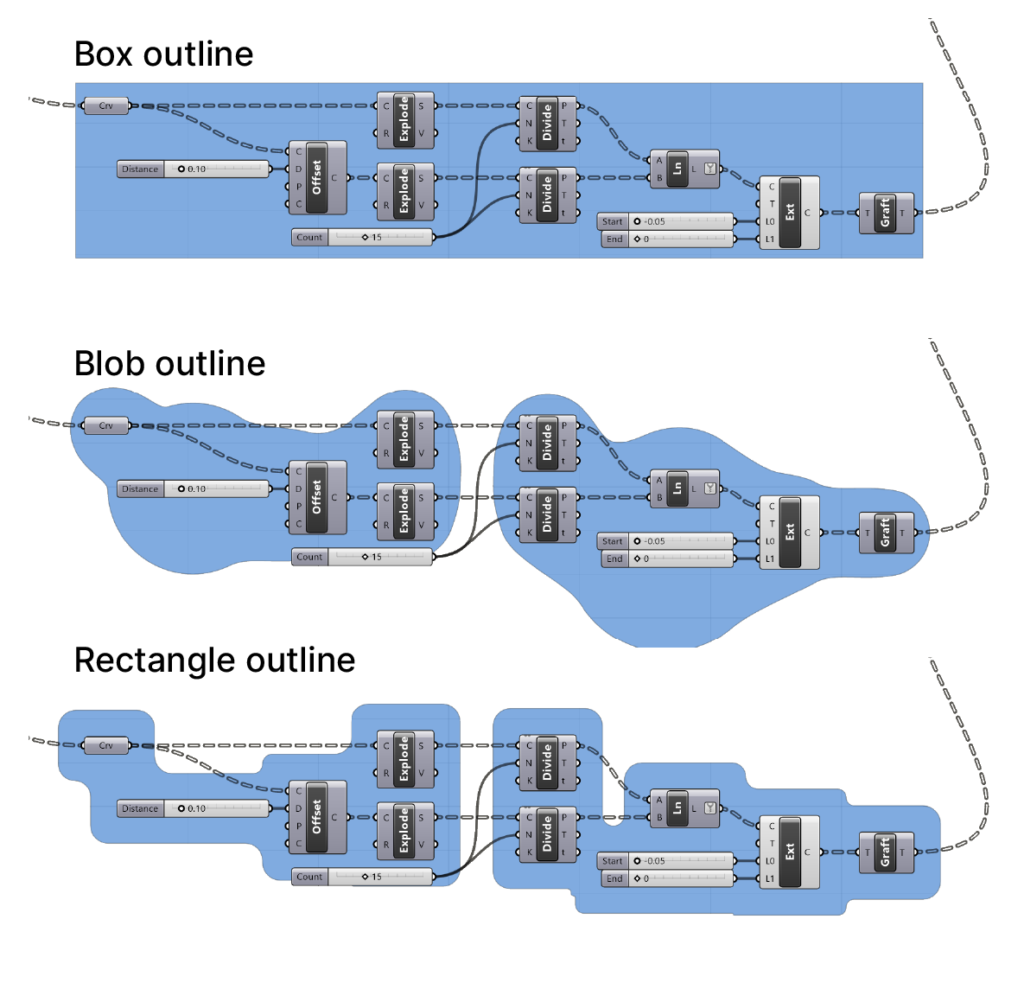
While the box outline clearly marks which components belong together, the blob and rectangle outline create organic shaped or rectangular bubbles around all the individual components in the group. These bubble will ‘grow together’ if they are in close proximity, and they will retain the same group color. If the bubbles are separated, each bubble will get its own name tag bubble, showing the group’s name or description.
Conclusion
In conclusion, grouping components in Grasshopper can greatly improve your workflow and make your scripts easier to understand and navigate. By grouping components in your script, you can make sure that the script remains readable and re-usable for yourself and others in the future.
You can also add and remove components from a group, and name and color the group to help identify its purpose. By following these tips, you can use component grouping to keep your Grasshopper scripts organized and efficient.
If you want to fast-track your way to mastering Grasshopper, check out Grasshopper Pro, our 6-week online training program specifically made for architectural designers in professional practices.
Stay hopific!