The most important feature of a parametric script is the ability to intuitively interact with its output. While number sliders are a great way to control a script, modifying geometry directly inside Rhino and seeing the script do its magic brings your design control to another level. To do that we need to create a live-connection between Rhino and Grasshopper. In Grasshopper this kind of connection is called a ‘Reference’. In this article we’ll go in-depth on how to reference objects in Grasshopper!
Let’s get started!
Using Data Containers to Reference Geometry
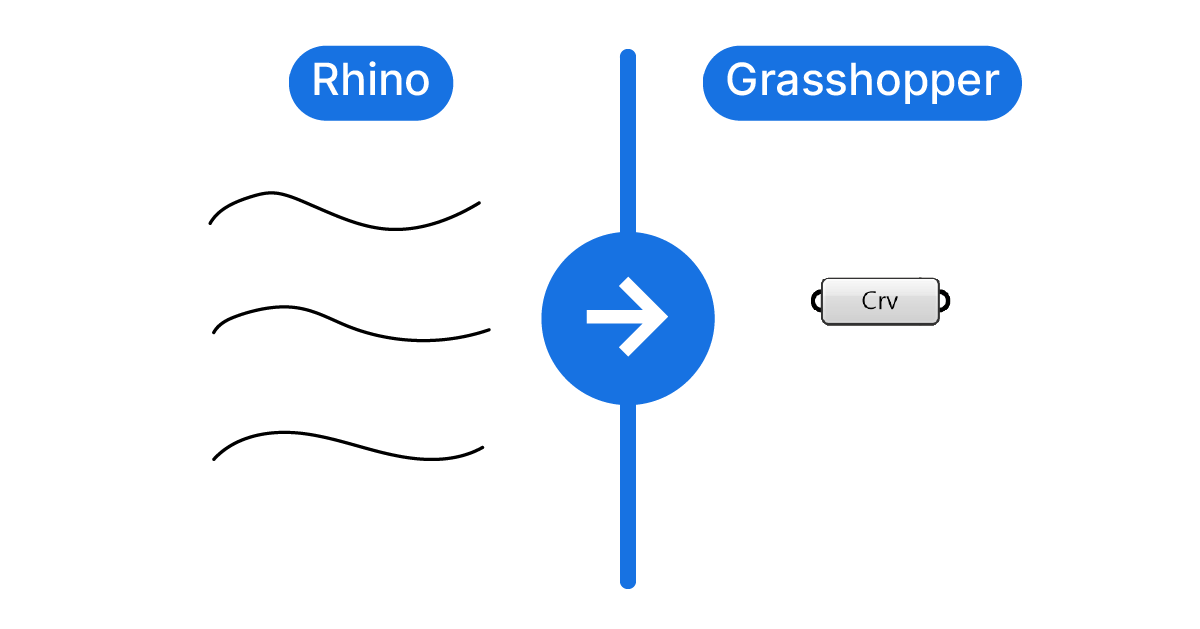
Referencing geometry means that we’ll create a live-link between actual geometry in our Rhino file and our Grasshopper script. If we move the geometry in Rhino, Grasshopper will pick up on it and update the script accordingly.
Referencing geometry is oftentimes the very first step of a Grasshopper script. To establish the connection between geometry in Rhino and Grasshopper, we need to use Data Containers.
You can find them in the first component tab called ‘Params‘ in the first group called ‘Geometry‘.
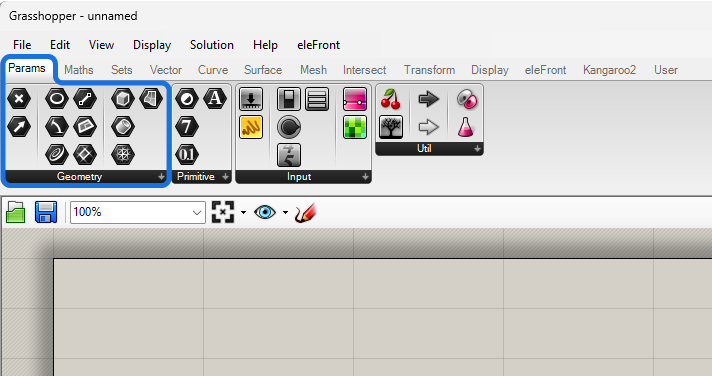
All the components in this tab with the black hexagon icon are data container components. These components don’t create or modify geometry, they just store it for us. There are data containers for all geometry types as well as for numbers and text.
I’m going to use a curve container in this example.
By default the component will appear orange, which is Grasshopper way of letting us know that something isn’t quite right.
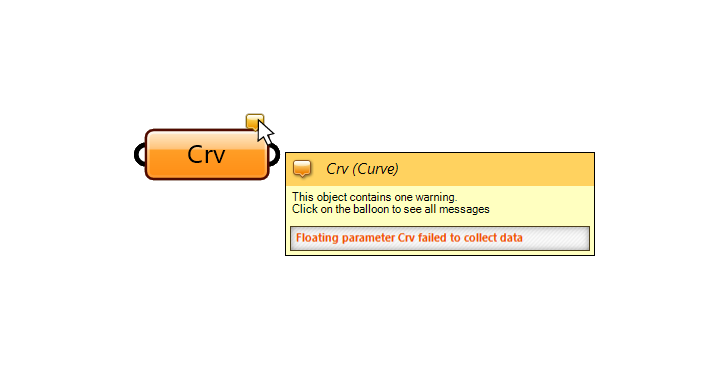
By hovering over the orange bubble on the top right corner of the component we can see what’s wrong. The tooltip says “Parameter Pt failed to collect data” – in other words – there is no input.
By default these components are ’empty’. But we can plug in geometry we created with other components, or we reference geometry directly from the Rhino document.
How to Reference Objects to a Data Container
To reference objects in Rhino, first we need to make sure that we are referencing the object to a matching container. We can’t reference a curve to a point container for example.
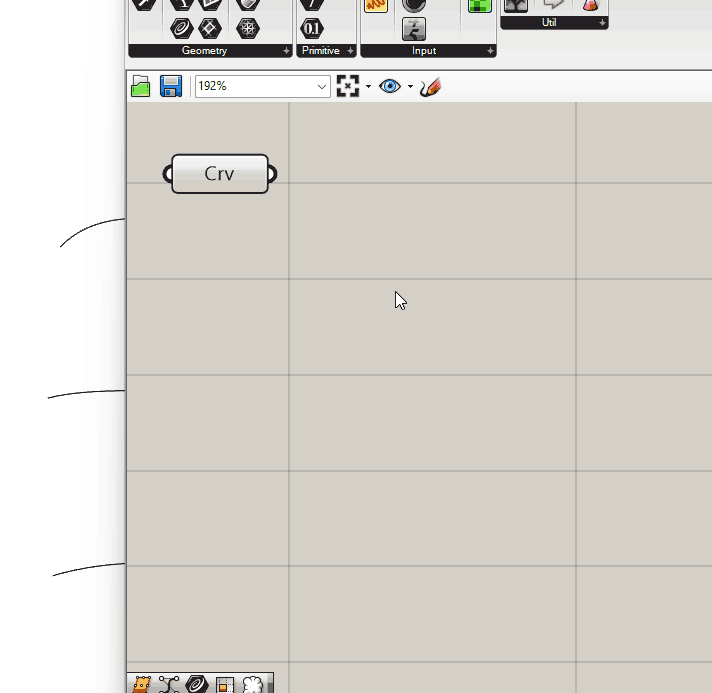
To reference a curve to a curve container, as shown below, right-click on the container component and select either ‘Set one Curve‘ or ‘Set Multiple Curves‘.
The wording will differ for each geometry type, but the logic remains the same.
As the names suggest, you can select single but also multiple objects to a single data container. If you select several objects, they will be stored in a list.

Don’t be surprised when the Grasshopper window disappears as soon as you select one of the two options. Grasshopper minimizes itself on purpose, to clear the screen so you can select objects more easily in Rhino.
If you selected ‘Set one Curve’, and you made your selection, the Grasshopper window will show up again, and the reference has been created.
If you selected ‘Set Multiple Curves’, select all the curves you want to reference and then confirm with with a right-click or by hitting ‘Enter’. Only then the Grasshopper window will be shown again.
Tip: Keep in mind that when selecting multiple objects, the order in which you select them in Rhino, is the order they will have in the list in Grasshopper!
The curves are now successfully referenced!
If we move any of the curves, the curves in Grasshopper will immediately be updated as well. The live-link has been created.
What Happens to the Referenced Object in Rhino?
Keep in mind that even if the reference objects in Rhino are hidden, or on a layer that is turned off – they will still be referenced in Grasshopper. Their preview will remain visible in the Rhino viewport unless we turn off the Grasshopper preview.
While hiding the referenced object has no effect in Grasshopper, as soon as you delete the referenced object in Rhino, the live-link is deleted. When that happens, the data container component will turn orange again.
Behind the scenes, Grasshopper references the unique object ID of the referenced curve in Rhino. If you want the same curve to be referenced next time you open your script, make sure that you also save the Rhino file.
From the point in time when you reference geometry, you should always keep track of which Grasshopper file belongs to which Rhino file.
Adding and Removing Referenced Objects
You can manage the objects referenced to a data container by right-clicking on it and selecting ‘Manage Curve Collection‘.
A menu will pop up showing all the currently referenced curves.
From here, you can add or remove curves from the container, with the green and red icon respectively.
Advanced Tip: You can even define branches within the referenced objects. To that, click the ‘first ‘Add Path’ icon (the curly brackets containing a plus symbol). You can then drag-and-drop the existing referenced objects to the branch of your choice.
Referencing Objects Directly in Component Inputs
While data containers are the most common way of referencing objects, Grasshopper actually allows to reference objects from Rhino directly in the component inputs. Let me show you what I mean:
By right-clicking onto the input, for example the ‘Curve’ input of the Loft component, we can reference objects just like we would in a data container. That way we don’t need to connect an extra component.
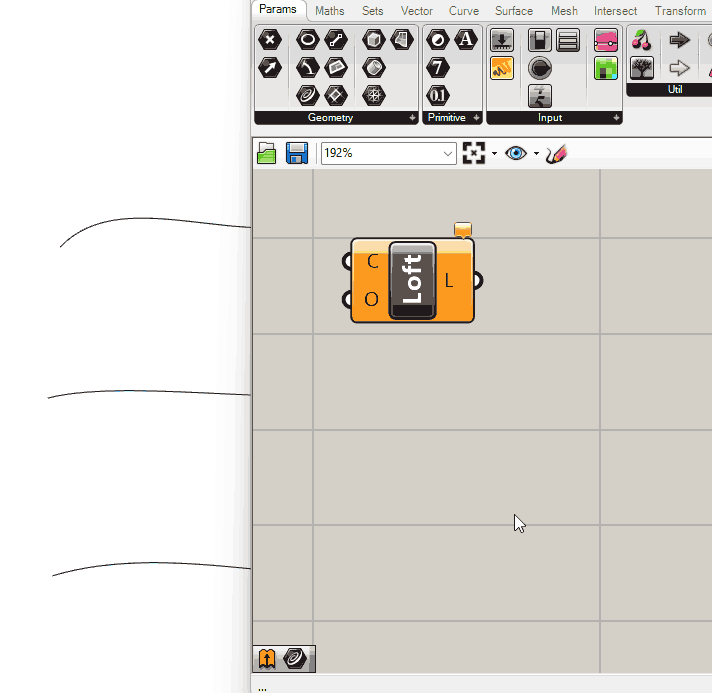
The drawback of this referencing method, is that it’s not immediately apparent in which component you referenced geometry.
Tip: To make it easier to spot where the Rhino – Grasshopper connection is in the script, group the referenced data container and give it a distinctive color, for example red. This way, if you need to use a Grasshopper script within another Rhino file, you’ll know which inputs you need to reference for the script to work.
How to Internalize Referenced Objects
In some cases you don’t want to open a particular Rhino file in order for your script to work. If you need to reference an object, but won’t need to change it in the future, Grasshopper gives you the option to save the actual geometry inside the container. The live-link will be removed, and you may even delete the originally referenced object in Rhino.
To do this, first reference the geometry from Rhino normally, then right-click on the data container and select ‘Internalize data’. The geometry is now stored inside the container component.
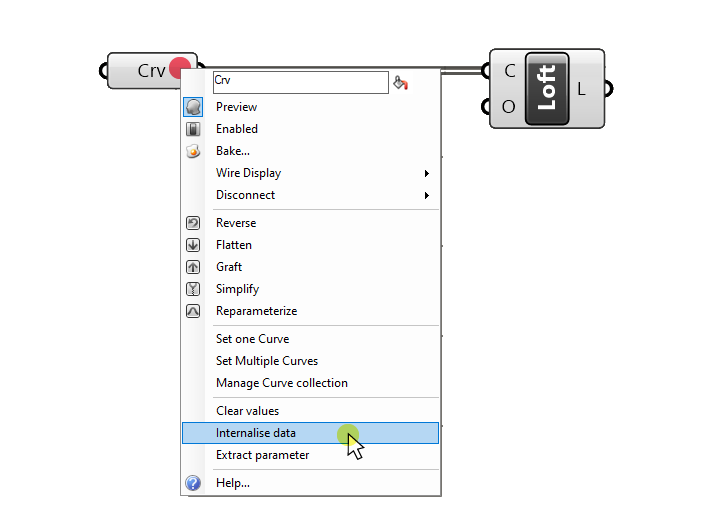
Keep in mind that this might make your script slow if you are internalizing a lot of data or if it is a complex geometry (for example a polysurface). In addition, the file-size of the Grasshopper script will increase as well.
The Bottom Line
In conclusion, referencing objects in Grasshopper bridges the gap between Rhino geometry and parametric design in Grasshopper, allowing us to create dynamic, interactive designs.
New to Grasshopper and you want to improve quickly? Enroll in our free mini course, “Getting Started with Grasshopper,” and unlock the full potential of parametric design in your architectural practice.
Start your Grasshopper journey today and unleash your creativity!
Happy designing!