If you’re looking to master sorting in Grasshopper, you’re in the right place. This tutorial will teach you how to use the Sort List component in Grasshopper, clarify the concept of parallel sorting, and show you how to apply it effectively in a step-by-step tutorial.
How the Sort List Component Works
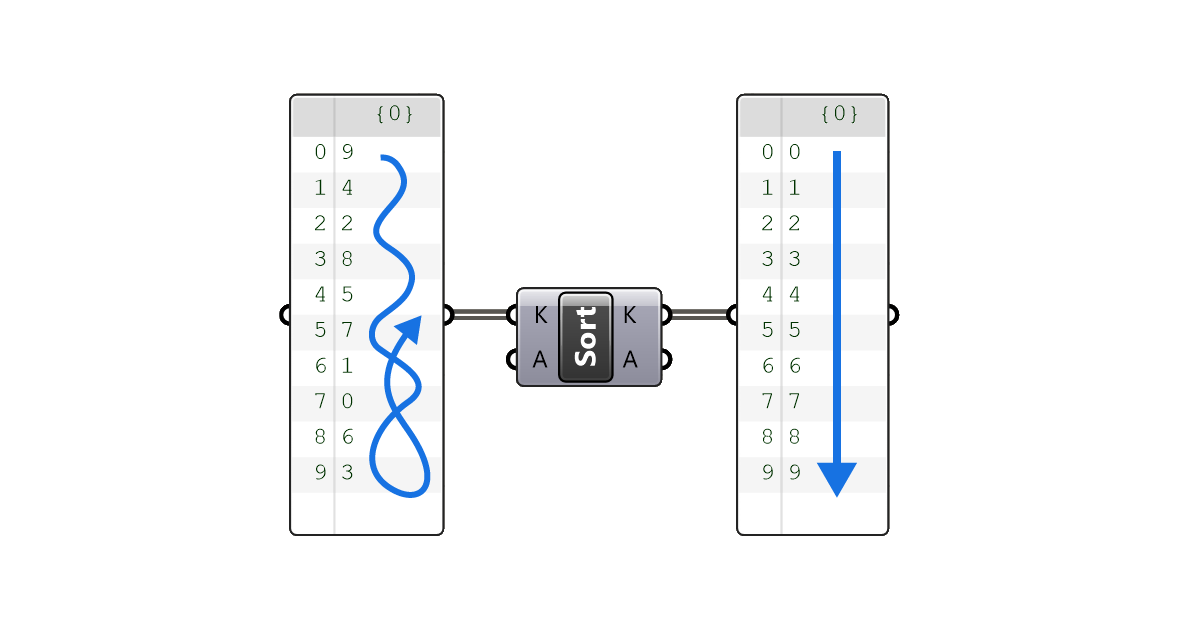
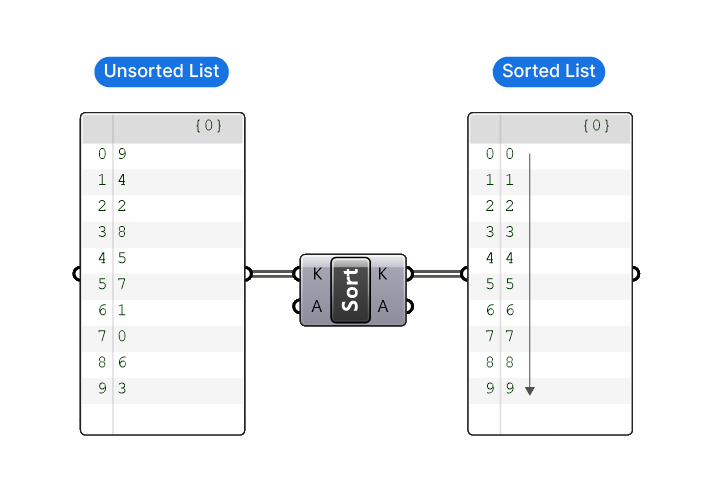
The Sort List component takes any list of numbers and sorts it to go from the smallest to the largest value. In the example below, a list of randomized numbers is sorted to go from 0 to 9.
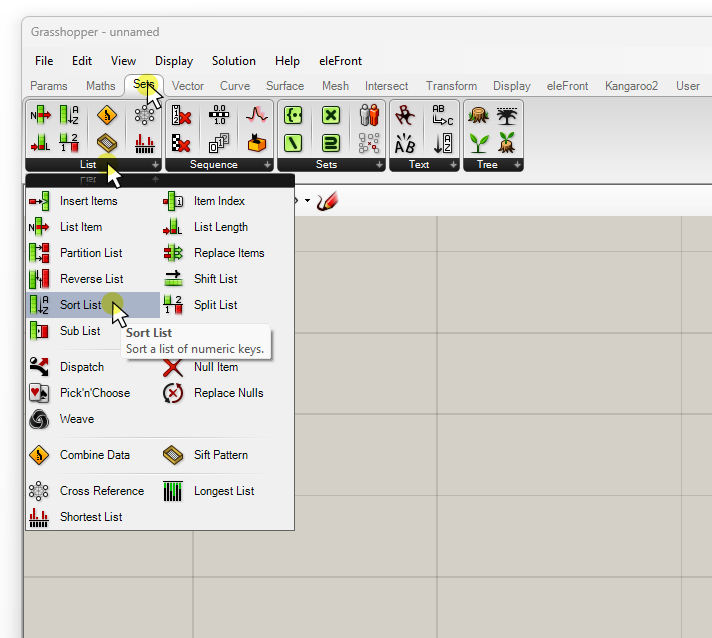
Let’s take a closer look at the ‘Sort List’ component. You can find it in the ‘Sets’ component tab, grouped under ‘List’.
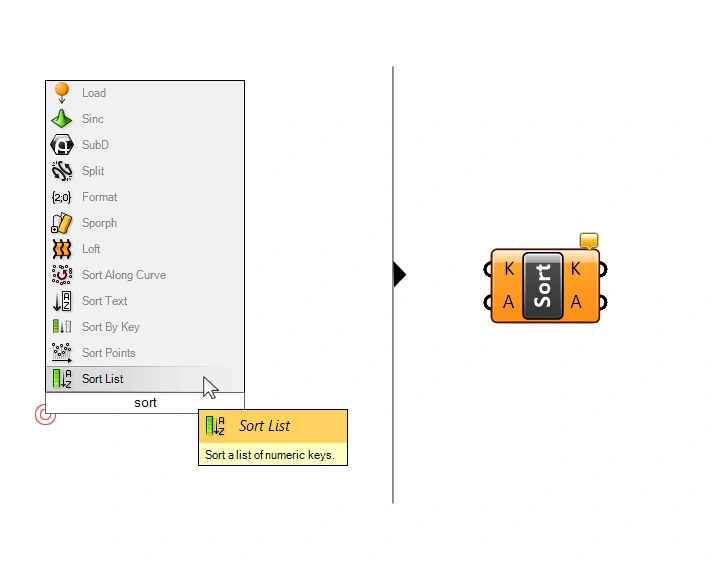
If you prefer to add components with the component search bar, simply double-click anywhere on the canvas, type ‘sort list’, and click on the first result.
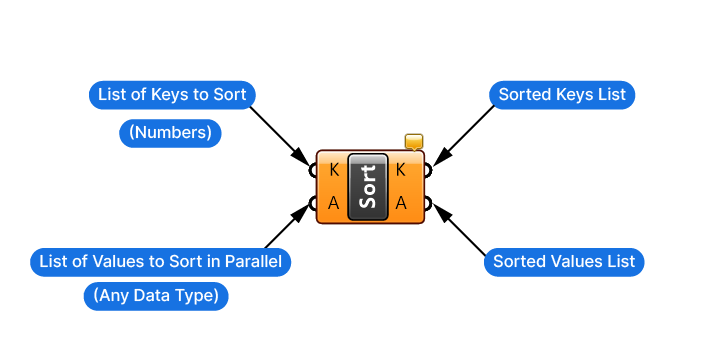
Sort List – Inputs and Outputs explained
The Sort List component in Grasshopper has two inputs. The ‘Keys’ (K) input is for the numerical list you wish to sort. This input takes numbers only. Below this is the ‘Values’ (A) input, which accepts any data type, not just numbers.
Now, what is the purpose of this second input (A)?
This is best explained with an example: say you are trying to sort a list of objects, and not numbers. You probably ran into the issue that the Sort List component only takes numbers as an input. So how can you sort other objects? This is where parallel sorting comes in.
The Values (A) input will be reorganized/sorted following the same order of the sorted Keys. (More on how this works in the next section.)
The Sort List component also has two outputs which align with the inputs on the left: whatever list we connected on the left, is returned, sorted, on the right.
The crucial thing to understand here is that only the Keys (K) input is the one being sorted. The Values (A) input list is going to be sorted ‘in parallel’, regardless of the value or content of its items.
Understanding Parallel Sorting
Let’s dive a bit deeper into parallel sorting. Parallel sorting involves two linked lists: we sort one list and simultaneously rearrange the other to maintain their linkage.
Now let’s unpack that using a simple example:
Imagine you have two lists: one with curves and another with the curves’ corresponding length.
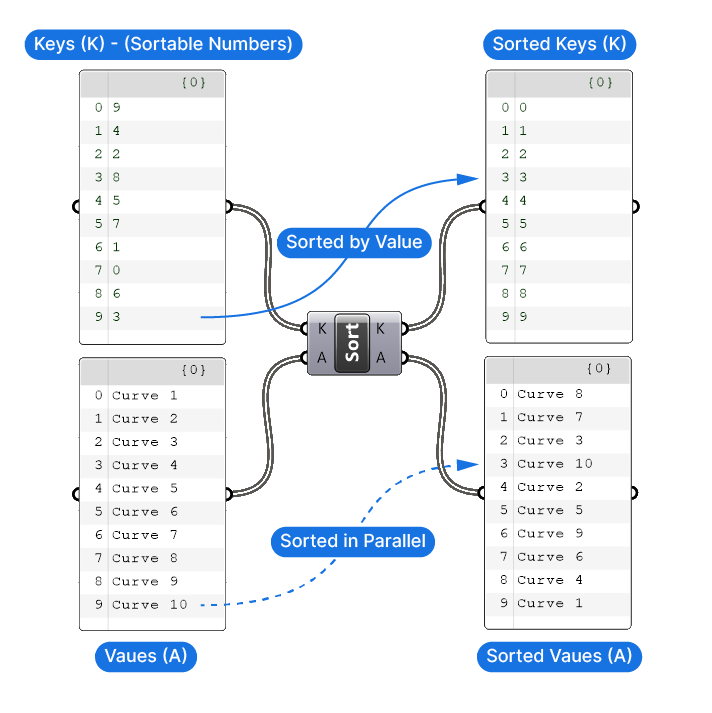
Now, suppose you want to sort the list of curves by length, so the shortest curve comes first. Parallel sorting in this context means that as you rearrange the list of curve lengths, you also rearrange the list of curves in the same order. So, if a curve that was originally in the last position in the curve list corresponds to a curve length that moves to the fourth position in the curve length list, you move that curve to the fourth position in the curve list as well.
In short, parallel sorting here means sorting one list (the numerical one) while simultaneously rearranging the second list to maintain the original pairing between the two lists. This way, you keep the relationship between the numbers and their corresponding items intact.
The only requirement for this to work is that the ‘Values’ (A) list must be the same length as the ‘Keys’ (K) list. The reason is simple: the second list will be rearranged in tandem with the first, but to do that the lists need to have the same length!
Enough theory! Let’s see what this looks like in practice in the following step-by-step tutorial!
Tutorial: Sorting Surfaces by their Z-value
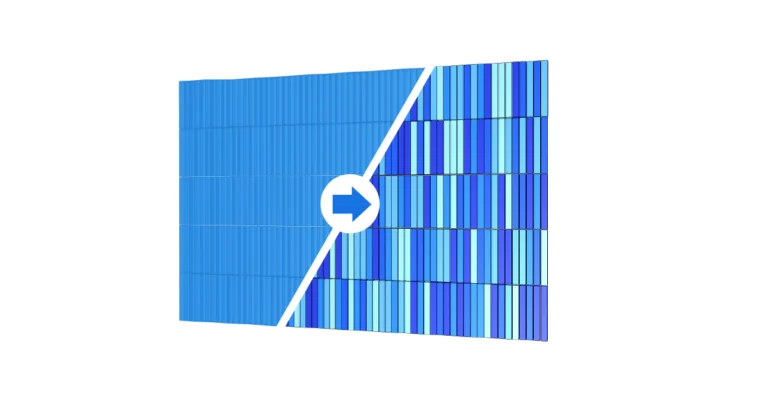
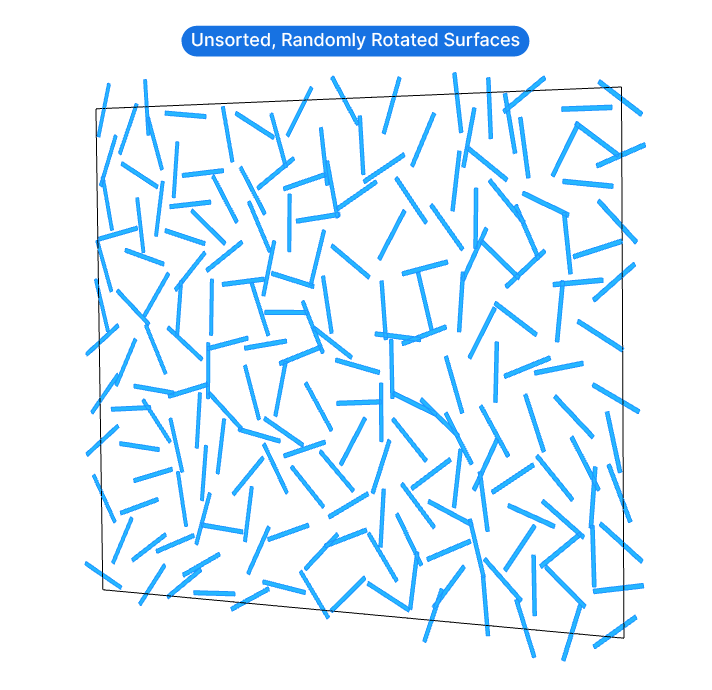
In this tutorial we’ll use the Sort List component’s parallel sorting ability to sort a list of surfaces in Grasshopper. Let’s say we’ve generated randomly rotated surfaces. Now, our goal is to sort these items vertically. That allows us to, for example, select only a subset of them based on their height.
Basic Script Setup
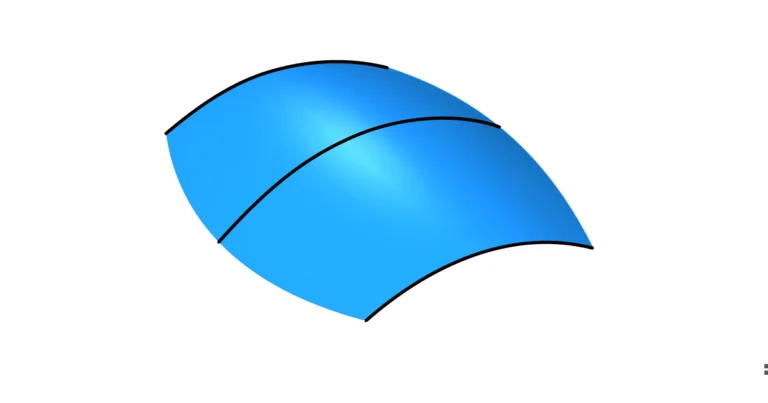
For the purposes of this tutorial I randomly populated a vertical surface with points and generated randomly rotated, elongated surfaces based on those points. A Surface (Srf) container component containing this geometry will be the starting point for this tutorial.
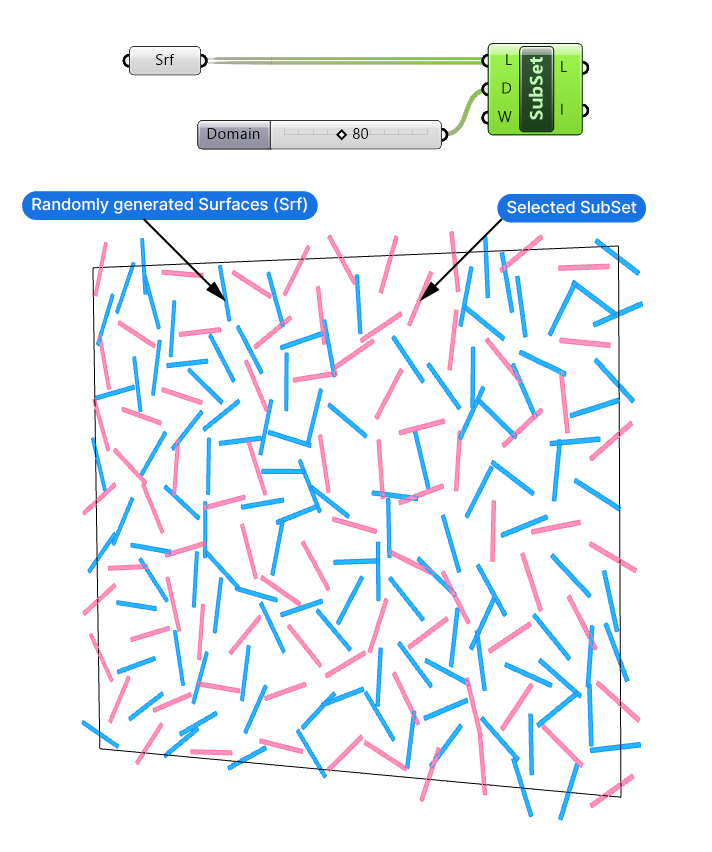
In the end we’ll want to select a subset of these items, so let’s already add a ‘Sub List (SubSet)’ component, and connect the surface container. I’ll add a Number Slider with a range of 0 to 200, and a value of 80, and plug it into the Domain (D) input of the Sub List component. This domain specifies the range of indices of the items to select. A value of 80 will select the items with the indices ranging from 0 to 80.
As you can see below, the Sub List component does in fact select the specified amount of objects, but the selection is completely random, because the list is unsorted. Let’s fix that!
Extracting the Surfaces’ CenterPoint
Since this list we want to sort contains surfaces, we won’t be able to sort it out of the box. We need to extract a numerical property from the surfaces that we can use to do the sorting. The easiest way to sort objects vertically, is to use the objects’ z-Coordinate. To get a single z-value for each object, we need to extract a point from each object that we can use as reference point.
There are several ways to generate a representative point for each surface, one is to use the ‘Area’ component. Double-click on the canvas and type ‘area’ into the component search bar to find it. This component outputs the Area (A) of the surface, but more importantly its Centroid (C) or the object centerpoint. We’ll use the z-Coordinate of these centerpoints to do the sorting.
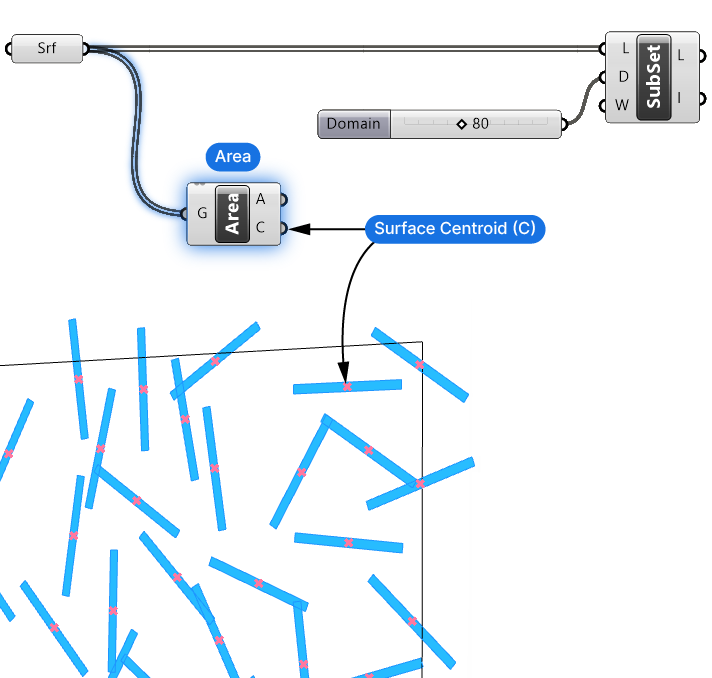
Now we have a representative point, but a point is still not a data type that our Sort List component can sort, since it’s made of three numbers (x,y, and z-values). So let’s go ahead and extract just the z-coordinate value of each point.
Extracting the Z-Coordinate Value from the Points
To do so we’ll need a Deconstruct Point component. Add it by double-clicking onto the canvas and typing ‘deconstruct’ and selecting the component.
I’ll connect the Centroid (C) output to it. We now get all the z-Coordinate values of these points in the Z output.
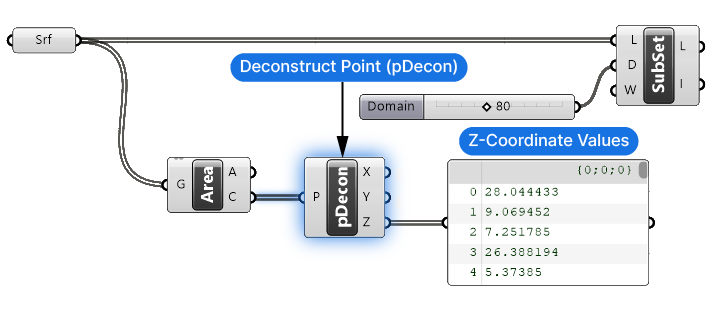
Now that we have a list of numerical values that we sort, it’s time to add the Sort List component.
The numbers we want to sort are the z-values, let’s connect them to the Keys (K) input. The list we want to sort in parallel is the surfaces themselves, so let’s connect them to the Values (A) input.
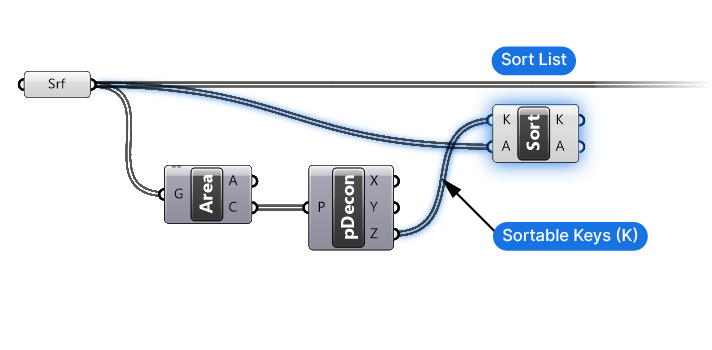
The ‘A’ output of the Sort List component now contains the surfaces, sorted vertically from smallest to largest. We can now connect this sorted list to the Sub List input and alas, the surfaces are now sorted by height and we are now selecting the first 80 surfaces starting from the bottom!
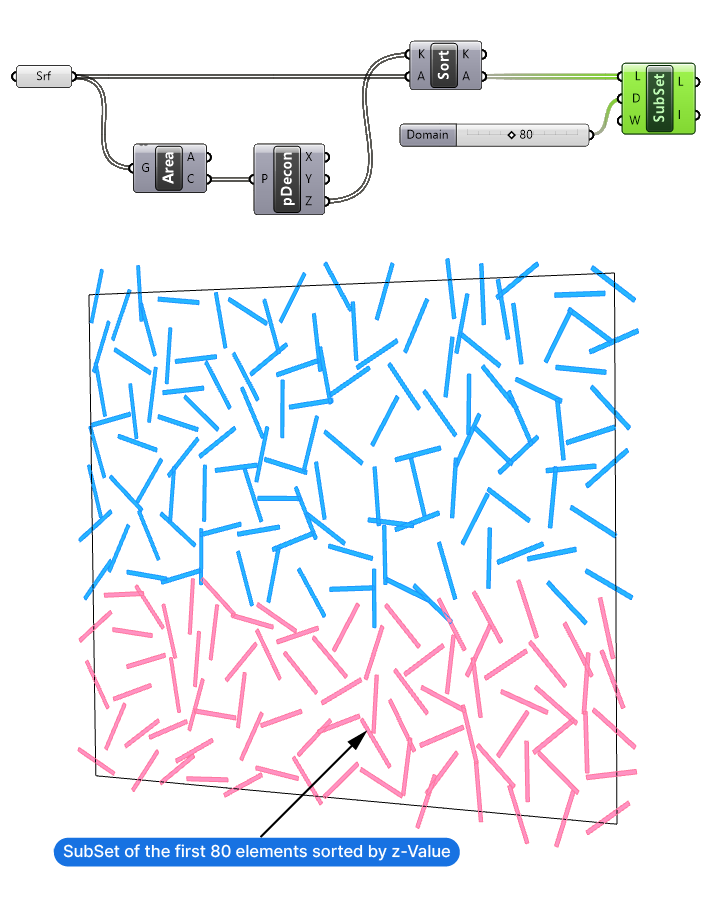
Sorting Multiple Lists in Parallel
In practice, sorting isn’t always about just two lists. Sometimes, we need to sort several lists in parallel. To sort more than one list in parallel, zoom in on the inputs of the Sort List component. A small plus sign will appear – hit the ‘plus’ symbol to add as many additional inputs as needed. With each input, Grasshopper creates a dedicated output of the same name.
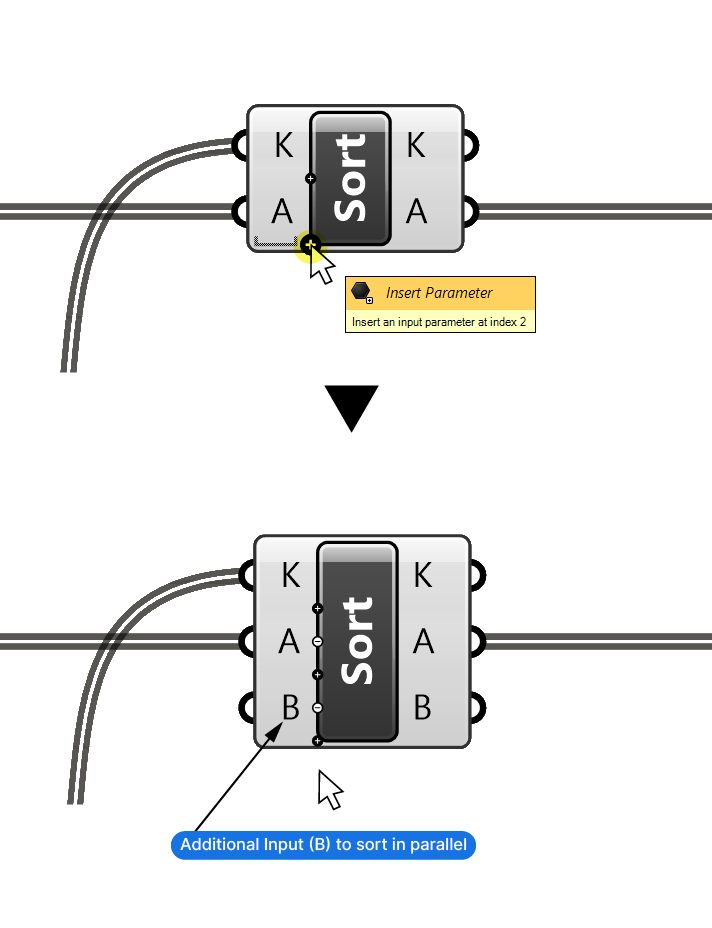
Even with more inputs, the Keys (K) input remains the only list driving the sorting order. All the following inputs and outputs (Values (A), Values (B)) are sorted following that order.
Sort List in Grasshopper – Final thoughts
Parallel sorting is one of those tricks that unlock a lot of potential in your Grasshopper scripting. I hope this short guide on the Sort List component in Grasshopper helped you understand how it works and that you are now empowered to use it in your scripts!
Remember, parallel sorting is not limited to Z-values: any numerical value extracted from the objects you want to sort can be used to do the sorting. The possibilities here are literally limitless! It could be the area of a surface, the length of a curve, pretty much anything!
If you’ve found this guide useful and you want to fast-track your way to Grasshopper mastery, check out my online course Grasshopper Pro – which provides you with a step-by-step guide to mastering Grasshopper in two weeks.
Happy designing!

