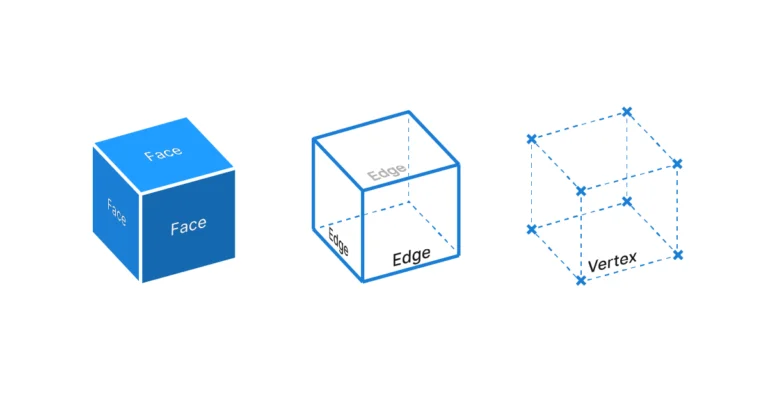
As much as design is about shapes, at some point it becomes about numbers. The Mass Addition component is perhaps the most useful math operator available in Grasshopper. The component takes a list of values and returns the sum. But it doesn’t stop there; it also provides partial results for each addition.
In this guide we’ll cover the basics of this powerful component and show a practical application example!
Let’s dive in!
Adding the Mass Addition Component
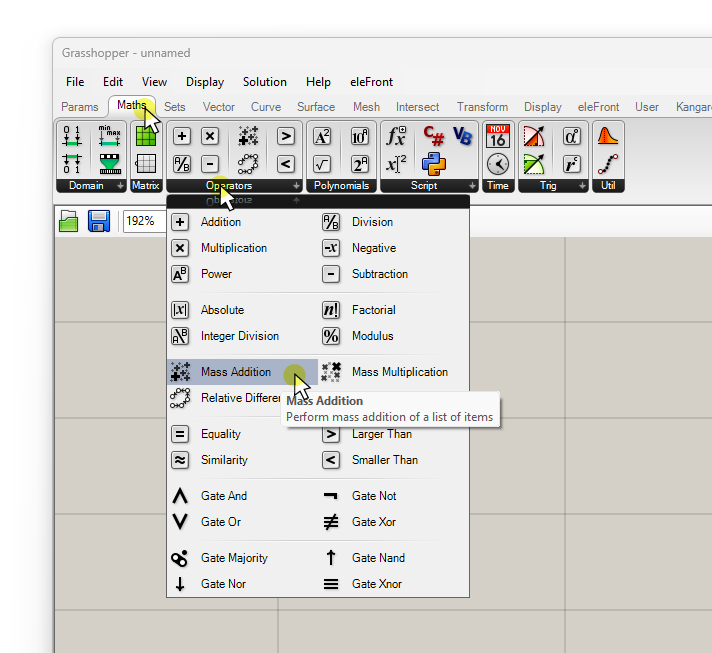
You can find it in the ‘Maths‘ component tab, in the ‘Operators‘ group. Select it and click anywhere on the canvas to add it to your script.
If you prefer to use the component search bar, simply double-click on the Grasshopper canvas where you want the component to be placed, and type “mass addition” into the search bar. Then click on the first result to add the component.

Mass Addition Outputs: Result and Partial Results Explained
Let’s take a look at the component inputs and outputs. The only Input (I) accepts any list of numbers. These will be the numbers the component adds up.
On the right we get two outputs: The Result (R) contains the sum of all the values we provided. Keep in mind that data structures still apply, more on that in a later section. If we provided a single list of numbers, the output will be a single number.
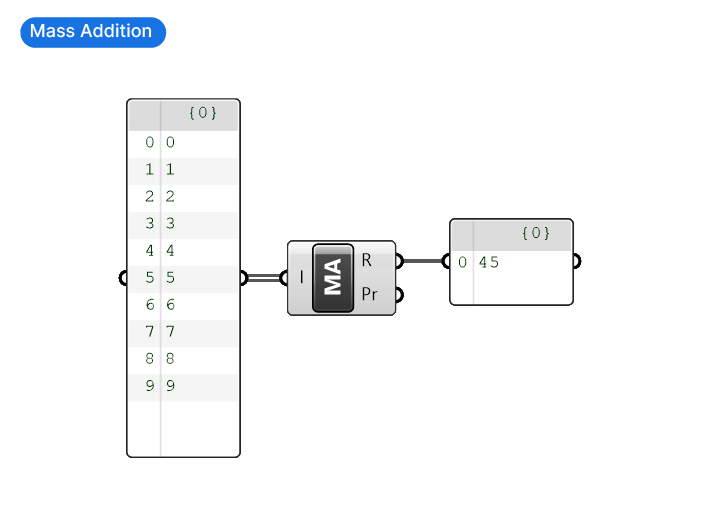
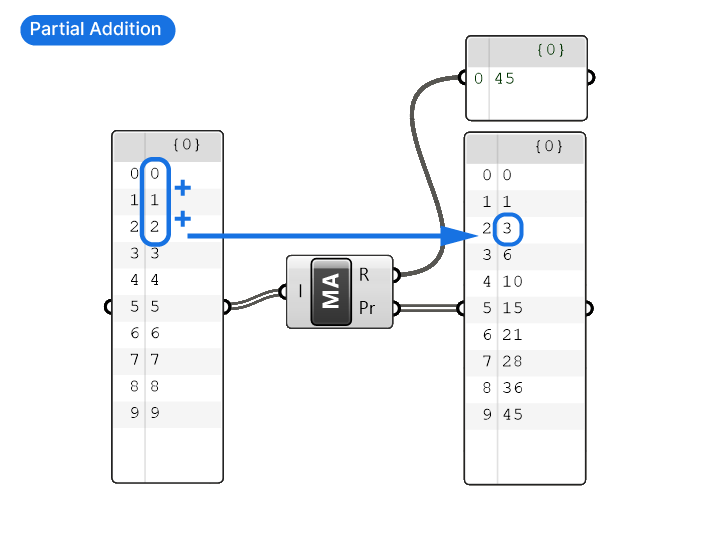
The second result called ‘Partial Results’ (Pr) contains every intermediate steps of the mass addition. This is best explained with an example. In the simple script below I created a list of 10 consecutive numbers, provided in a Panel. The partial result output has as many values as the input list. Each value represents the sum of all numbers up to its corresponding index in the original input list. Highlighted below, the Partial result on index 2 (which is the third item in the list, since lists in Grasshopper start at 0) equals 3, the sum of the three values up to index 2 of the original list: 0, 1, and 2.
The final partial result matches the sum or ‘mass addition’ of all the items in the list (45), as can be seen below.
Now let’s see the component in action to understand how it can be used!
Step-by-Step Tutorial: Mass Addition of Floor Areas
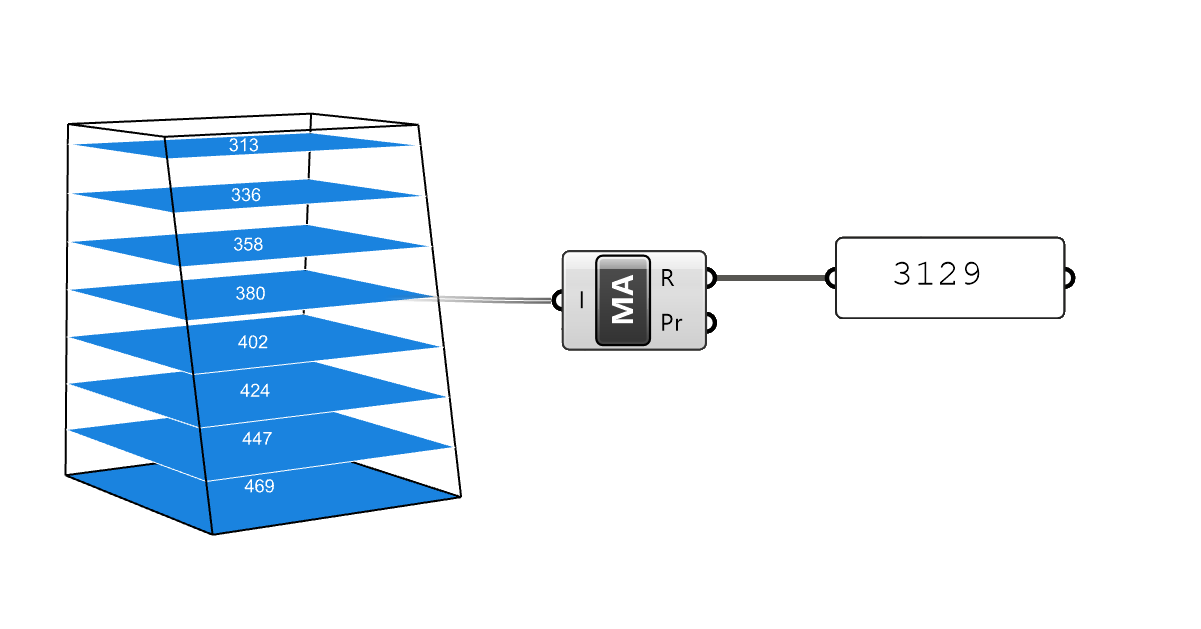
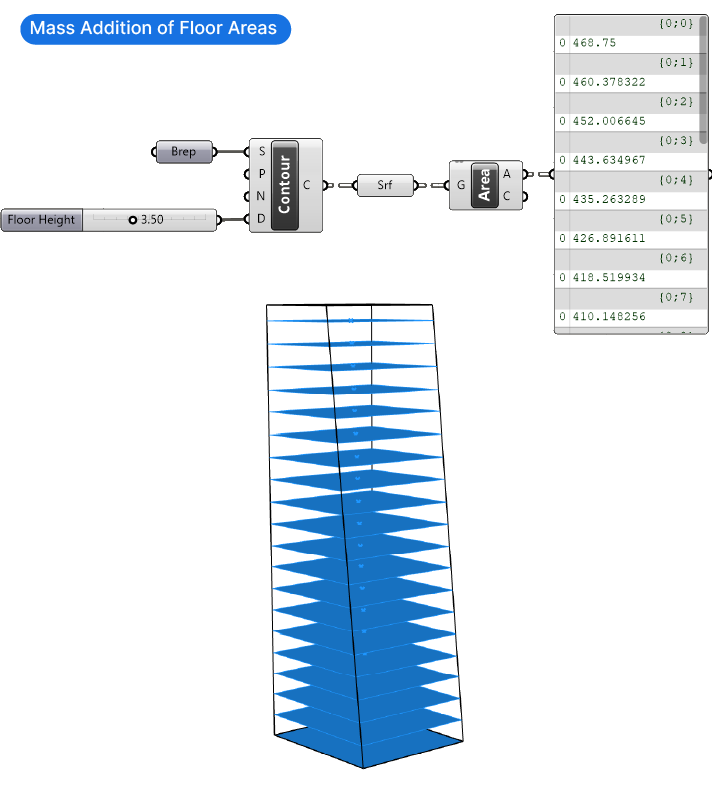
Let’s say we have a script where we create floor slabs from an irregular massing and we want to know the GFA (Gross Floor Area) of the resulting design. This is a typical mass addition task. Here’s how we can approach it:
Basic Floor Generation Script
Before we add the floor areas, let’s generate the floors. The following is a basic setup to generate floors with the help of the Contour component:
- We have a referenced Brep (polysurface) from Rhino that we contour with the Contour component. We define a floor height for the contour distance using a Number Slider and stick with the default contour starting location of 0,0,0, and the default contour direction of z (vertical contours).
- We turn these closed, planar curves into surfaces by plugging them into a Surface data container component.
- We use the Area component to calculate the area of the resulting surfaces.
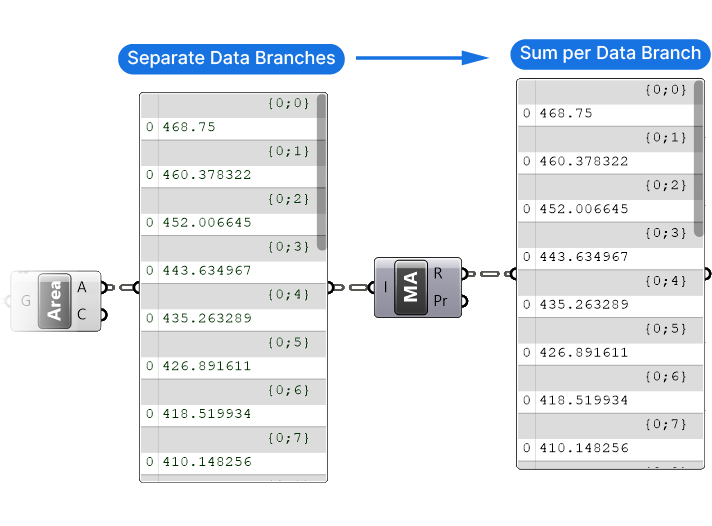
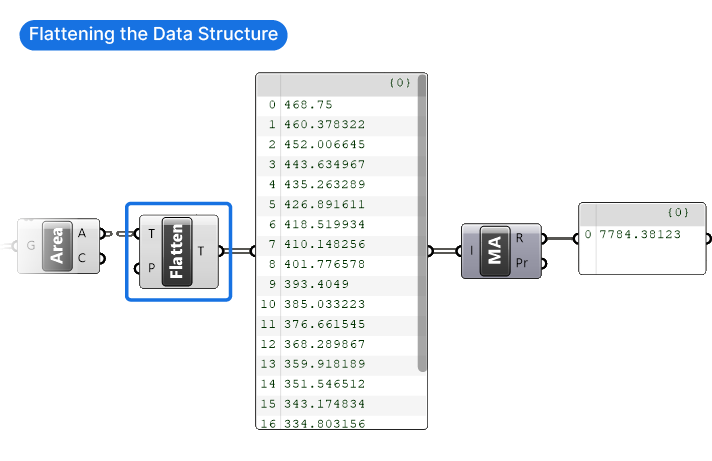
The Panel below displays the output from the Area component. Each floor and floor area is stored in a separate data branch (marked by {0;0} ).
Adjusting the Data Structure for the Mass Addition
If we add the Mass Addition component here and connect the Area output, we get what looks like the exact same output we just had. Here’s why: like all components in Grasshopper, the Mass Addition component respects data branches and will only sum up items within a list or data branch. Since we are basically dealing with several lists all containing a single number, the sum of that single number is the same.
To obtain the cumulative sum of all floor areas, we must modify the data structure before inputting it into the Mass Addition component. To erase all data branch information and collect all items in a single branch, we can use the Flatten component. Once applied right after the Area component output, we see that all area values are now in the same list named {0}. Consequently, the Mass Addition component now returns the number we wanted: the sum of all floor areas.
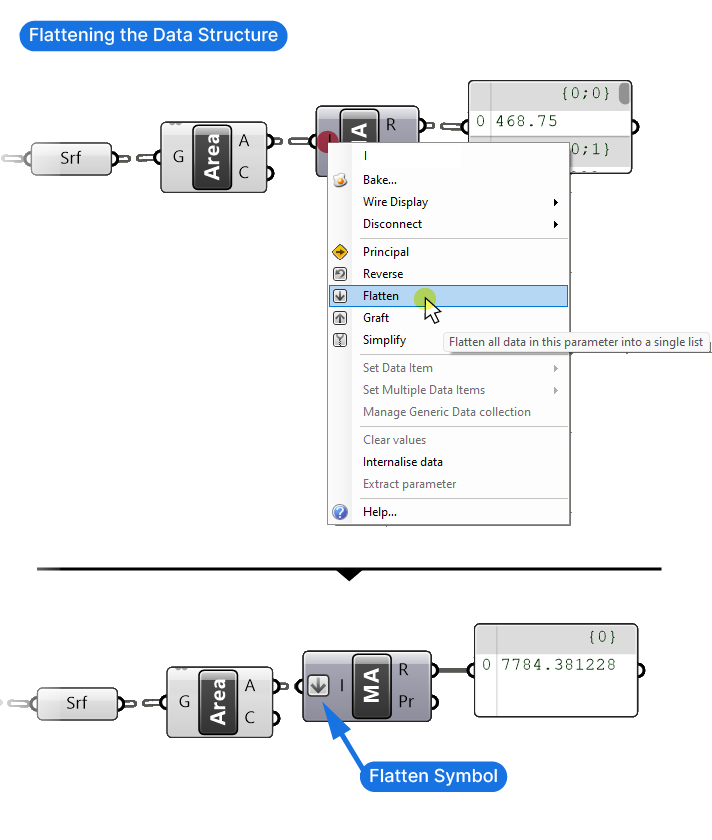
Flattening Component Inputs
There is an alternative way of flattening the data structure, that doesn’t involve a separate component: flattening the input. In Grasshopper there are four basic data structure operations that can be applied to any input, and ‘Flatten’ is one of them. To flatten the input, right-click on the Mass Addition input and click on ‘Flatten’. Once activated, the effect is the same as with the dedicated component: all data is collected in a single branch. To show that a data branch operation has been applied, Grasshopper displays a downward-facing arrow on the input, as shown below. This is the symbol for ‘Flatten’.
The result is the same: we get our total area in the Mass Addition output.
Note: Flattening the data structure worked in this particular case due to the single massing. Depending on the data structure of the numbers you want to get the sum of, you will need to adjust the data structure differently. This may involve trimming the data structure for example. Always check and modify the data structure of the Mass Addition component input to get the sum you want.
Mass Addition in Grasshopper – Final thoughts
Understanding and mastering tools like the Mass Addition component can significantly elevate your design processes, especially your ability to stay on top of numerical constraints. As architects, we don’t just shape spaces; we quantify and measure them. Grasshopper’s Mass Addition component is the foundation for more intricate and dynamic designs.
If this deep dive piqued your interest and you’re eager to explore the multifaceted capabilities of Grasshopper, consider upskilling with our comprehensive online course. Grasshopper Pro is meticulously crafted for architects, helping you fast-track your learnings and unlock a world of design possibilities. Dive in and watch your architectural visions come to life with precision and flair.
Happy designing!