Grasshopper offers several components for extracting points from a curve. However, to fully leverage these components, it’s crucial to understand how Grasshopper defines locations on a curve using Curve Parameters.
By the end of this article, you’ll know all about Curve Parameters, the Curve Domain, and all the essential methods to get the points you need.
Let’s dive in!
Curve Parameters – How Grasshopper Describes Locations on a Curve
Unlike polylines that approximate curves with linear segments, NURBS-curves are true smooth curves defining with a mathematical model. This means that every point on a NURBS curve can also be mathematically described.
This is where Curve Parameters come in. Curve Parameters are numerical values that describe an exact location at any point along a curve. The NURBS mathematical model allows us to associate each number with a specific location on the curve.
So, where do these numbers come from, and how can we use them?
To understand that it helps to think of a curve like a road from A to B.
You could describe how far along a road you are by using the distance from the starting point A to where you are now.
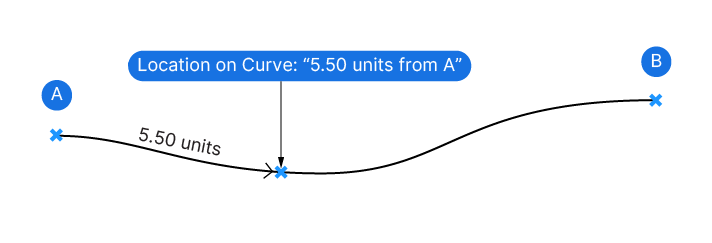
In Rhino it works similarly:
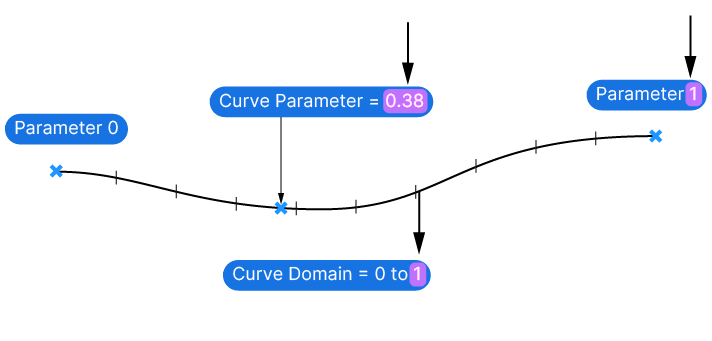
When you create a curve, the start is assigned a curve parameter of 0, and the end receives a parameter related to its length (though not precisely).
This range, defined by the start and end parameters, is called the Curve Domain.
Any location on the curve can then be described with a number within the curve’s domain.

This is purely a convention, since the NURBS model allows the curve start and end parameter to have any two values. What’s important, is that all numbers in-between the start and end parameter will be interpolated so that we can describe any point along the curve.
Now what does this mean in practice? And how can we accurately describe points on a curve in Grasshopper if the numbers are seemingly arbitrary?
Reparametrizing a Curve’s Domain
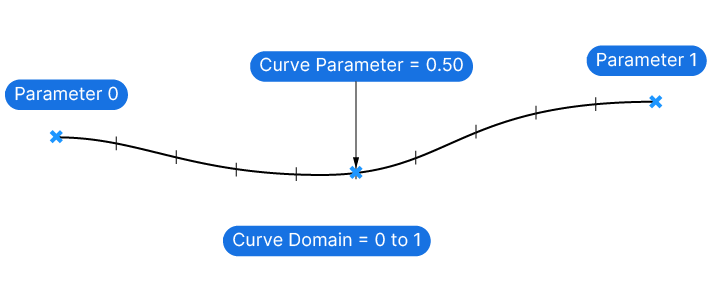
To make the interaction with Curve Parameters more intuitive and predictable, Grasshopper allows us to ‘Reparametrize‘ Curves. This means that the start and end parameters of a curve will be reset to range from 0 to 1.
Once a curve is reparametrized, we can more easily understand that a Curve Parameter of 0.1 represents a point near the beginning, while 0.5 represents the middle.
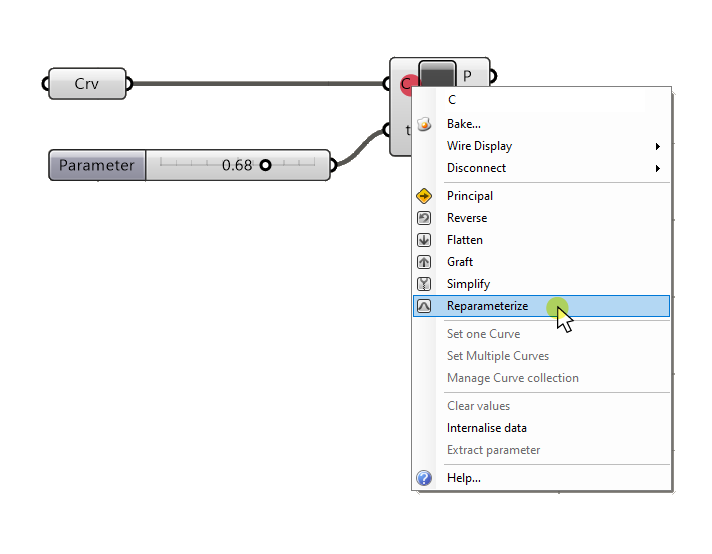
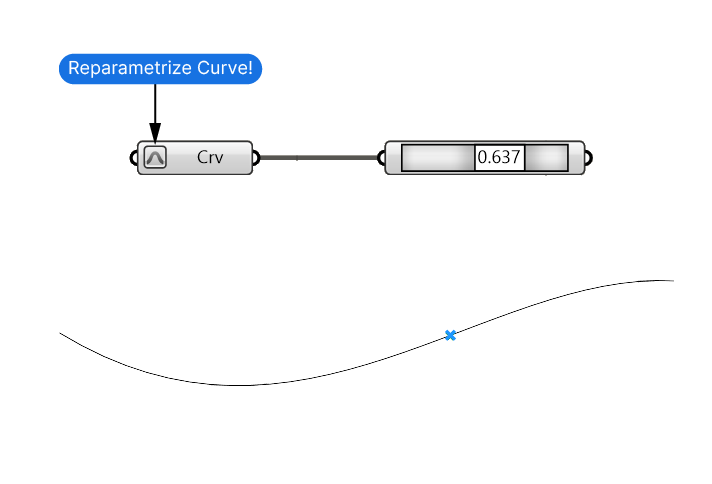
To reparametrize any curve, right-click on the component that contains it and select ‘Reparametrize‘.
You can reparametrize curves in curve container components:
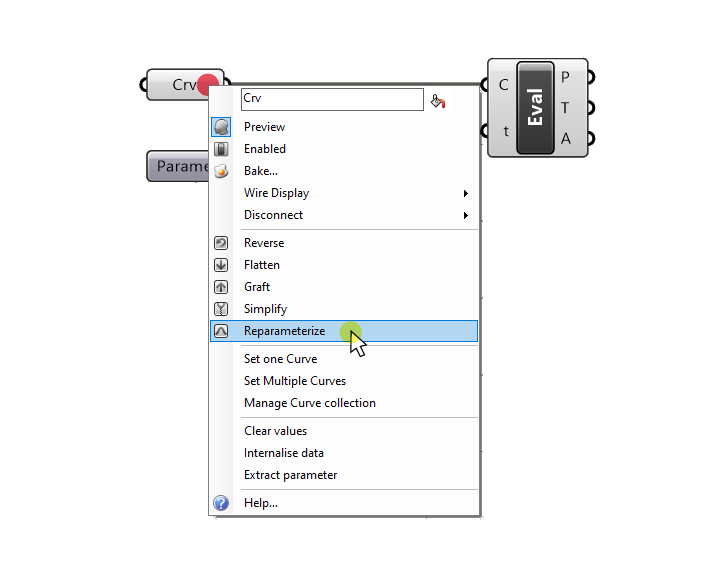
…but also directly on other components’ curve inputs or outputs:
From that point on in your script, the curve’s parameters will be set to range from 0 to 1.
So, how do we use these Curve Parameters to extract points from a curve?
Extracting Points from a Curve Using Curve Parameters
Grasshopper gives us several components to extract points from a curve using Curve Parameters. You can find them in the ‘Curve‘ component tab, in the ‘Analysis‘ group.
I’ll focus on the three most frequently used components:

→ It’s critical that you ‘Reparametrize‘ any curves before you use these components on them.
Evaluate Curve
The Evaluate Curve component is the most straight-forward and powerful component among the three I’ll discuss in this article.
By connecting a curve to its Curve (C) input and providing a numerical value in the Parameter (t) input, the Evaluate Curve component outputs not only the corresponding point on the curve but also the Tangent (T) and curve Angle (A) at that location.
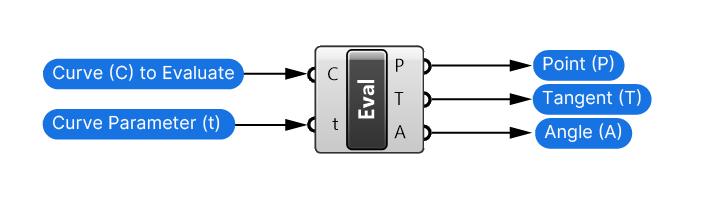
Here’s what an example setup looks like:
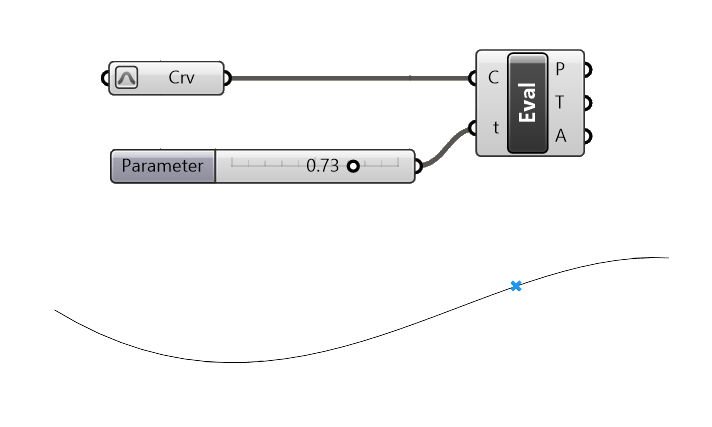
Point on Curve
If you only need the points at a specific Curve Parameter and no additional data, you can use Grasshopper’s Point on Curve component.
This component combines a Number Slider with the curve evaluation feature. We connect the curve on the left, specify the Curve Parameter on the component itself, and get the point in the output on the right. Straight-forward.
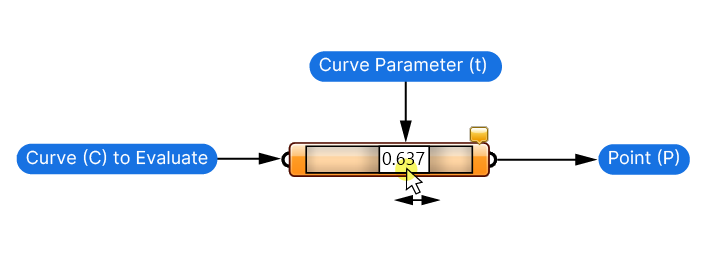
Since you can’t change the range of the built-in slider, make sure to reparametrize the curve before connecting it.
I don’t recommend using this component because you can’t double-click on the slider to enter a specific value as you can with standard Number Sliders. In addition, the minimal component design leaves you guessing what the output actually is, as well as not allowing you to reparametrizing the input.
For anything other than quickly extracting a point from a curve for testing purposes, use the Evaluate Curve component instead.
Evaluate Length
The Evaluate Length component allows us to extract a point at a specific length of the curve. Thinking back to our road example, we can describe the point location at a certain distance from the start.
The Length (L) input in this case is the actual length, not a ‘arbitrary’ curve parameter.

For the component to work as intended, right-click on the Normalized (N) input, select ‘Set Boolean,’ and set it to ‘False’.
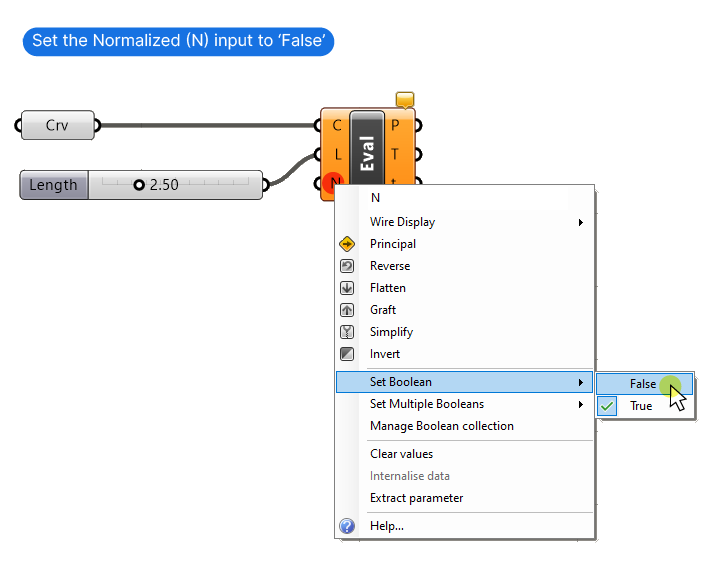
The Normalized (N) input effectively works like a ‘Reparametrize’ input. Set to True, the curve will be reparametrized, and set to False, it won’t.
At the default setting of ‘True‘, the Length (L) input will be treated like a normal Curve Parameter instead of creating a point at a certain length.
Below the basic setup of the Evaluate Length component with the Normalized (N) option set to ‘False‘. The point is generated at exactly 2.50 units from the start of the curve.

Use this component whenever you need to work with precise measurements.
Extracting Points with Curve Property Components
If we just need to extract points at certain common features of a curve, like the end points or the middle, we can use the following components.
These components don’t require specifying a Curve Parameter. Instead, they generate points based on the curve’s geometric properties.
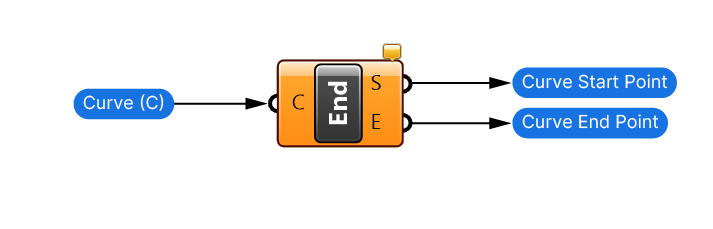
End Points
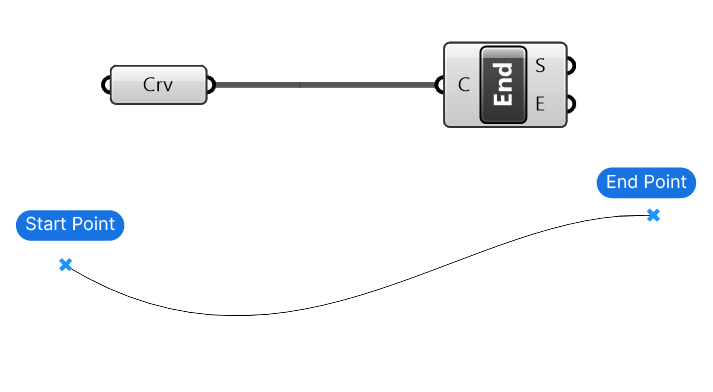
The End Points component for example, takes any Curve (C) and outputs its Start and End Point. This saves us the need to use an Evaluate Curve component with a value of 0 or 1.
Here’s what it looks like in action:
Curve Middle
Similarly, the Curve Middle (MidPt) component returns the geometric midpoint of a curve given a Curve (C) input.
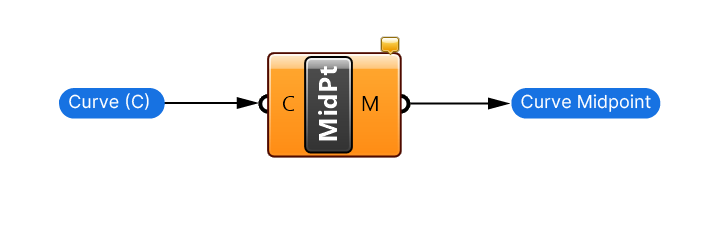
The reason this component is so useful is that it returns the true middle of the curve, meaning that both segments to either side are of equal length.
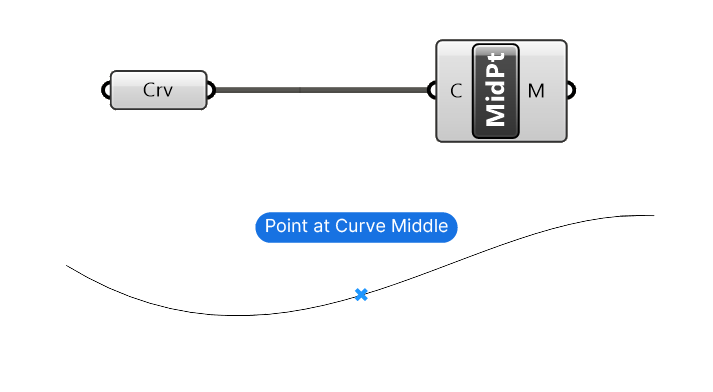
Evaluating a reparametrized curve with a Curve Parameter of 0.50 for example, does not necessarily return the geometric midpoint! The distribution of control points on a NURBS curve can skew how Curve Parameters are spaced along the curve. In other words the Curve Parameter interpolation between start and end parameter is not linear.
Use this component any time you just need a quick point to represent a curve in your script.
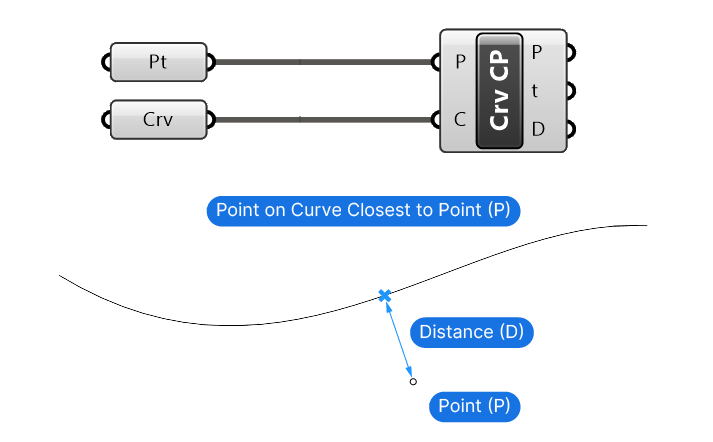
Curve Closest Point
The Curve Closest Point (Crv CP) component requires a Point (P) input as well as a Curve (C). The component will return the closest point on the curve from the input Point (P). In addition, it will return the Curve parameter (t) at that point, as well as the Distance (D) from the input Point (P).
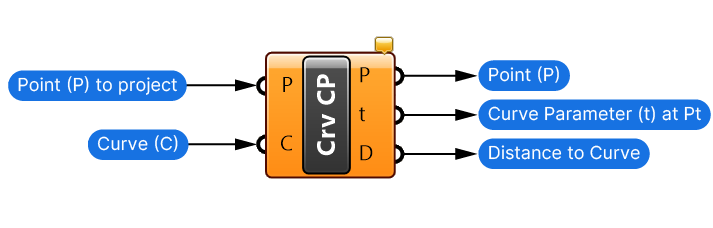
Thanks to the Parameter (t) output, you can then use an Evaluate Curve component to extract the Tangent at the output points.
Discontinuities
The Discontinuities (Disc) component generates a point wherever there is a discontinuity in the curve. You can think of a discontinuity as a “jump” in smoothness. For example from a straight line to an arc.
The component will output the Points (P) at the locations where discontinuities occur, as well as the Curve Parameters (t) at those points. Once again, we can use the Curve Parameter (t) information to get the Tangent (T) at that point or split (“shatter”) the curve.
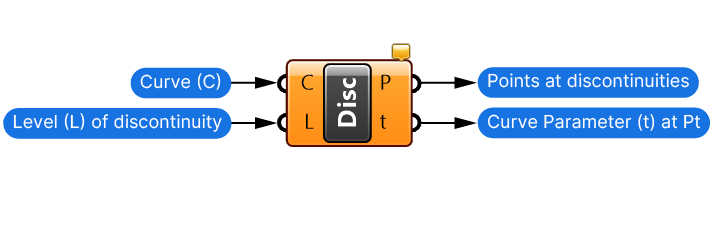
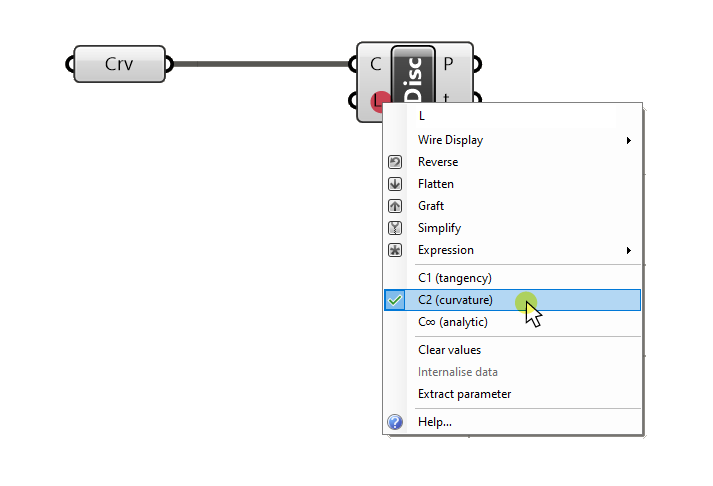
We can specify the Level (L) of discontinuity that should be analyzed: We can choose between:
- C1 (tangency)
- C2 (curvature)
- C(inf) (analytic)
Right-click on the Level (L) input to pick the desired level. For most cases, the default C1 (tangency) level is perfectly fine.
See below for an example setup:
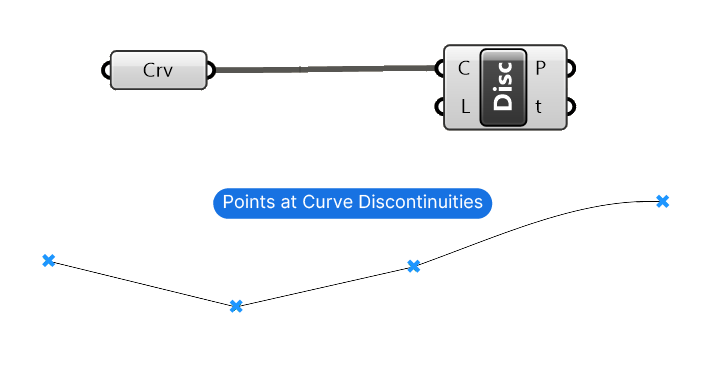
This component can be useful to extract the corner points of polygonal curves. Or to verify the smoothness of a curve.
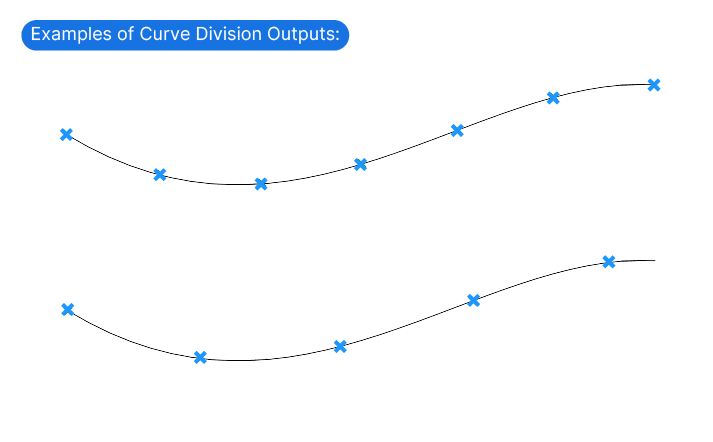
Extracting Points with Curve Division Components
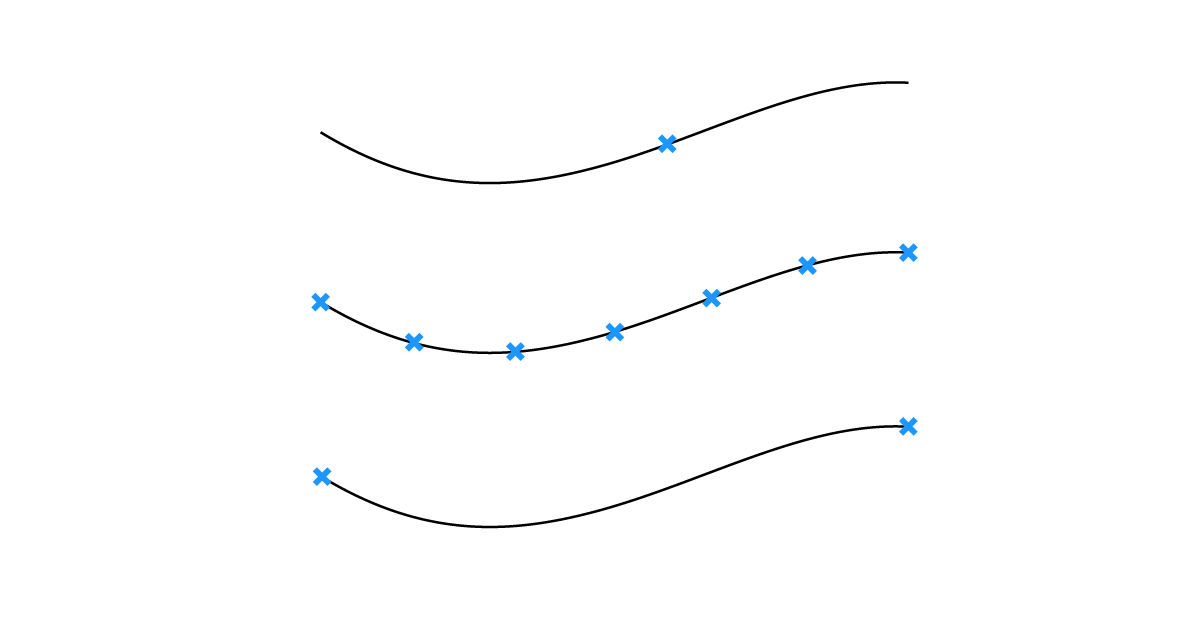
If we want to extract several points from a curve at once, and have the points be equally spaced along the curve, we can use Grasshopper’s Curve Division components.
The term “divide” may be a bit confusing at first, since it suggests the input curve will be split into segments, which is not the case. Instead Grasshopper will generate new points on the curve.
The components differ in the parameters that drive the division process.
Divide Curve
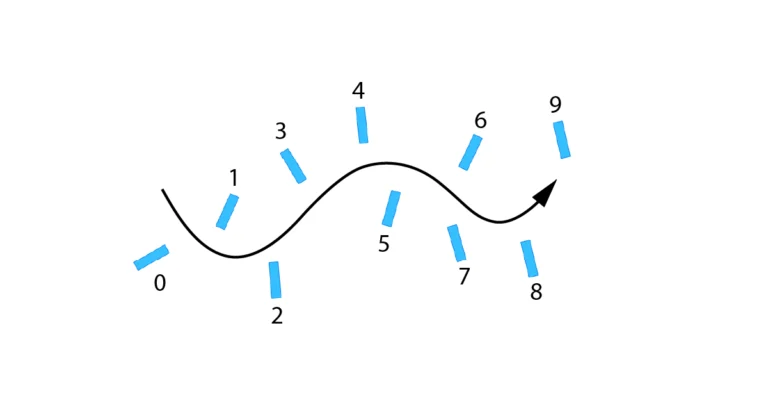
The Divide Curve component will take the length of the input Curve (C) and divide it by the Count (N) of segments we specify.
It outputs the resulting division Points (P) as well as the Tangent (T) and Curve Parameter (t) at those points. All curve division components in Grasshopper have these three outputs.

The third, optional Kinks (K) input allows us to specify with a Boolean value (i.e. True or False) whether the component should create a point at the kinks of the input curve. In most cases, you won’t need that and you can leave the default value of ‘False‘.
This curve division will be uniform, meaning the segments will all be spaced evenly along the curve resulting segments of the same length.
The benefit of this type of division is that it goes neatly from start to finish, with no ‘remainder’ piece at the end.
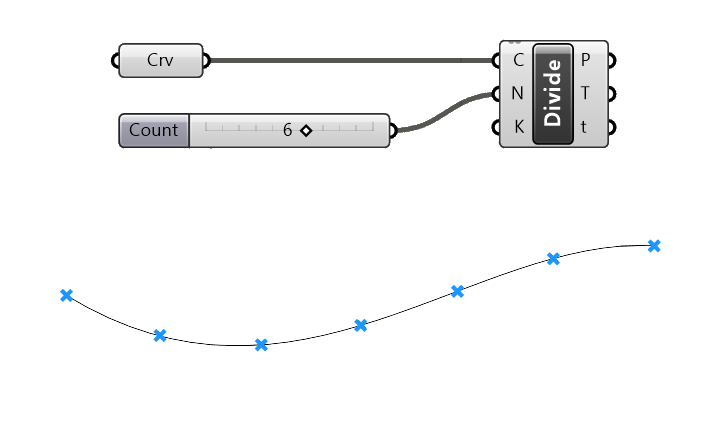
At the same time this can be a disadvantage, since the spacing is largely dependent on the curve length and often ends up being an uneven (arbitrary) number.
One thing to be aware of, is that by specifying 10 segments, we get 11 points in the Points (P) output, since the end point is included as well.
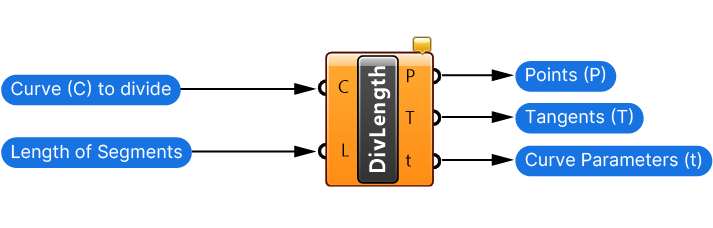
Divide Length
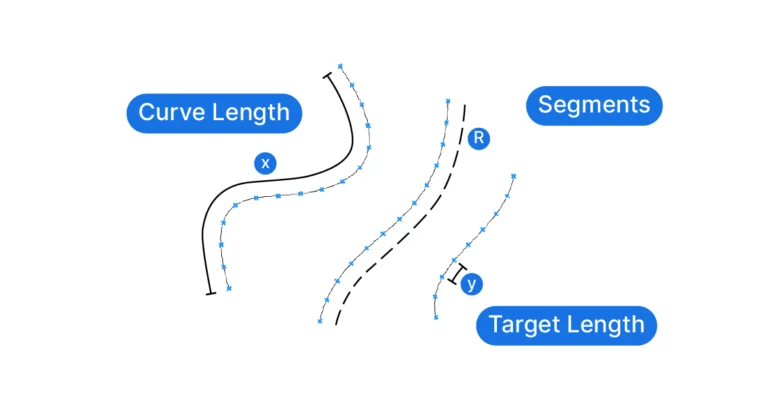
If we need control of the spacing of the division points, we can use the Divide Length component. With the Length (L) input, we can specify the exact length between the points along the curve.
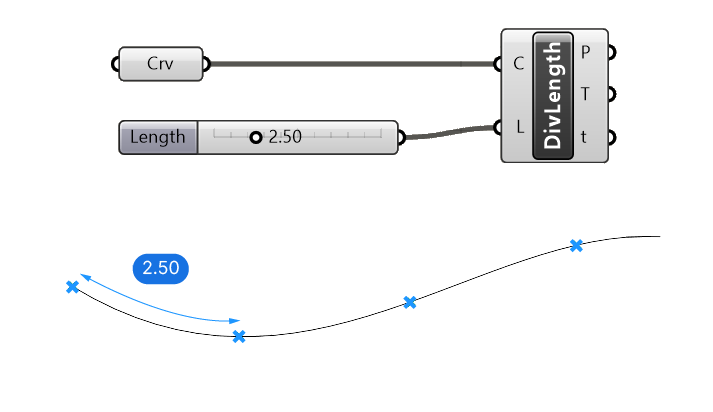
Once scripts get more precise, this is an indispensable tool in your arsenal.
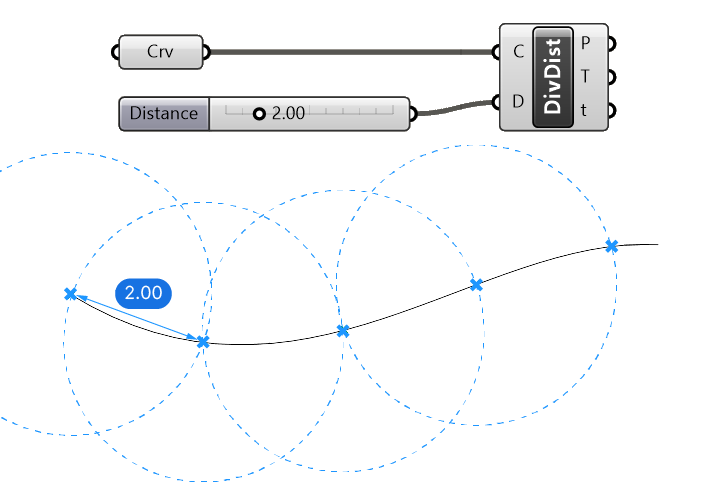
Divide Distance
If you are wondering what the difference between the Divide Length and Divide Distance component is, you are not alone. It took me a while to figure out.
Unlike the Divide Length component, the Divide Distance component will create the points with a constant distance from each other. This distance is unrelated to the actual curve – it is measured based on the coordinates between one point and the next.
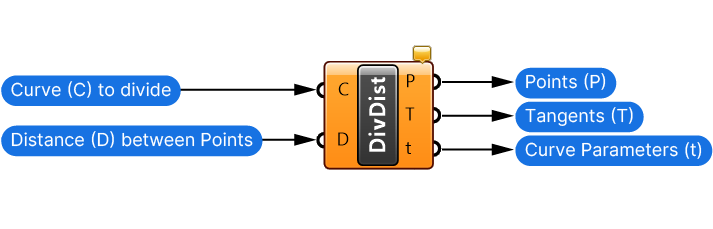
Imagine a circle being drawn at the start of the curve. Where the circle intersects the curve would be the next division point. And so on.
Unless you are working with curves with big curvatures, the difference to the Divide Length output will be almost imperceptible.
A possible application example is to approximate a curve with straight segments of a certain length.
Final Thoughts
As we’ve seen, Grasshopper offers several different ways for generating points on a curve. Whether you just want to get a single point, or generate several precisely spaced points along a curve, you now know the components that can help you achieve that.
Test these components yourself and familiarize yourself with them, soon they will become your best friends!
Happy designing!