To unlock the true power of Grasshopper as a computational design tool, we need go beyond the commands available in Rhino, we need to speak the computer’s language, and for the most part, that is numbers. Grasshopper offers several components to control and modify numerical values, and perhaps the most powerful one is the Remap component.
In this guide we’ll cover the core logic of remapping and unlock the hidden power of remapping numbers. I’ll show you a basic remap Grasshopper script setup and finally a simple application example.
Let’s get started!
The logic of remapping numbers
Before we dive into the component itself, let’s understand what remapping numbers means.
Remapping numbers means that we take numbers that exist within one numerical domain and proportionally remap them to another numerical domain.
Let’s break that down.
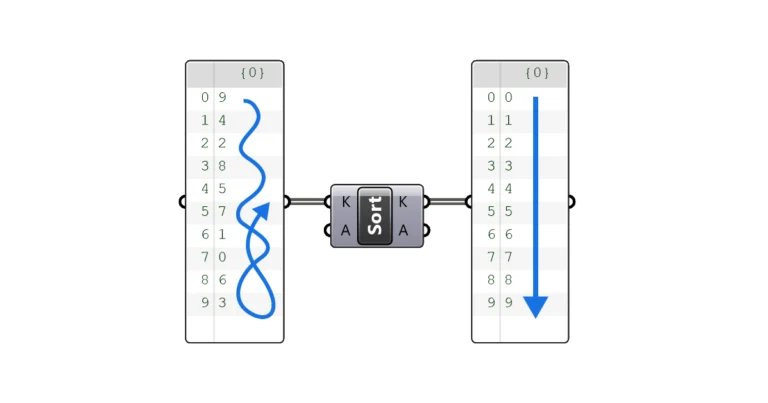
Let’s say we have a list containing the following numbers:
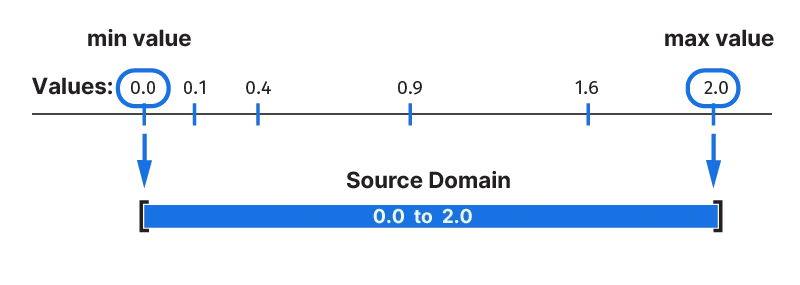
{0.0, 0.4, 0.1, 0.9, 1.6, 2.0}The numbers are not sorted, and they are not a regular sequence.
But one property that this set of numbers has, is that all the numbers are within 0 and 2.
[0 to 2]This numerical range, described by the smallest and largest number in the set, is called a Domain. All numbers in the list are contained within that domain.
Now let’s say that we want to modify this list of numbers, so that the lowest value is still 0, but the largest number will be 90.
We can express this target range as our Target Domain of 0 to 90.
With the Remap component we remap the set of numerical values from its Source Domain to a Target Domain we specify.
All the values will be remapped proportionally, meaning that the relationship between the numbers remains the same, it’s only their ‘scale’ that changes.
You can think of remapping as the ‘scale 1D’ of numbers.
This means that to remap numbers in Grasshopper, we need a List of numbers to operate on, a Source Domain, and finally a Target Domain.
Remap Example
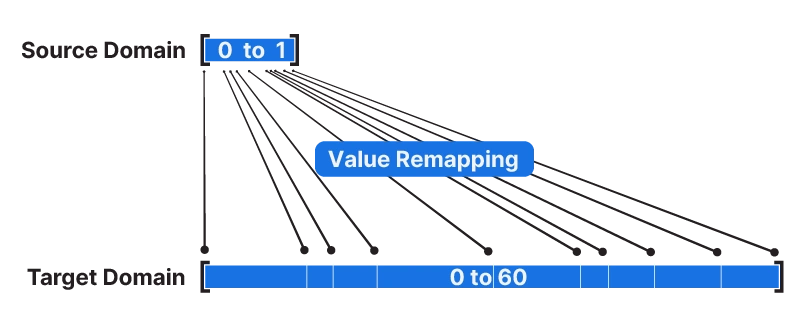
Let’s say that our source domain has a domain of 0 to 1. Meaning that all the values we want to operate on are within those two numbers. For simplicity, I’m using 10 numbers with a regular spacing.
{0.0, 0.1, 0.2, 0.3, 0.4, 0.5, 0.6, 0.7, 0.8, 0.9, 1.0}We define our target domain as 0 to 60.
Let’s now take any value from the source domain, for example the value 0.5.
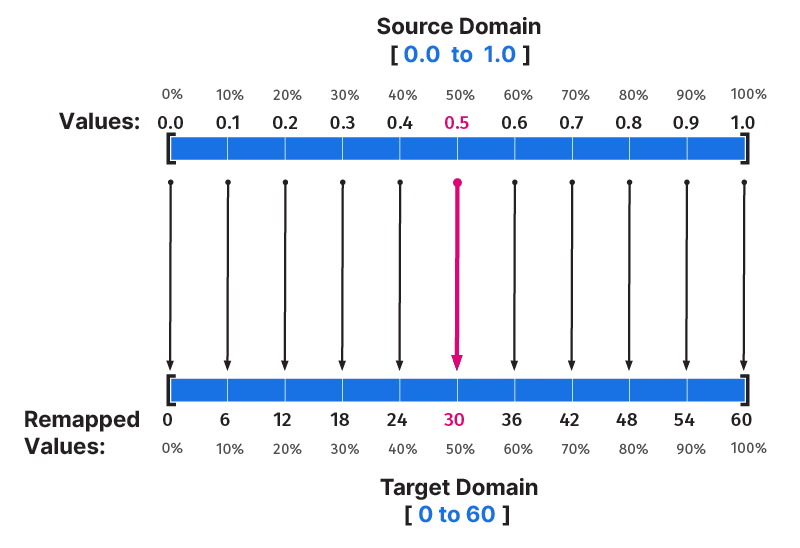
In relation to the source domain of 0.0 to 1.0, the value 0.5 is exactly at 50%.
This value is therefore mapped to the target domain in relation to it’s relative position in the source domain. 50% of the target domain of 0 to 60 would be 30, so the value 0.5 would be remapped to 30.
The same logic is applied to all values in the list of values.
An important thing to note is that the domains don’t have to have a common starting point or even start at zero. The domain can even be inverted, meaning that it ranges from a larger number to a smaller one. We can for instance remap values from a domain of 12 to 59 to a domain of 4 to -22! The mapping logic will remain the same.
We can also think of the remapping process as a chart:
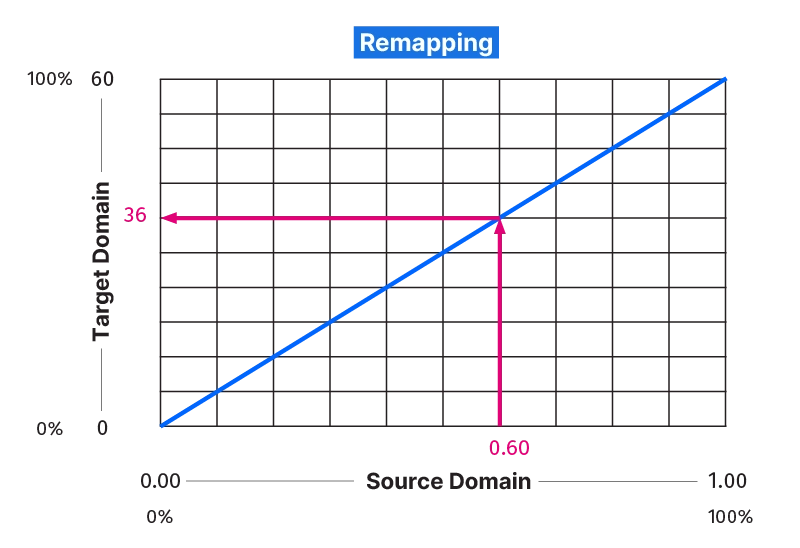
The Source Domain is on the X-axis, and the Target Domain on the Y-axis.
Because we are remapping the values linearly, the diagonal line represents the relationship between source and target domain.
With the Graphmapper component we can create a non-linear value mapping, but that’s something for another guide!
So if we are remapping the value 0.60 which corresponds to 60% of the source domain, it will be remapped to 60% of the target domain and return a final value of 36.
When to use the remap component
The reason that the remap component in Grasshopper is so powerful, is that with it we can create a relationship between two different object properties.
We can for example turn the distance from an object into a rotation. Or the z-value or height of an object into a scaling factor.
Creating this kind of parametric relationship results in designs that have an internal logic, which translates into intricate and aesthetically beautiful architectural designs.
Examples for object property transformations are:
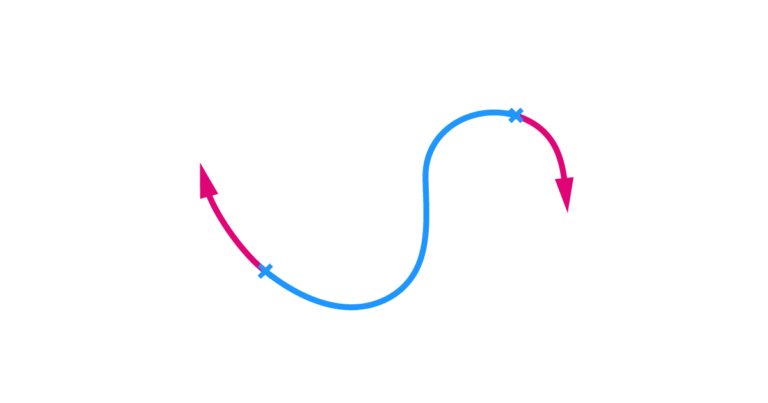
Distance -> Rotation
Curve Length -> Scale Factor
Area -> Extrusion Length
In order for this ‘property transformation’ to work, we need to capture object properties in form of numbers (as opposed to a point, or a line, which are more complex data types).
Once we have the a set of numbers representing object properties in numerical form, we generate a domain from those numbers. In the next section we’ll learn about a component that finds the lowest and highest numbers in a list and turns them into our Source Domain.
Then we construct a second domain – our Target Domain – which will describe the transformation, once again in numerical form.
The Remap component in Grasshopper will take care of remapping the values, the final step will then be to use those values for a transformation. For example a rotation.
Enough theory, let’s see the component in action!
Basic Remapping Script Setup
Let’s begin by adding a Remap component. We can add it by double-clicking onto the empty Grasshopper canvas, typing ‘Remap’ and selecting the first result.
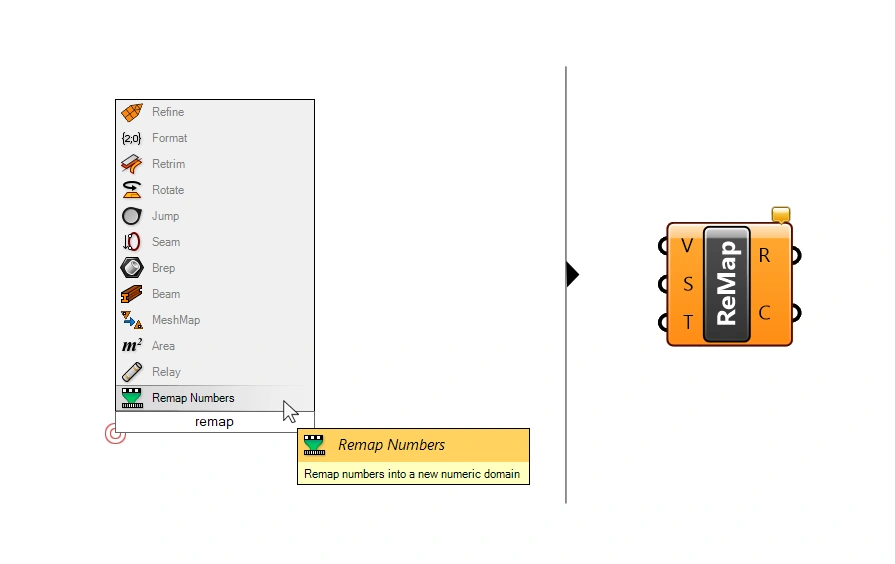
The three inputs are:
- V – the Values to remap
- S – the Source Domain
- T – and the Target Domain
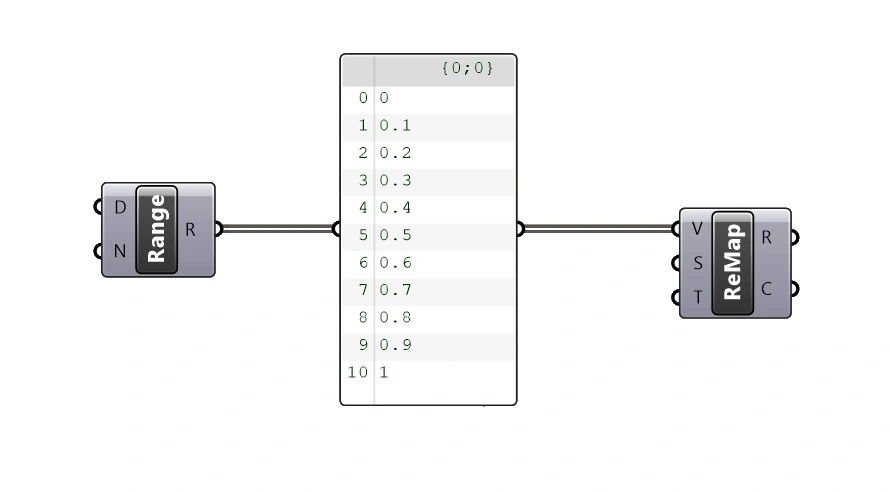
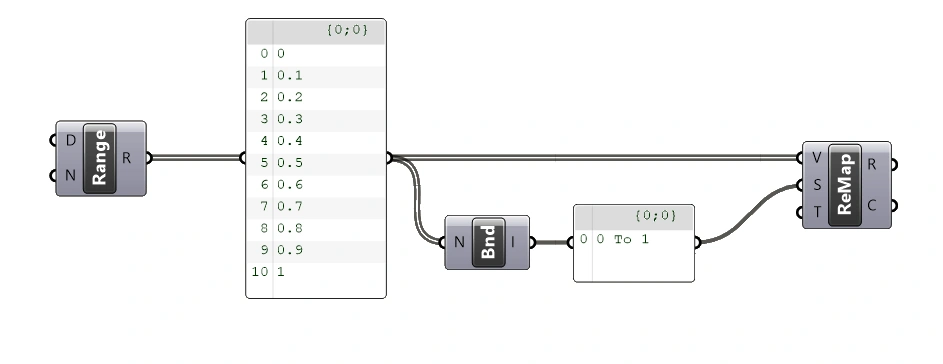
Let’s start by generating a set of numbers to work on. We’ll use the Range component to generate a set of numbers for us. We don’t need to specify any inputs, by default we’ll get 10 values between 0 and 1. These are going to be the values we are going to remap, so we can plug them in to the V input.
Defining the Source Domain
The next step is to define the source domain of our values. In this example, the domain is obvious: it’s 0 to 1. But once we use large sets of non-ordered numbers, we need an easy method to get the source domain.
Grasshopper has a component that automatically generates a domain by using the lowest and highest value. It’s called Bounds.
Double-click on the canvas and type ‘Bounds’ to add it.
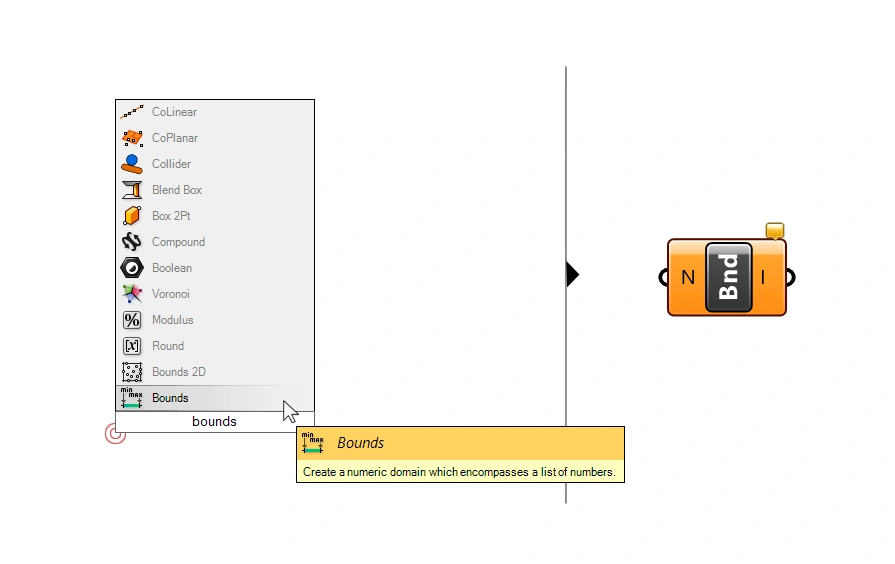
The only input we need is a list of numerical values.
Tip: Always make sure you are feeding a list of values into the component, and not individual values in separate branches.
We connect the output of our Range component into the Bounds component and see that the resulting domain output correctly says “0 to 1”.
Let’s connect that to the Source Domain (S) input of the Remap component.
Constructing the Target Domain
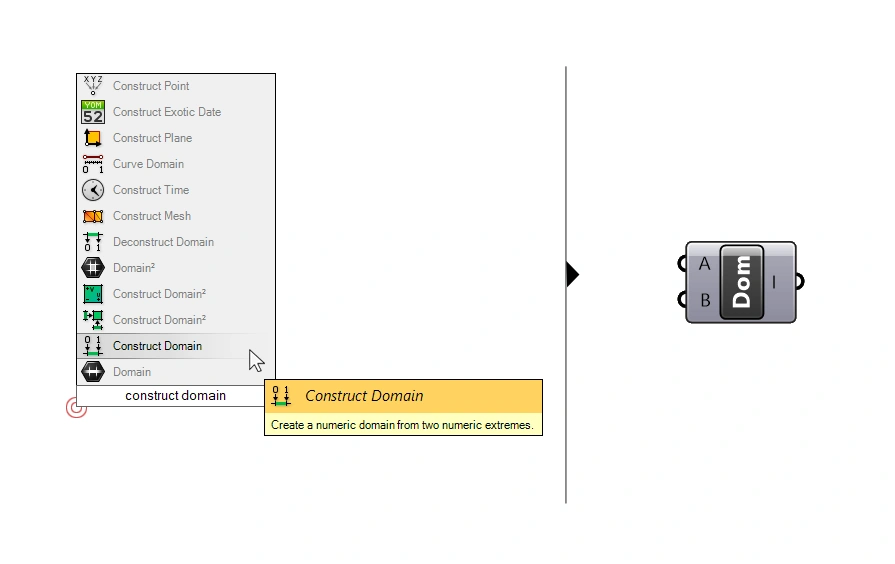
The last step is to define our target domain. To do that we’ll need to construct our own domain. We can do that with the ‘Construct Domain‘ component. Type ‘Construct Domain’ into the component search bar to add it to your script.
Be sure to select the one without a ‘²‘ sign. Those components create two-dimensional domains. To remap numbers, a so-called one-dimensional domain is what we need.
The component inputs A and B are the lowest and highest number which define the bounds of the domain. We can use Number Sliders to define those two numbers.
Once we’ve created the domain, we can connect it to the Target Domain (T) input of the Remap component to complete our basic remap setup!
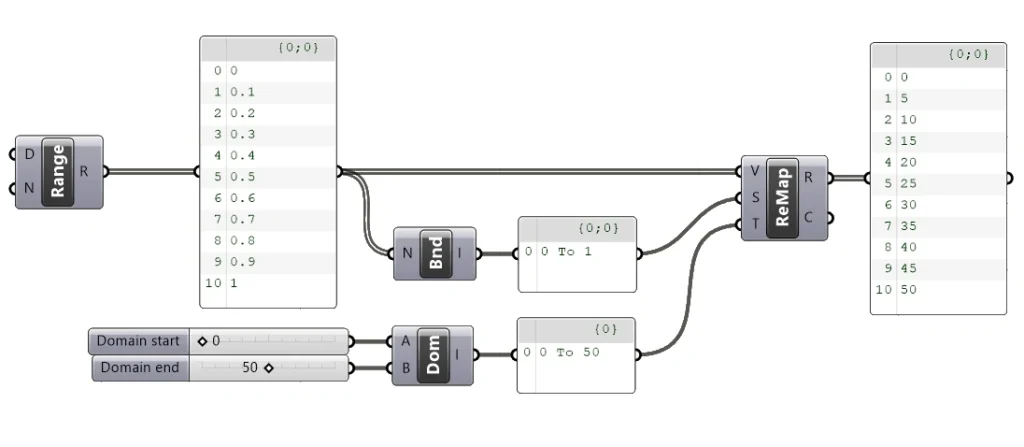
As shown in the Panel, the resulting numbers are now remapped from their original domain of 0 to 1 to the domain of 0 to 50.
Remember, the target domain doesn’t have to start with 0, it can be any number. The domain could for instance go from 10 to 50.
This is the basic setup for using the Remap component in Grasshopper.
Next, let’s see how we can use it to create a relationship between object properties.
Example Script: How to Remap Distance to Rotation
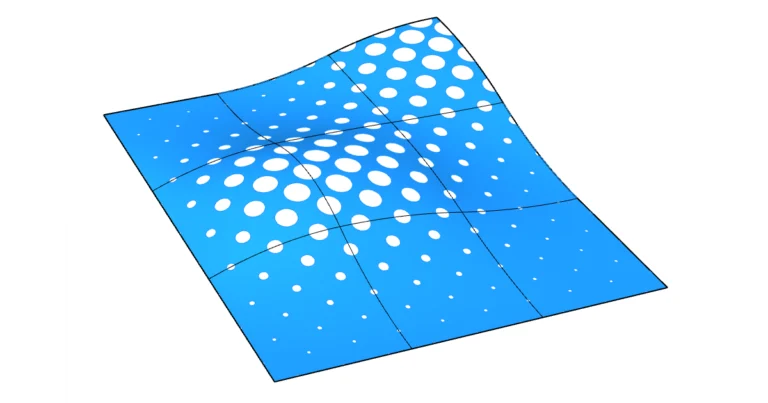
Let’s create a simple façade panelization and learn how we can use the Remap component to define the rotation of each panel in relation to the distance to a point.
Panelizing a Surface
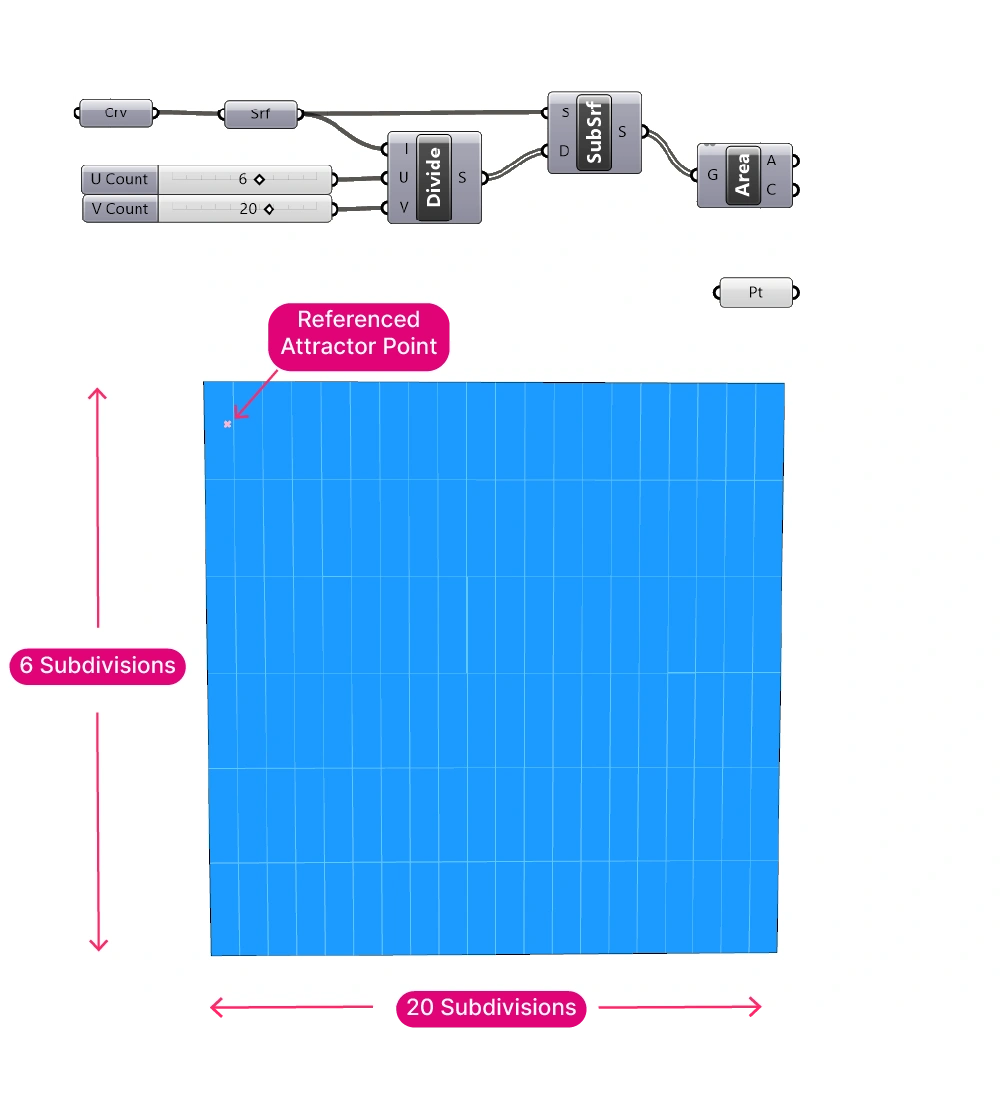
To create a basic panelization, let’s draw a vertical rectangle in Rhino, and reference it to a curve container component in Rhino. Then we’ll use a combination of the Divide Domain² and the Isotrim (SubSrf) components to subdivide the surface into panels in the X and Y direction.
We can group these components to keep the script organized.
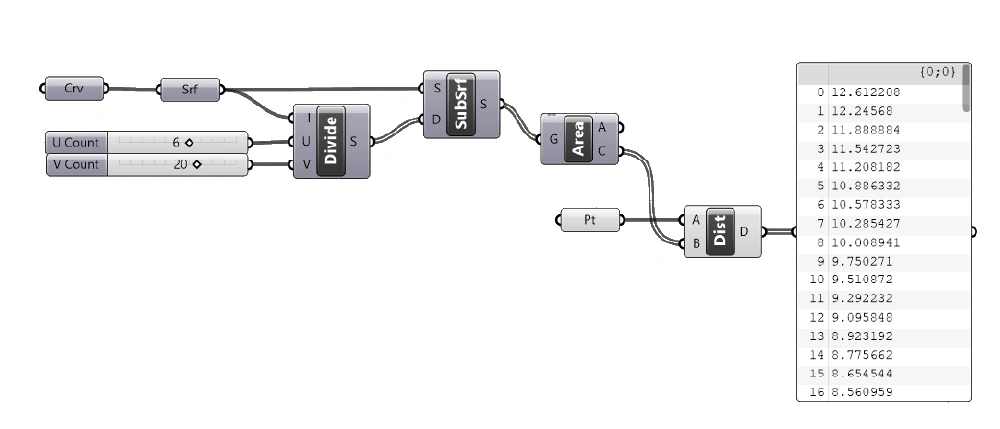
We’ll also get the centerpoint of each panel with the Area component. Next to the area, the ‘C’ output returns the centroid of the input surface. We’ll use these centerpoints as a proxy to measure the distances.
Let’s also draw a point in Rhino and reference it to a Point container in Grasshopper. We’ll measure the distance from each panel to that attractor point, and use that value as the transformation driver.
To get the list of values that we want to remap, let’s add a Distance component and connect the centerpoints into the A input and the referenced attractor point into the B input.
The distance output will be a list of numbers. These are the values we are going to remap to a rotation range we’ll specify.
Remapping the Numbers
Next let’s add a Remap component. We can connect the distance values to the first input: the values to remap.
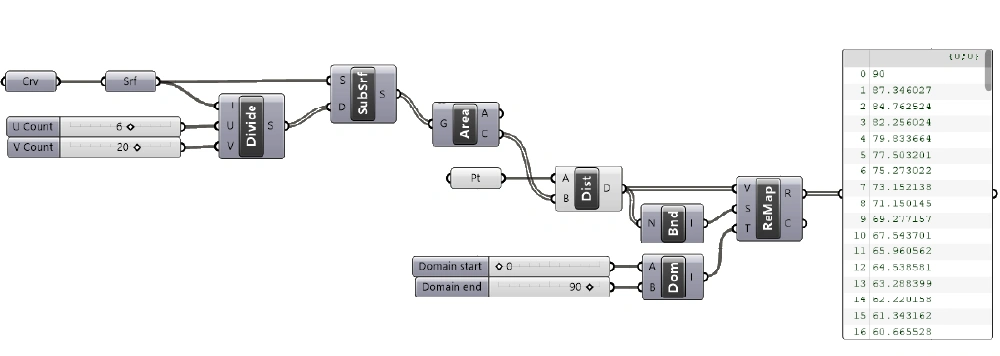
Now we need the get the Source Domain. We’ll use the Bounds (Bnd) component and connect our distances output. The Bounds component will generate a domain that ranges from the lowest to the highest number in the list.
To define the Target Domain, we’ll use the Construct Domain (Dom) component. Two number sliders help us define the start and end value of the domain.
Let’s set the minimum value to 0 (no rotation) and the maximum to 90 (degrees).
The output of the Remap component now contains all the numbers between 0 and 90 that define the rotation of each panel in relationship to their distance to our attractor point.
Turning the Numbers into Rotation
Finally, we’ll use these values to perform the actual rotation.
Let’s add a Rotate component, connect the panel surfaces as geometry to rotate (Input G), and the centerpoints of the panels as the rotation point (Input P).
(Note: by default, the Rotate component’s rotation plane is the XY-Plane, which is the ground plane. By adding a point input, the XY-plane moves to that location.)
The final step is to connect our rotation values (the output of the Remap component) to the Angle (A) input of the Rotate component.
Make sure to right-click on the Angle (A) input and toggle ‘Degrees’, otherwise the numbers will be interpreted as Radians!
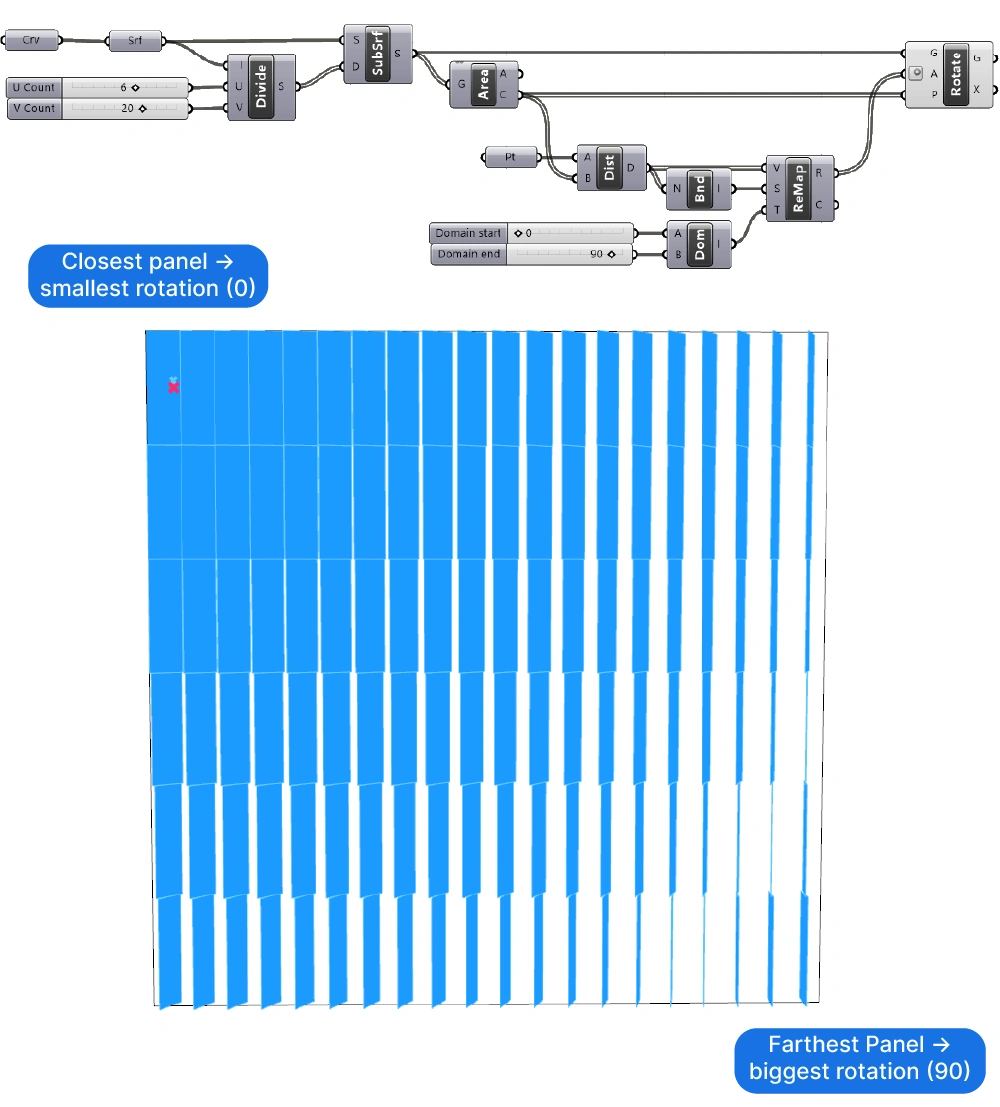
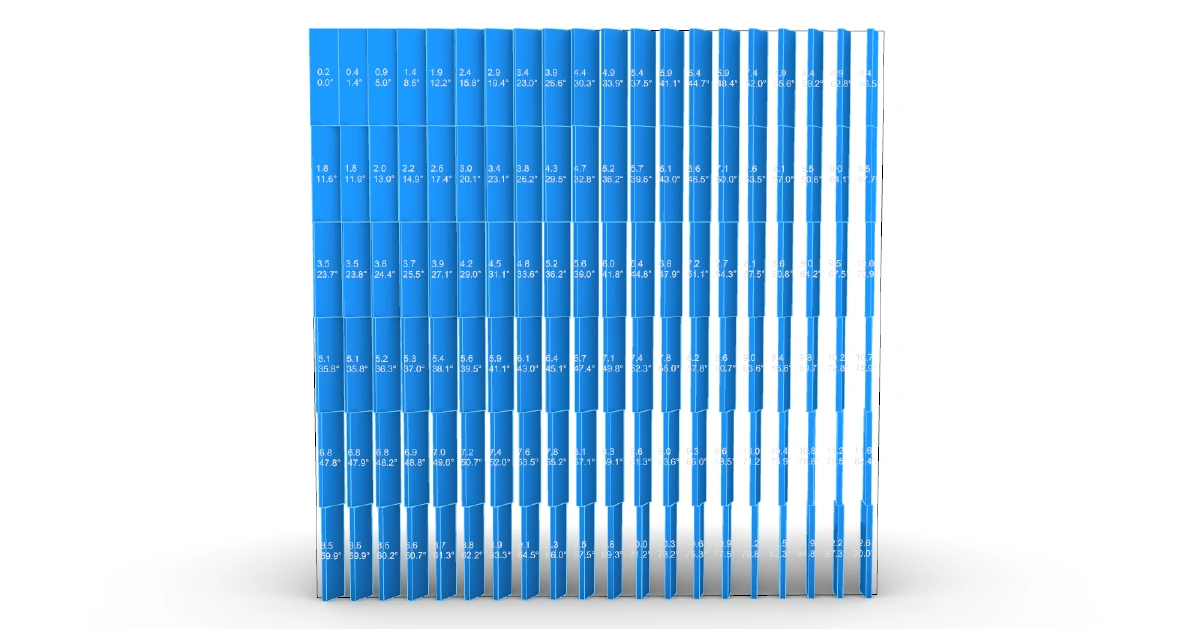
And there we go!
We’ve used the Remap component to create a gradient rotation across the façade panels based on their distance to an attractor point. As a result, the panels closer to the point have smaller rotations, and the ones further away have larger rotations.
The Bottom Line
In conclusion, the Remap component in Grasshopper is a truly powerful tool that enables us to harness the logic of remapping numbers to create intricate and dynamically responsive designs. By understanding the concepts of Source and Target Domains and how to proportionally remap numerical values from one to the other, we can construct parametric relationships between different object properties, leading to intelligent and aesthetically pleasing designs.
With the power of Grasshopper’s Remap component, the possibilities for innovative and dynamic design are endless. So go ahead and explore what you can do with this incredible tool!