Having control over the order of elements in a list is essential when creating scripts in Grasshopper. But sometimes objects end up in a randomized order. Luckily, Grasshopper offers several ways to restore order – one of them is the ‘Sort Along Curve‘ component.
In this detailed guide I’ll walk you through how to use the Sort Along Curve component to sort any kind of geometry along a guide curve.
Let’s dive in!
Application Example: Sorting Rectangles Along a Curve
To show you how to solve this problem I’ll use a practical application example.
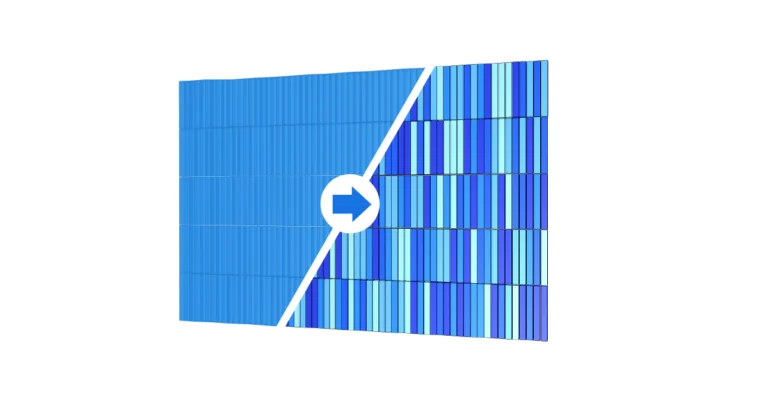
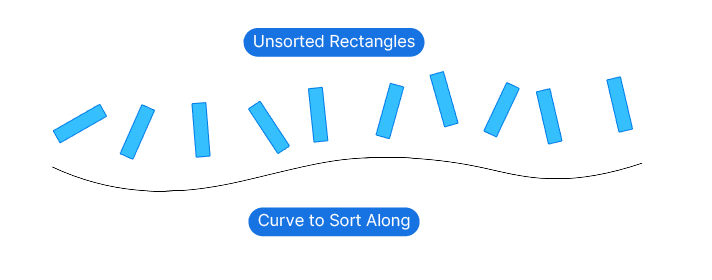
Let’s say we have an unsorted set of rectangular surfaces as well as a curve that we want to sort them along.
Reasons why you might end up with unsorted elements include:
- You referenced objects from Rhino.
- You used a random-based component in your script, resulting in a loss of order.
- A component unexpectedly outputs a list with items out of order.
Whatever the case may be, the first step is to identify that they are in fact not sorted.
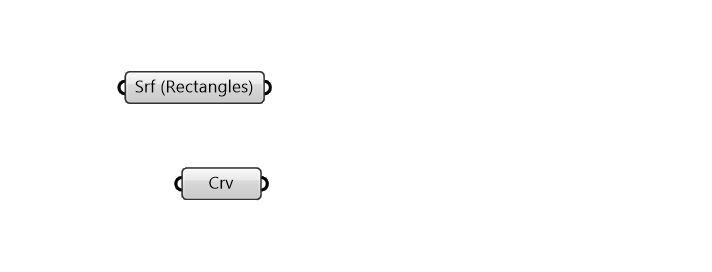
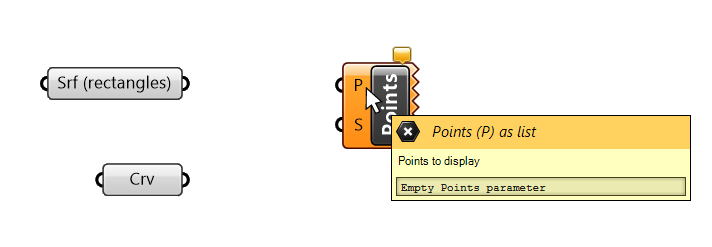
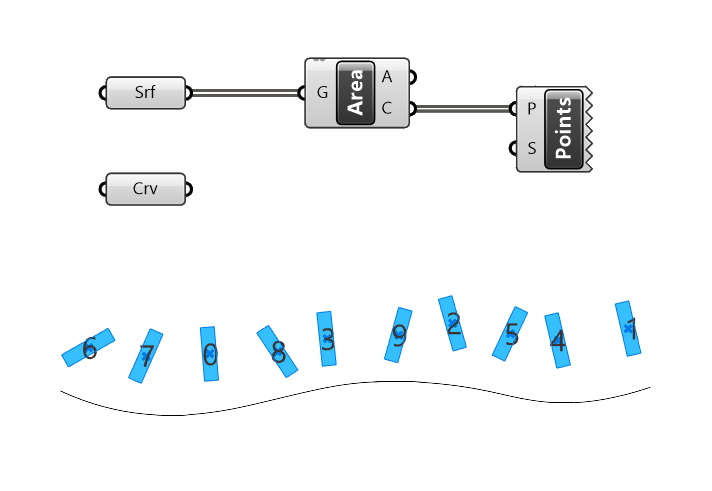
I referenced the rectangles to a Surface container component, and the guide curve to a Curve component.
Displaying the Current Order with the Point List Component
If you get an unexpected result in your script, verifying the order of the objects you’re working with should be part of your debugging process.
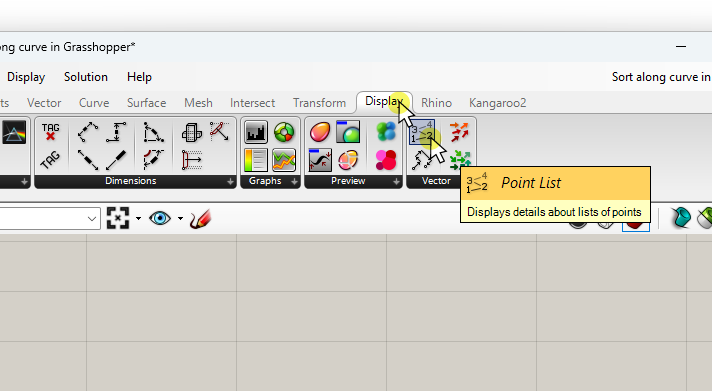
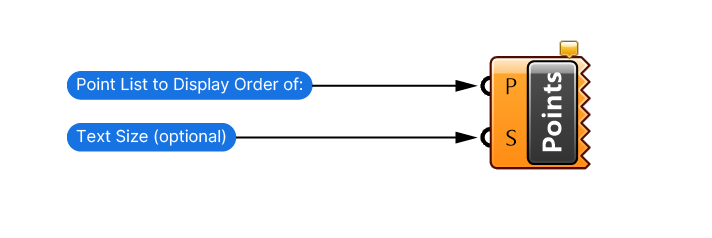
To check whether a list of objects is sorted or not, we can display the index of each object using the Point List (Points) component. That way we can visually check the objects’ order.
You can find it in the ‘Display’ component tab, in the ‘Vector’ group on the far right.
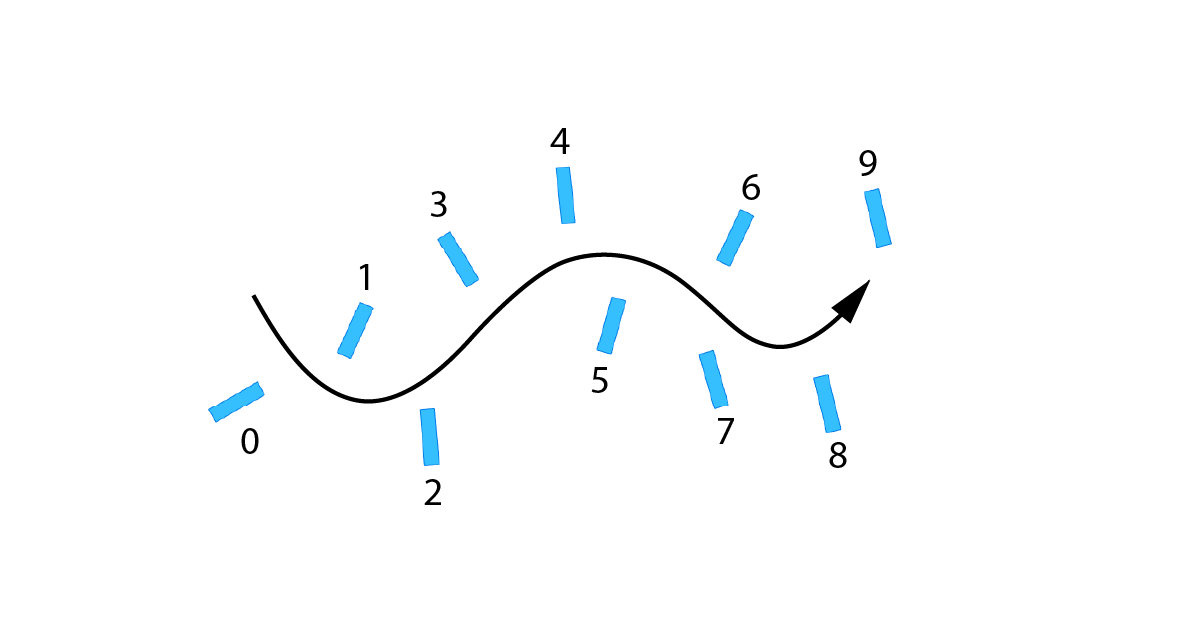
The Point List (Points) component displays the index of each input point with a number in the Rhino viewport, as shown below:
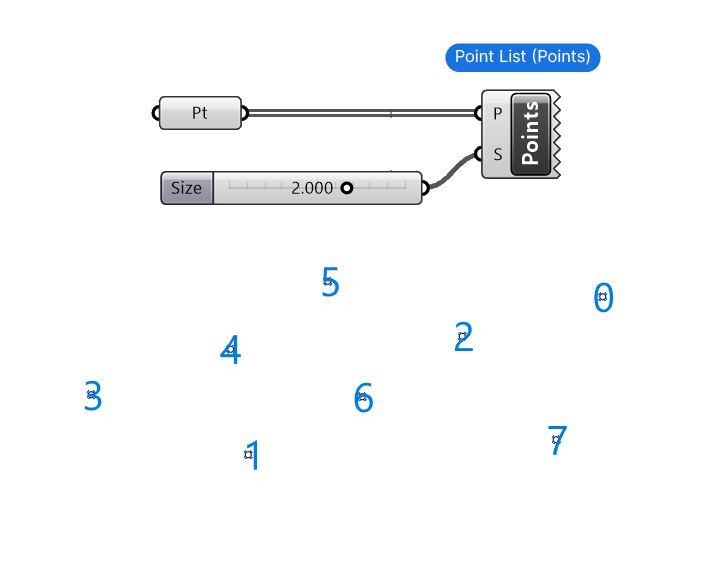
The optional Size (S) input allows us to control the size of the numbers in the viewport.
Like all Grasshopper components that are only used for Display purposes in the Rhino viewport, the right-hand side of the component has no outputs, just a jagged edge.
Because the Point List (Points) component requires a list of points as input, and we are dealing with rectangular surfaces, we first need to generate a representative point for each surface.
Generating Points as Proxy for an Object’s Location
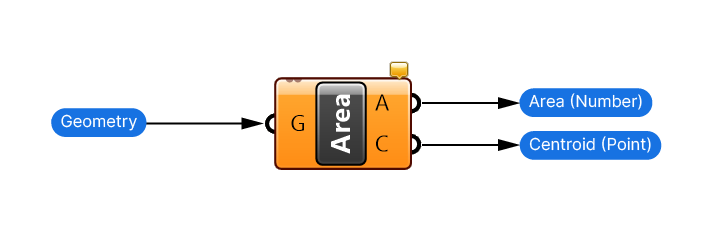
I’ll use the ‘Area’ component to do that.
Add the Area component from the ‘Surface’ component tab, you’ll find it in the ‘Analysis’ group.
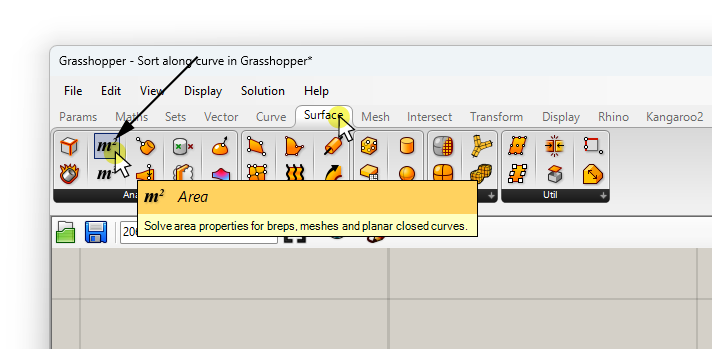
Besides returning the surface area in its first output Area (A), the Area component will return the Centroid (the point describing the geometric middle of the surface) of each closed curve, surface or mesh input in the Centroid (C) output.
Note: Getting a point with the ‘Area‘ component only works for closed, planar curves and surfaces. For open curves you can use the ‘Curve Middle‘ component, and for closed Breps the ‘Volume‘ component. For complex geometries you can first generate a Bounding Box, and then use the ‘Volume’ component to get the Volume Centroid.
By connecting these Centroids to the Point List (Points) component, I can see the current order of my surfaces: they are in a completely random order.
Let’s fix that using the Sort Along Curve component.
The Sort Along Curve Component
Add the Sort Along Curve component from Grasshopper’s ‘Vector‘ component tab. You can find it in the ‘Point’ group.
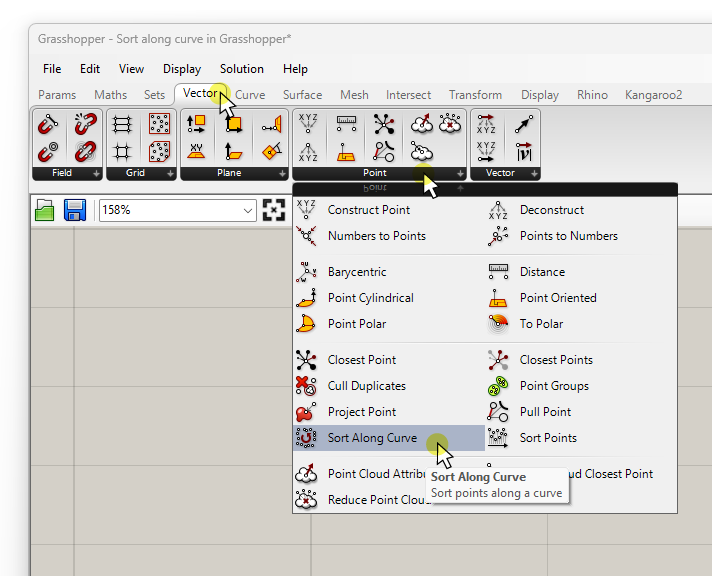
Alternatively, double-click anywhere on the Grasshopper canvas and type “sort along”, and select the component from the list.
The component has two inputs:
- The Points (P) to sort
- The Curve (C) to sort them along

The outputs are where it gets interesting:
The first output Points (P) contains the points from the input, but sorted along the curve.
The second output Indices (I) returns a list of numbers. These numbers represent the indices of the points in the original list but in the re-ordered state. So while the Points (P) output returns the sorted points, this “Index Map” shows exactly how the points have been reordered.
Understanding the Index Map output
Here’s a simple example to illustrate how it works:
I referenced randomized points from Rhino and used the Sort Along Curve component to sort them along a curve I specified.
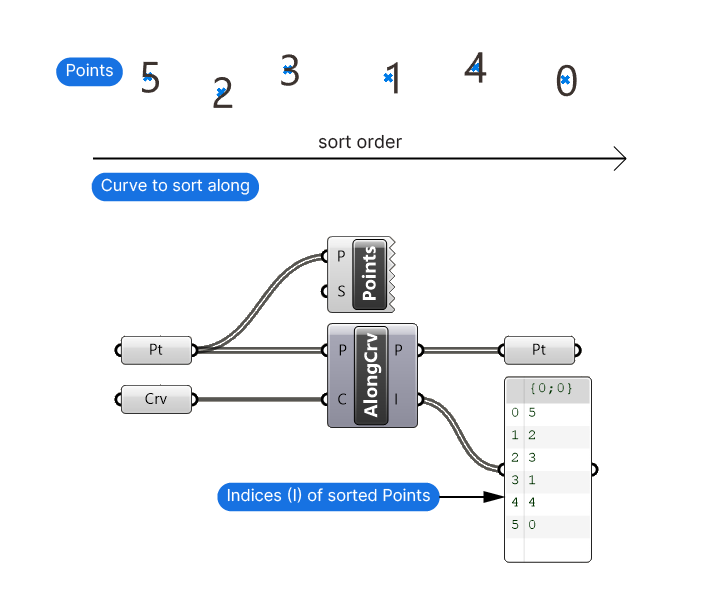
I’m using the Point List (Points) component to display the indices of the Points before sorting them. It generates the numbers right at the points.
After the Sort Along Curve component, the Points are sorted left to right, following the direction of the curve. The Panel component shows the indices of the sorted points. As we would expect, the Panel displays the points in the following order:
5, 2, 3, 1, 4, 0This means that to get a sorted list using the input point list, you would need to pick the point at index 5 as the first point, the one at index 2 as the second, index 3 as the third, and so on.
This Index Map is the key to sorting any kind of object along a curve.
Let’s apply the Sort Along Curve component to our example script and learn how to use the Index Map to sort the rectangles.
Implementing the Sort Along Curve component
The first step is to connect the points to be sorted. Just like with the Point List (Points) component, we need a point that can represent the location of the object we are trying to sort along the curve.
Since we already created a point for each surface using the ‘Area‘ component to display the current order, we can use the same Centroid output and connect it to the Points (P) input.
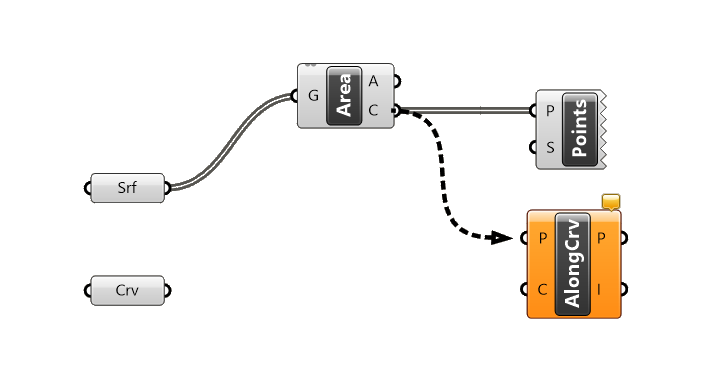
Next we’ll connect the curve to sort along. In the example I’m using, I want to sort the rectangles along the base curve I referenced at the beginning, so I’ll connect it to the Curve (C) input.

We can disregard the sorted Points (P) output since it’s of little use to us. Instead, we’ll use the Indices (I) output.
Applying the Index Map with the List Item component
Here’s how to use the Index Map to sort the rectangles:
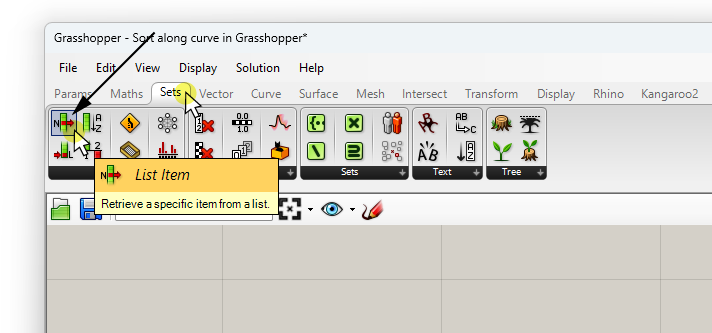
Use the List Item (Item) component to pick the items from the surfaces list in the exact order of the reordered point list.
You can find the List Item (Item) component in the ‘Sets‘ component tab, grouped under ‘List‘.
The List Item (Item) component requires a base list of any kind in the List (L) input and the index of the item you wish to select in the Index (i) input.
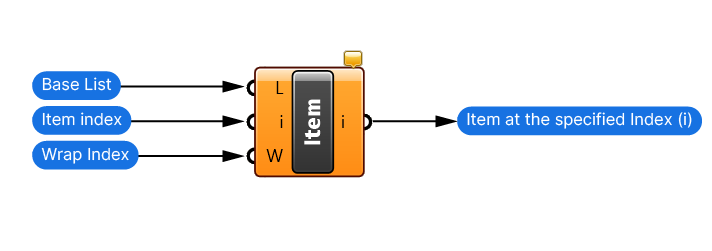
Usually the List Item (Item) component is used to pick a single item from a list using one index. But when we provide a list of numbers as the Item Index (i), the component will output exactly those items in the order we specified.
Connect the Index Map to the Item Index (i) input of the List Item (Item) component.
Finally, connect the rectangles (or any other geometry you want to sort!) to the Base List (L) input.
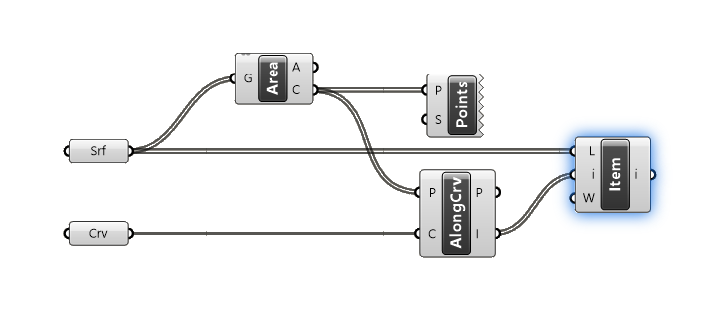
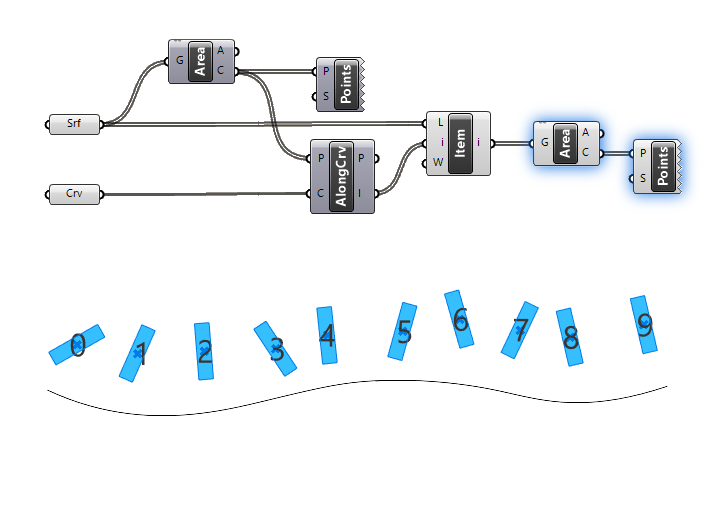
And that’s it! The rectangles are now sorted along the curve.
To check whether the surfaces are now indeed sorted, copy the Area and Point List (Points) components and connect them to the List Item (Item) output. Make sure to turn off the preview of the original two components by selecting them and pressing Ctrl+Q.
Concluding Thoughts on Sort Along Curve in Grasshopper
The secret to sorting any kind of geometry along a curve in Grasshopper is to generate a point for each object to be sorted, and then use the Index Map output of the Sort Along Curve component in combination with the List Item component. While the Index Map may seem like a useless list of numbers at first glance, combined with the List Item component, it becomes a powerful method for reordering a series of geometries.
Happy designing!