The Grasshopper Player inside Rhino allows us to run custom Grasshopper scripts within Rhino like normal commands, without launching Grasshopper. In this article, I’ll cover how to use the Grasshopper Player, make scripts compatible with it, and how to access them more quickly by binding them to a command-line alias.
Let’s dive in!
How it works
While Grasshopper is great for creating sophisticated scripts, sometimes we just need scripts that we can run once, bake the result and move on with modeling in Rhino.
In such one-off cases, opening Grasshopper, finding the script, referencing the input geometry, and baking the output is excessive for a simple script.
That’s why McNeel introduced the ‘Grasshopper Player’. It allows us to run (or ‘play’) Grasshopper scripts like regular Rhino commands without opening the Grasshopper interface.
This can both speed up your design workflow and make the power of Grasshopper more accessible to Rhino users who don’t use Grasshopper.
To use a script with the Grasshopper Player, it needs to be set up in a specific way.
Before we dive in, let’s explore what the final Grasshopper Player experience looks like.
How to Use the Grasshopper Player
Step 1: Run the Grasshopper Player command
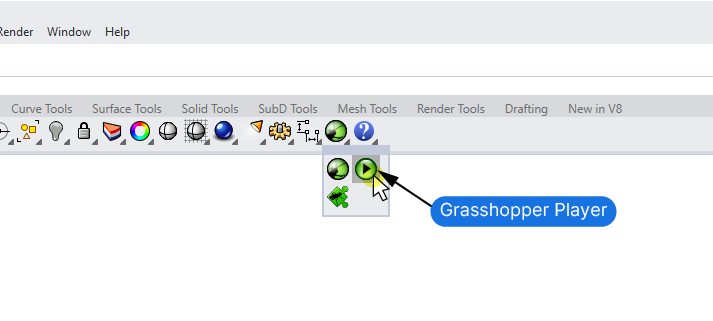
To use the Grasshopper Player, right-click on the Grasshopper icon on the Standard component toolbar, and select the ‘Grasshopper Player’ icon.
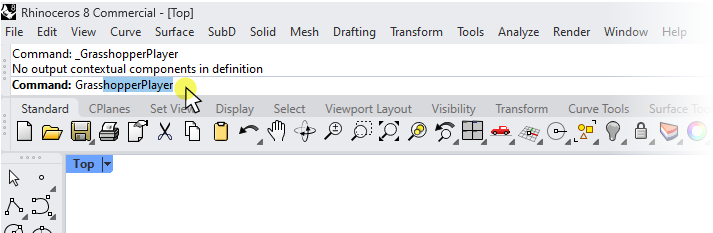
Alternatively, type “GrasshopperPlayer” into the command line and hit ‘Enter’.
Step 2: Select the Script
A popup will prompt you to browse for the script you want to run. You can select any file with the .gh extension.
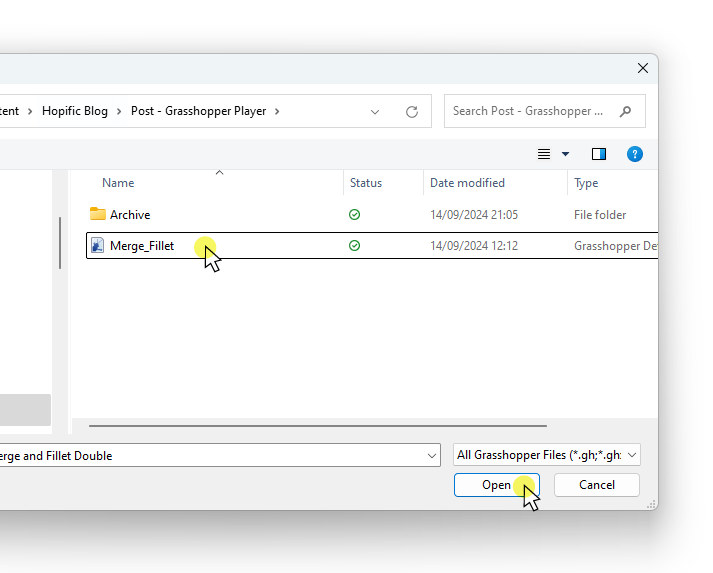
Select the script and hit ‘Open’.
Important Note: Unless the script is set up to run with the Grasshopper Player, nothing will happen, with the command line reading: “No output contextual components in definition.”. I cover how to prepare a script in detail in the next section.
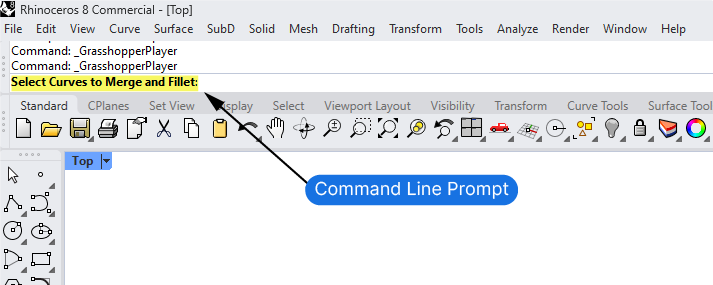
Step 3: Follow the Command Line instructions
If the script has been set up correctly, follow the command prompts in the command line, just like a regular Rhino command, until you receive the final output.
Now let’s learn how to set up a script so it can be run with the Grasshopper Player.
Creating a Grasshopper Player script
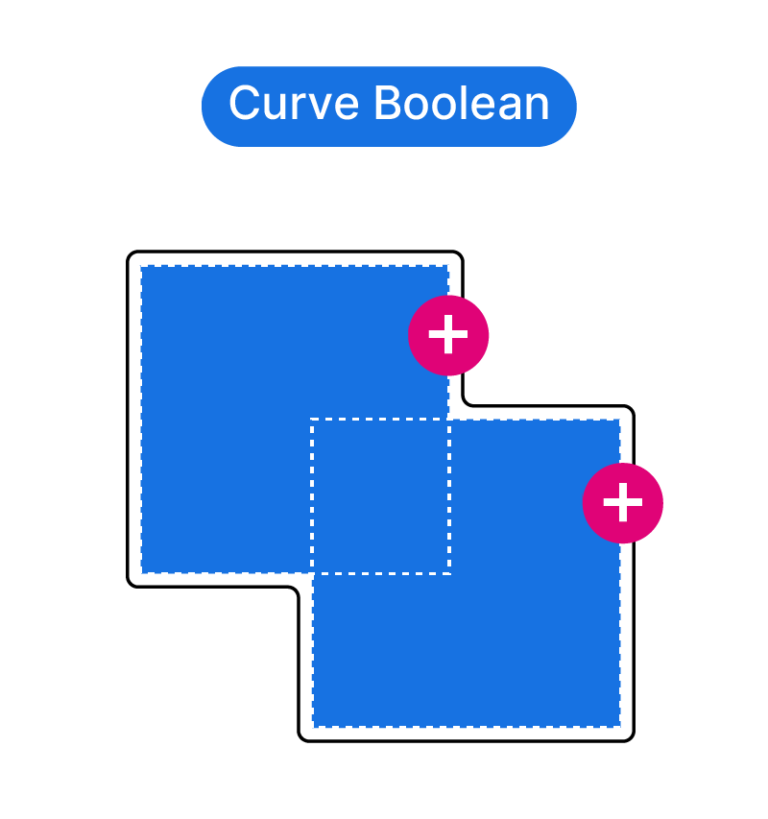
Let’s walk through the process step-by-step using this simple script as an example:
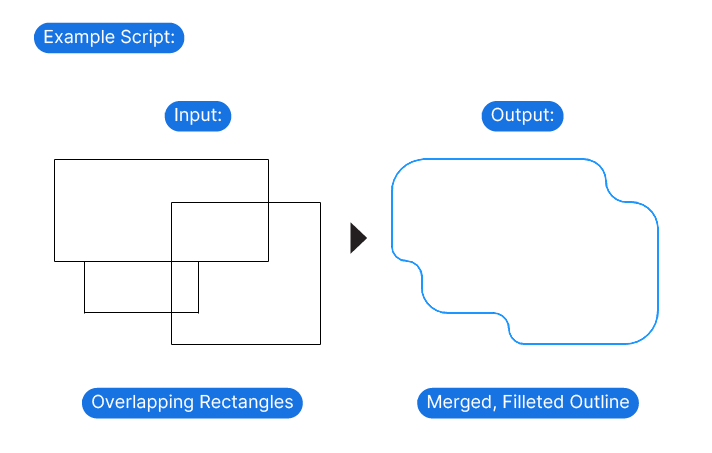
Our input will be several rectangles and the output a single merged outline that is filleted with a radius we specify.
Step 1: Create a normal Grasshopper Script
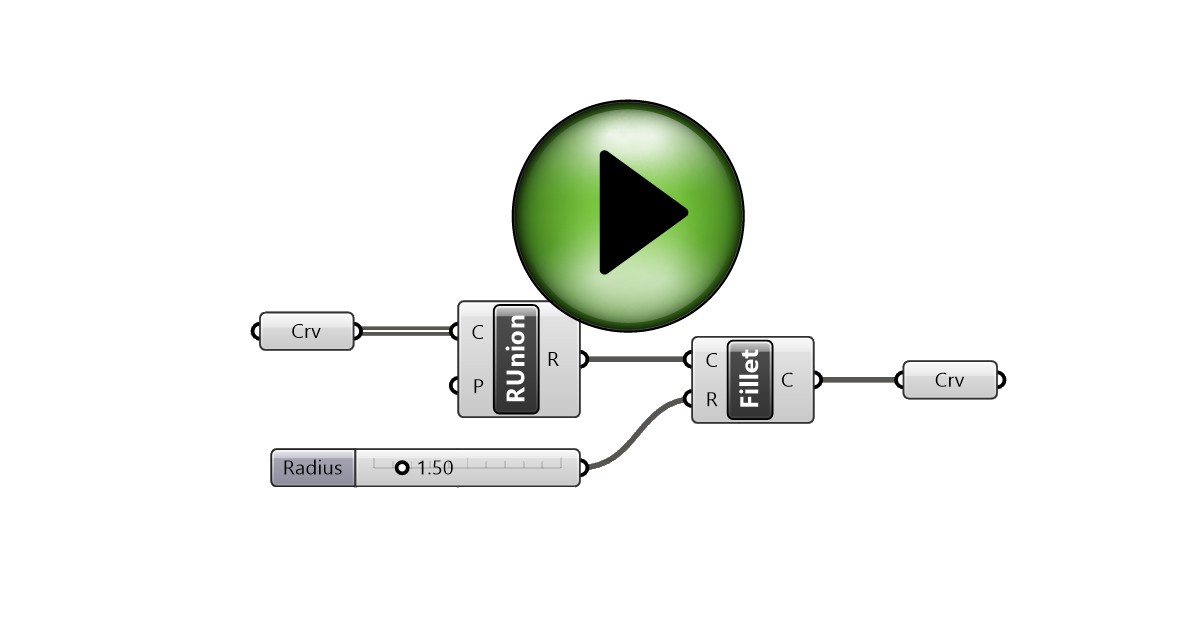
The first step is to create the Grasshopper script as usual. Start with a referenced input geometry from Rhino and use the same components you would normally.
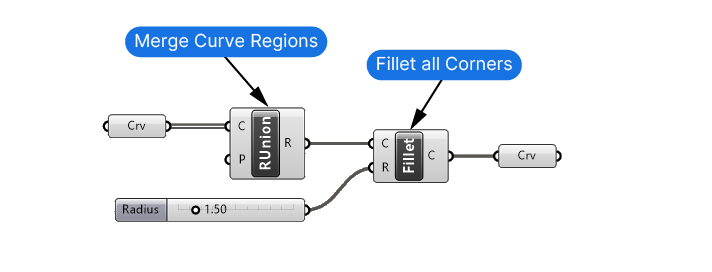
For this example I’m using a Region Union (RUnion) component to merge the curve regions and a Fillet component to fill all the curves’ corners with a specified radius.
Before continuing, ensure the script works for various cases, as you’ll use it with many different inputs. Once you run the script with Grasshopper Player, you won’t be able to debug or make adjustments.
Step 2: Adding Contextual Components
The next step is to add what Grasshopper calls ‘Contextual Components’. These components will allow the Grasshopper Player to behave just like a normal Rhino command. They convert the parametric inputs in your script into input requests in the Rhino command line.
You can find all the available contextual components in the ‘Params’ component tab, in the ‘Util’ group. The components are all marked with a dark purple tag.
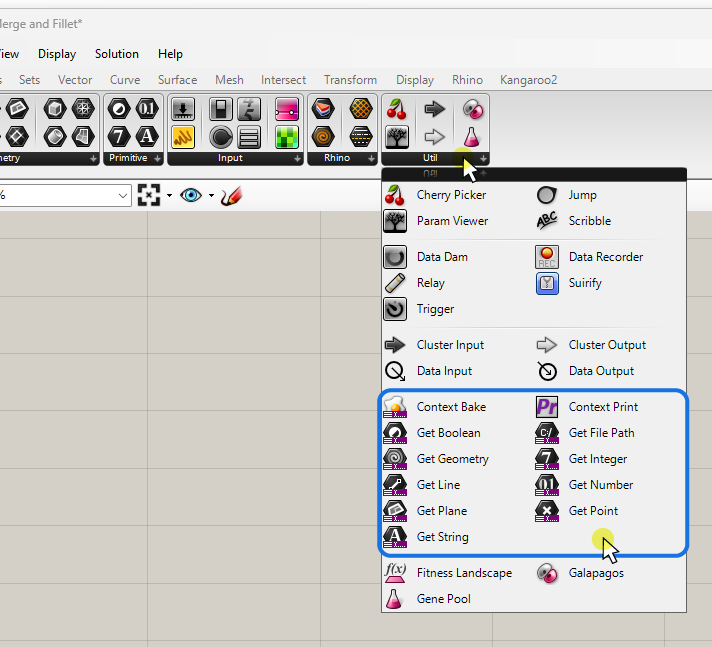
The components can be divided into three main categories:
- Input components
- Context Bake component
- Context Print component.
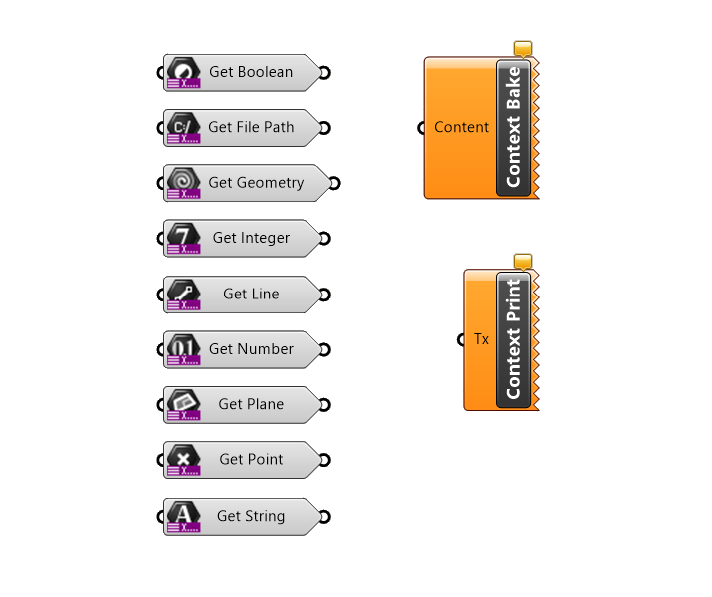
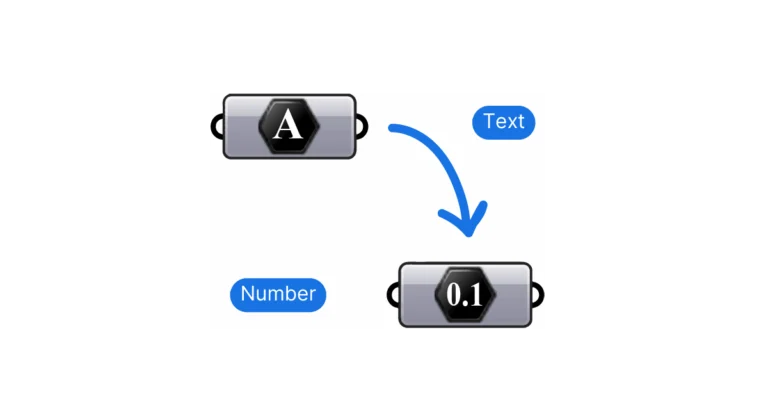
Any input in our script that we want to be able to specify when the script runs in Rhino, needs to be replaced with a contextual input component. These special input components will turn the Grasshopper script inputs into Rhino command line prompts that define the output of the command.
Replace the referenced geometry input and any numerical input (for example Number Sliders) that you want to be able to change from the command line with the corresponding contextual input component.
Place the Context Bake component at the end of the script, containing the final geometry to output.
The Context Print component allows us to give command-line feedback on the command in the form of text or numbers. The length of a curve for example. This component is optional.
So if our default Grasshopper script looks like this:
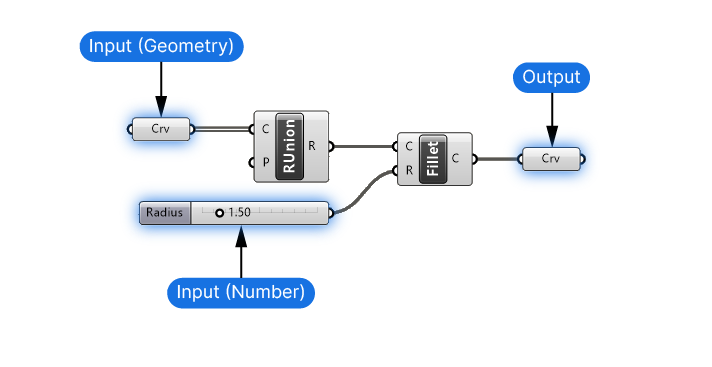
By adding the Contextual Components it turns into this:
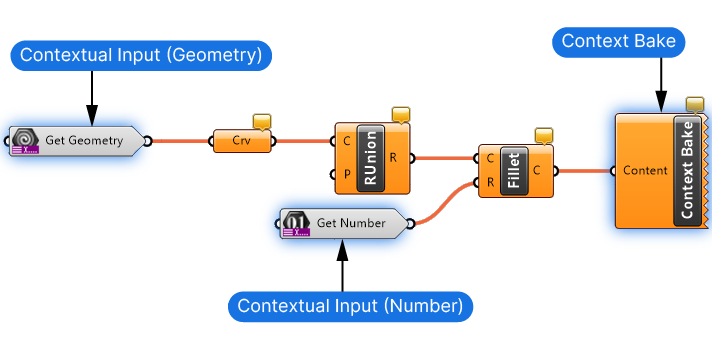
Make sure that the script runs as intended before you add the contextual components, because once you add them, all the components will turn orange – since no data will run through them any longer.
But there are more settings we can control in the Get Geometry input, let’s cover that next:
Setting Up the Get Geometry Component
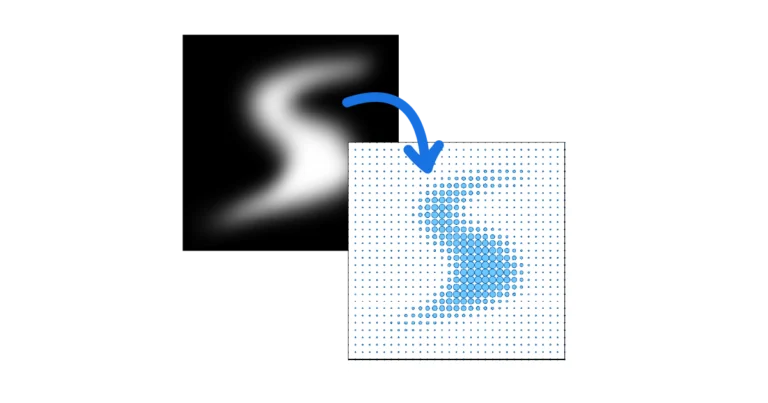
By and large, Rhino commands are limited to specific types of geometries. Loft for example only allows you to select curves. The Get Geometry contextual component allows us to control which kind of geometry will be accepted as input. In practice this means that only the specified type is selectable in Rhino once we run the command.
Specifying the Input Geometry
To specify the eligible geometry, right-click on the Get Geometry input. In the pop-up menu you’ll see all the data types. Uncheck the ones you want to exclude.
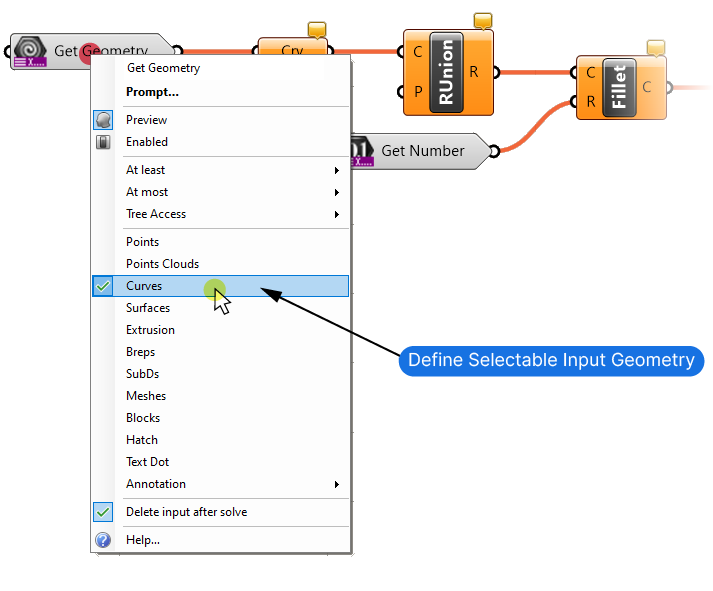
Typically, you’ll want to limit the selectable geometry to a single type. To avoid deselecting all the other types, simply open the menu and right-click on the desired geometry type. This will deselect all the others.
In our example, we’ll limit the input to Curves.
Controlling the Number of Input Items
We can also specify the number of objects that can be selected. Access these options by right-clicking on the Get Geometry component.
You can define the minimum number of elements (loft for example needs at least two) and the maximum with the ‘At least’ and ‘At most’ menu.
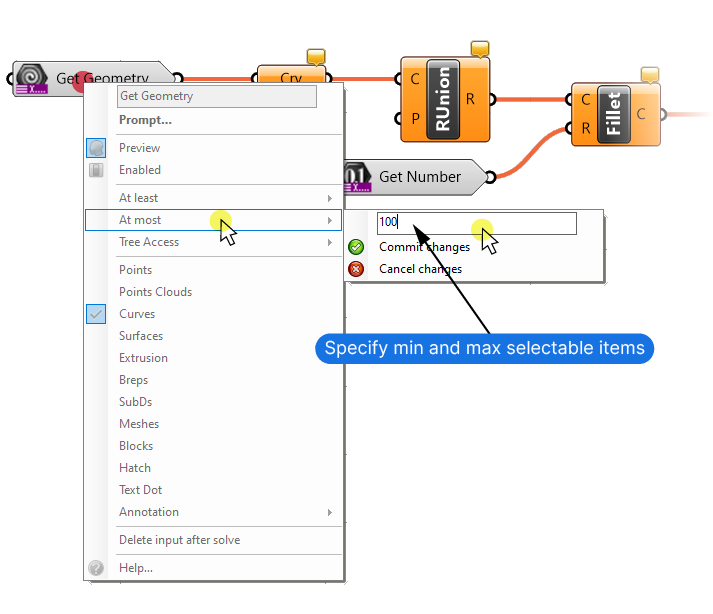
By default both are set to ‘1’, so make sure to change the ‘At most’ option if needed.
For our example we’ll raise the ‘At most’ value to 100.
Controlling What Happens with the Input Geometry
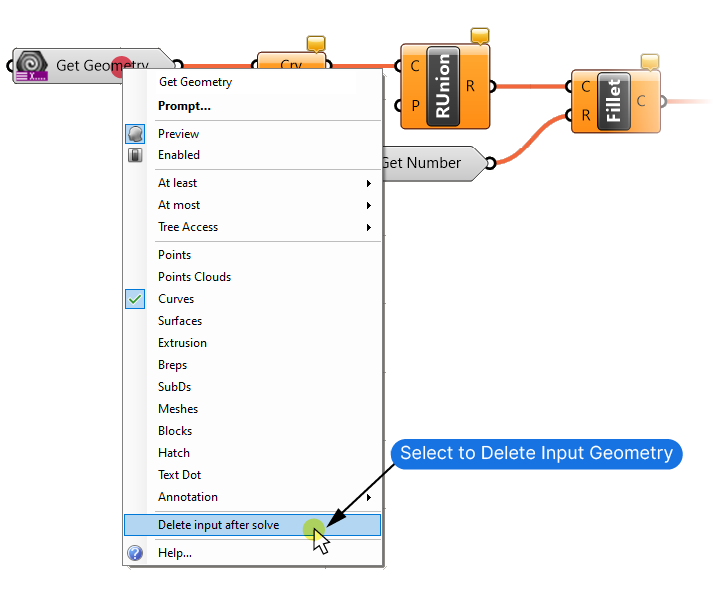
We can choose whether we want to keep or delete the input geometry.
Right-click on the Get Geometry component again and toggle the ‘Delete input after solve’ option.
Customizing the Command Line Prompts
We already learned that the contextual input components will become the command line prompts once we run the script with the Grasshopper Player. To make it clear what each input does, we can specify custom prompts. It could be something like: “Select Curves to Merge and Fillet” or anything that helps us understand the input.
We can customize each contextual input by right-clicking on the component and selecting ‘Prompt’.
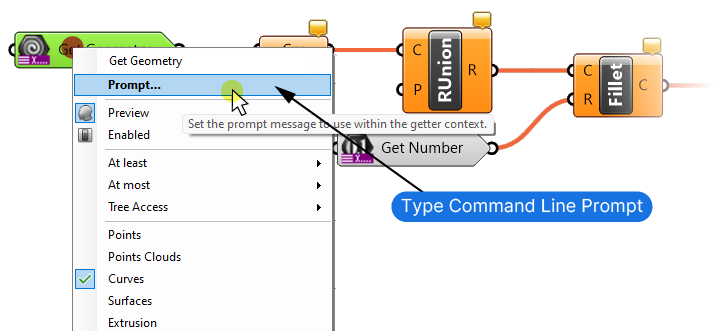
You’ll be asked to type the desired prompt message into a pop-up.

For our example I’ll type: “Select the Curves to Merge and Fillet”.
Tip: There is no need to add a colon, it will be added automatically.
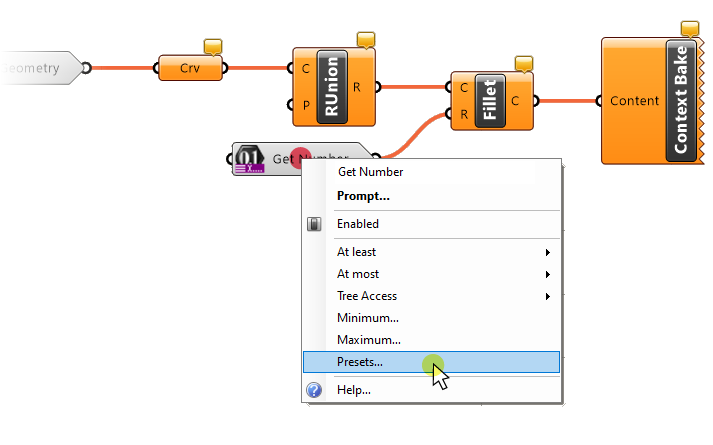
Defining Command-Line Presets
Just like with regular Rhino commands, we can specify certain presets. In our Merge and Fillet example script, we could specify default fillet radii that we can pick in the command line.
To define presets, right-click on the contextual input component, for example the ‘Get Number’ component, and select ‘Preset…‘.
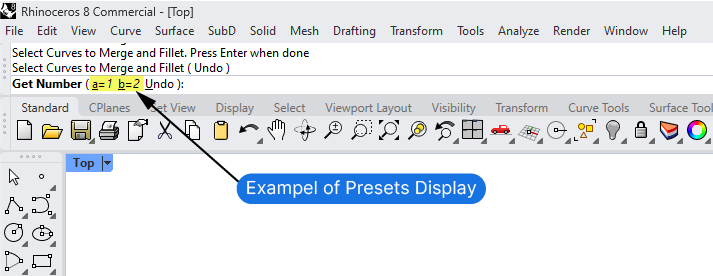
Type the preset values into the pop-up box and hit ‘Enter’ for every new value.

Once you run the script with Grasshopper Player, the preset will be displayed as shown below. selecting or typing the corresponding letter will use the preset.
Once you’ve set up all the Contextual Components, save the Grasshopper script.
Keep in mind that you can only have one “script stream” with contextual inputs and one output per script. In other words, create a separate .gh file for every Grasshopper Player script.
You can now run the Grasshopper Player command, pick the script you just created and test it in Rhino!
Advanced: How to Run a Grasshopper Player Script via an Alias in Rhino
With the Grasshopper Player we can effectively create custom commands that are customized to our workflow. To access these commands even quicker, without having to browse to the script folder, we can set up an alias to run the command directly from the command line. Here’s how:
- Open the Rhino Options
- Go to Aliases
- Add a New Alias
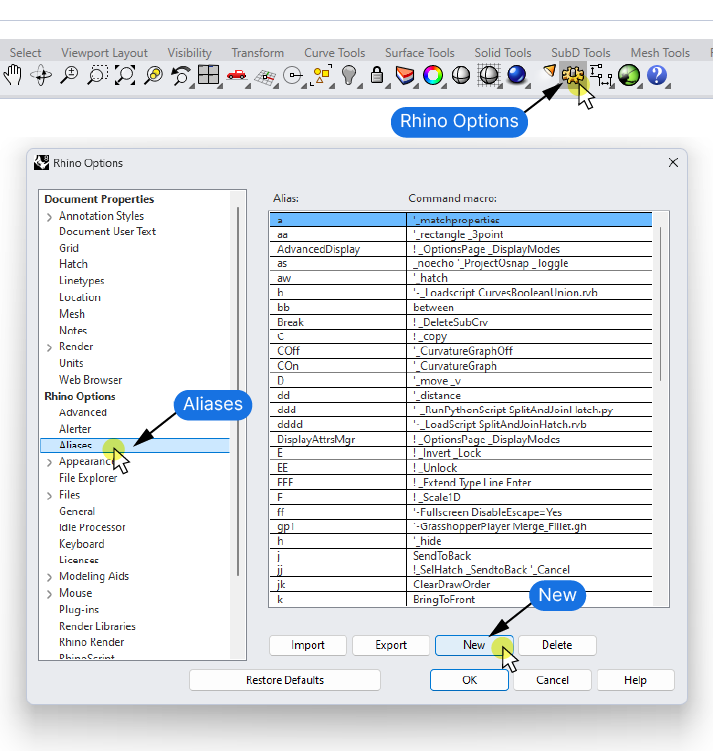
Specify the custom Alias (it must be unique and can’t contain spaces).
Then paste the following line into the ‘Command Macro’ field:
'-GrasshopperPlayer Script_Name.gh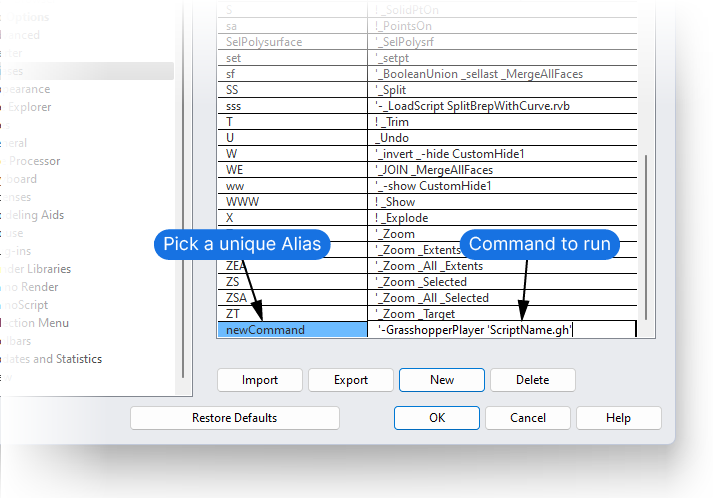
It’s important that the script name doesn’t contain any spaces! Either use CamelCase or replace spaces with an underscore. The reason is that spaces are interpreted as ‘Enter’ in the Rhino command line, so the file name would be run as two commands: ‘Script’ and then ‘Name.gh’, which won’t work.
Before we can use the Alias, we need to specify where the file is located. Instead of pasting a specific file path into the macro, which would have the same ‘space’ limitations as the file name, do the following:
Go to Rhino Options> Files> Search Paths
Here we can specify folders that Rhino will look for files in by default.
Add a new search path and browse to the folder.
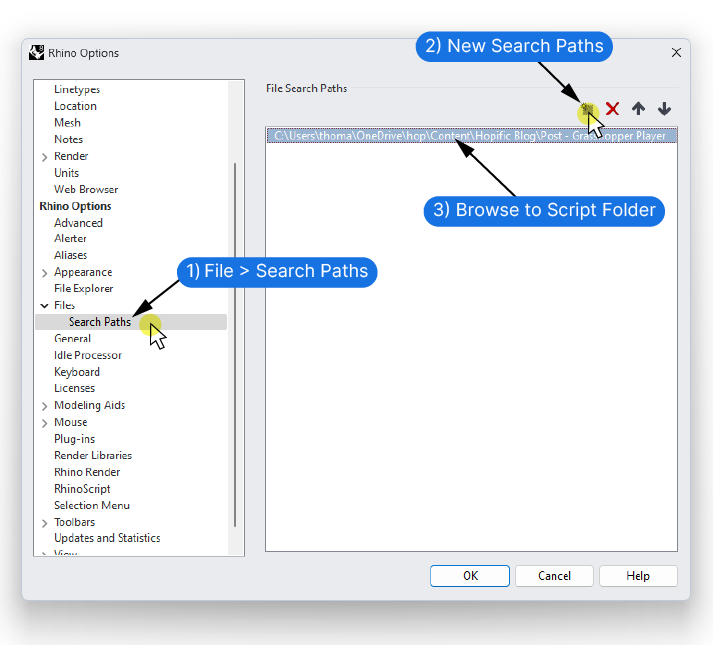
I recommend to set up a central folder for all your Grasshopper Player scripts.
Confirm with ‘OK’.
You can now run the Grasshopper Player script by simply typing the alias into the Rhino command bar and hitting ‘Enter’. In the example above it would be ‘newCommand’.
For workflow-specific commands this is a real time-saver!
Concluding thoughts
The Grasshopper Player is a great feature and I hope this guide will help you set it up for your own scripts! While I’m personally sticking to the ‘real’ Grasshopper interface for more complex scripts, it’s perfect to automate specific, repetitive command sequences you frequently use in your workflow. Once set up, it can save your hours!
Happy designing!